Digital Journey Map
When building a digital journey, it is possible to have many form driven flows dedicated to the same digital journey, but each has a different set of steps that may be related to the other flows. In order to build visually aesthetic journeys with customer flows and operator flows, FintechOS Studio makes it possible to see all the flows on one journey in a map.
This helps the users see all the steps, rules and the flow of the journey.
To access the map:
- In the main menu, go to Digital Experience > Digital Journeys.
- From the list, select the digital journey you are interested in.
- Select the Digital Journey Map tab. From here, it is possible to perform an array of actions.
Add a flow to the map
-
Click Add flow. In the grid that appears, fill in the following fields:
-
Name and Description of the flow.
-
Type - can be Form Driven Flow or Custom Flow.
-
Form Driven Flow - select the desired flow from the list.
-
2. Click Save and reload. Add as many flows as needed.
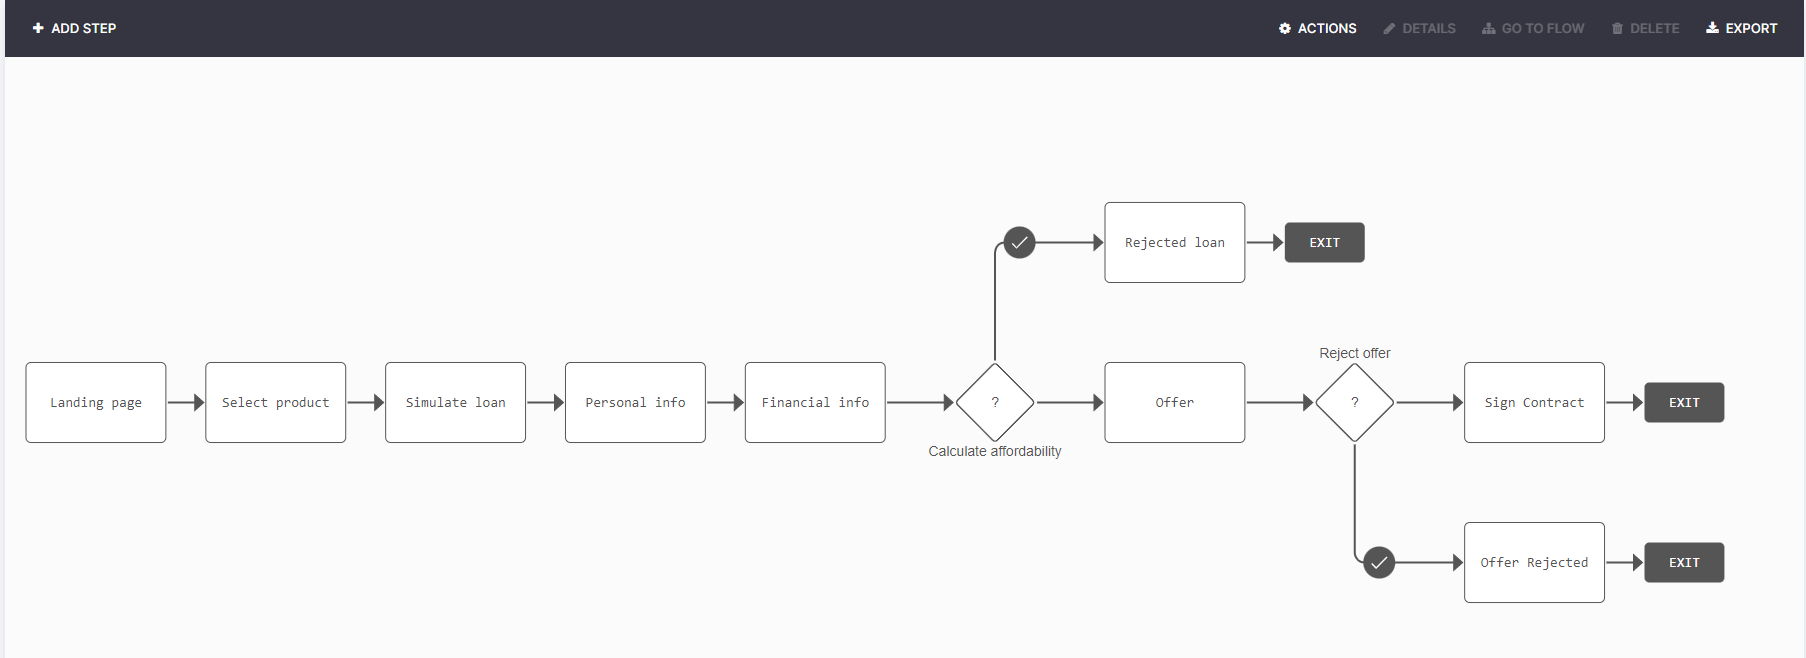
Edit a step
Click a step to activate the Details and Delete buttons.
When you click Details or double-click a step, the configurations for the step are shown and it is possible to edit any needed element such as the UI, the flow and the security roles.
The Delete button erases the step from the digital journey map.
Double-clicking a rule on the map, opens the Edit Flow Control rule page, which allows you to edit the rule as needed. For more information, see Flow Control.
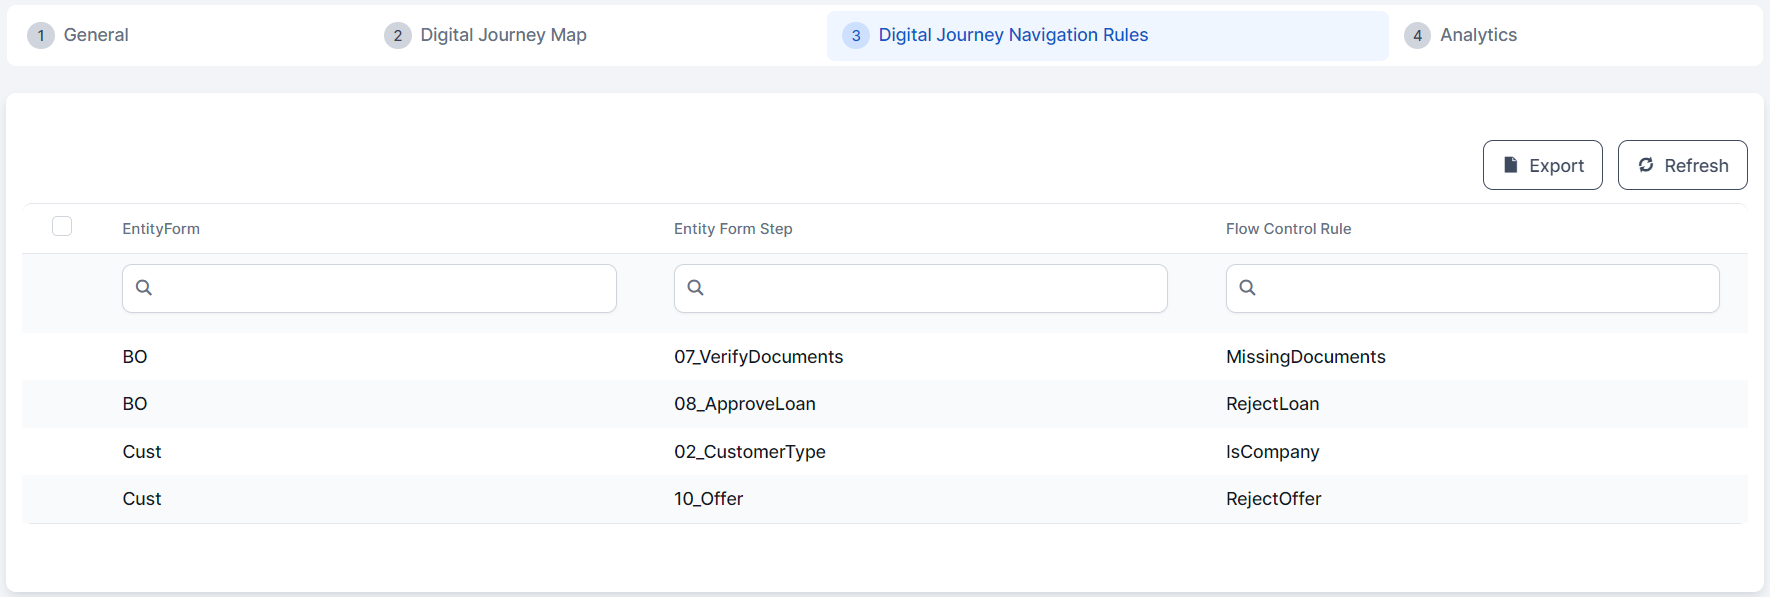
Based on the Digital Journey Map settings, the fields in the Digital Journey Navigation Rules tab will be populated with the step transitions.