Configure Business Workflows
This main menu entry opens the Business Workflow Configurations List. From here it is possible to:
- deactivate the workflow
- insert a business condition
- access the transition configurations
- insert data management.
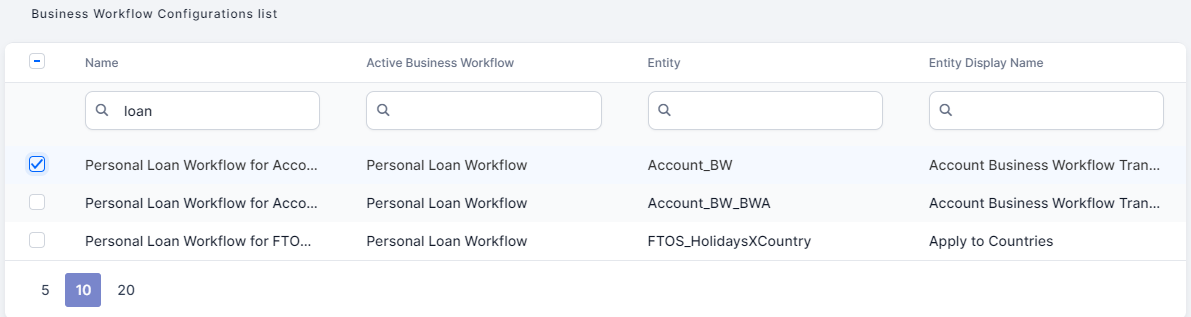
The configurations from this page cannot be inserted, only exported. They are created and listed as in the picture above when the Business Workflow is created using the menu entry named Business Workflow Designer.
By double-clicking on one of the names from the Business Workflow Configurations List, it opens the following tabs and fields. The name is generated by the system when the workflow is created. The name has the structure: Name of the workflow for the name of the entity, e.g. Loan_Workflow for FTOS_AB_Account.
- Double-click on one of the entries from the list.
- The General tab is opened. It holds the following fields:
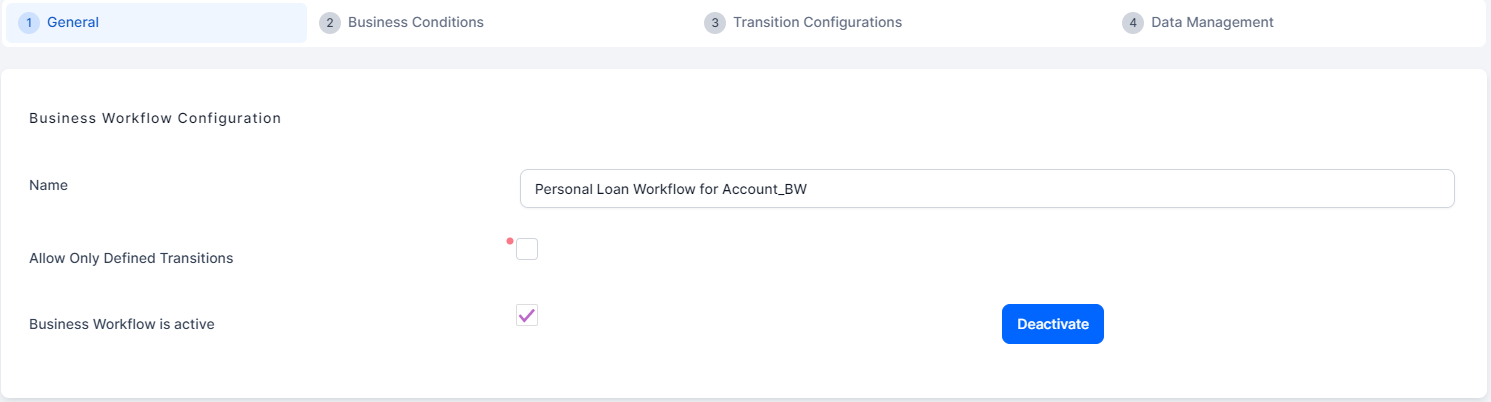
Name: Name of the workflow for the name of the entity, The user can change it to be more suggestive.
Allow only defined transitions:
If true, then only the defined transitions between statuses will be visible in the entity form, i.e. that if there are four statuses such as Prospect, In progress, Approved and Denied, and two transitions between Prospect_In Progress and between In Progress and Approved, it will not be possible to add other transitions via code snippets.
If false, then transitions that have not yet been defined can be via code snippets or other methods.
Business Workflow is active: The workflow is active for the entity it is attached to. To deactivate it, click on the button labelled Deactivate on the right side of the panel.
- Click Save and close.
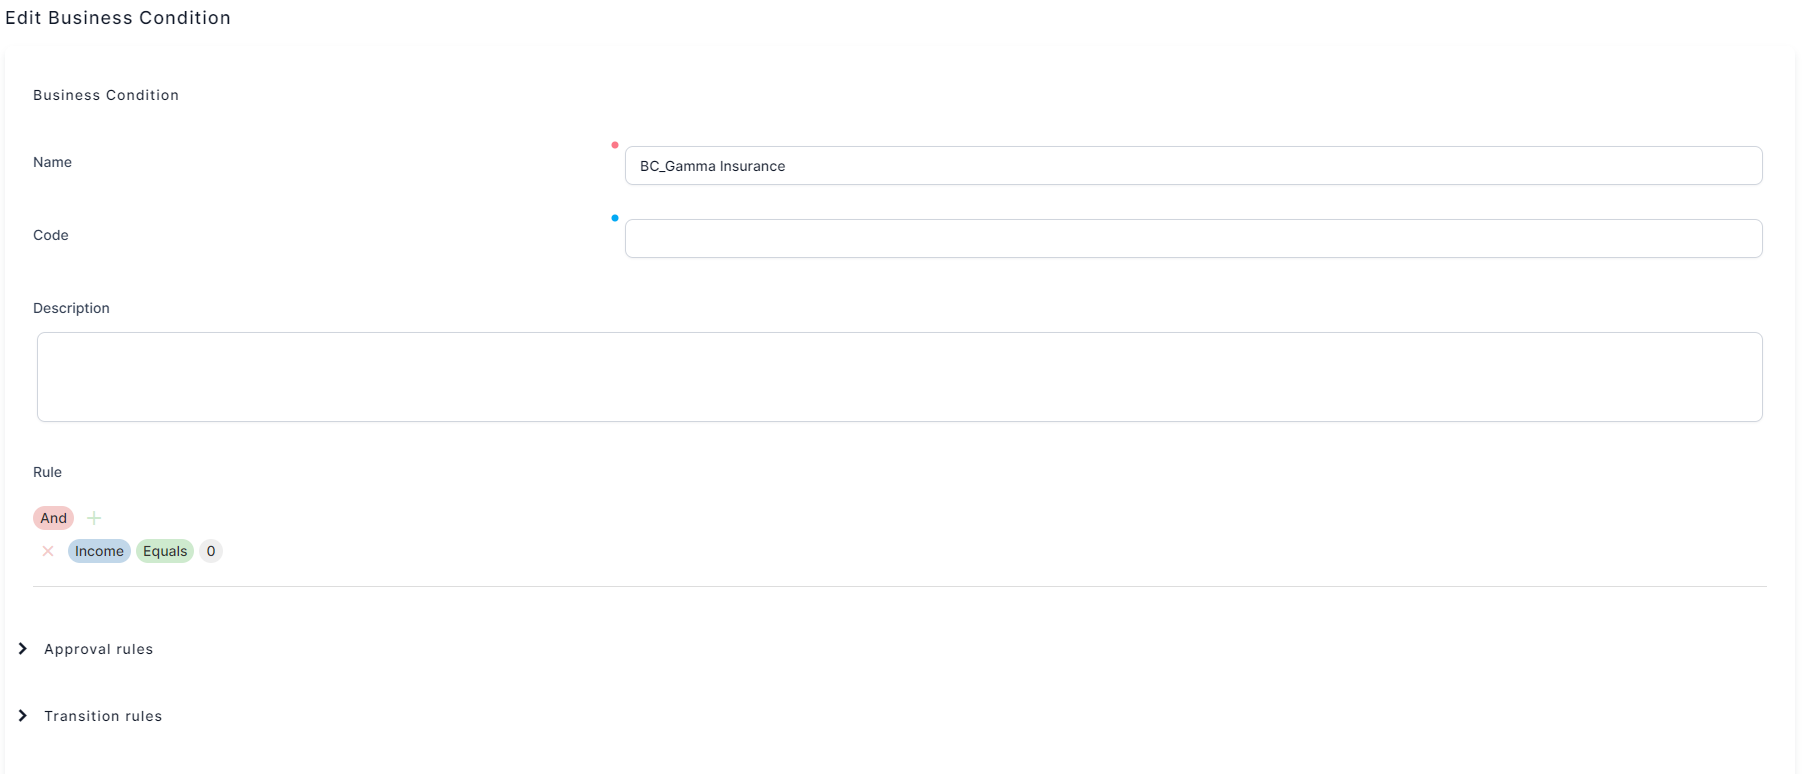
This tab attaches a condition to the workflow.
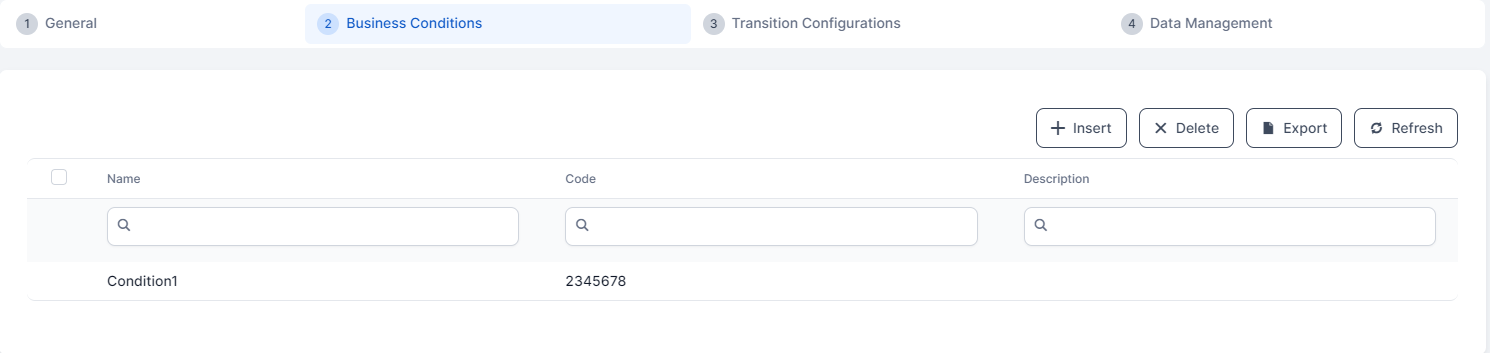
- Click Insert. The Add Business Condition page opens. This page can be accessed as well from the main menu as explained in this page Business Rules.
- Fill in the following fields:
- Name: Insert a suggestive name.
- Code: Insert a unique code
- Description: Insert a suggestive description.
- Rule: Add a rule to be executed to trigger a status change or approval, e.g. Savings equals $400.
- Click Save and close.
- Two grids open: Approval Rules and Transition Rules.
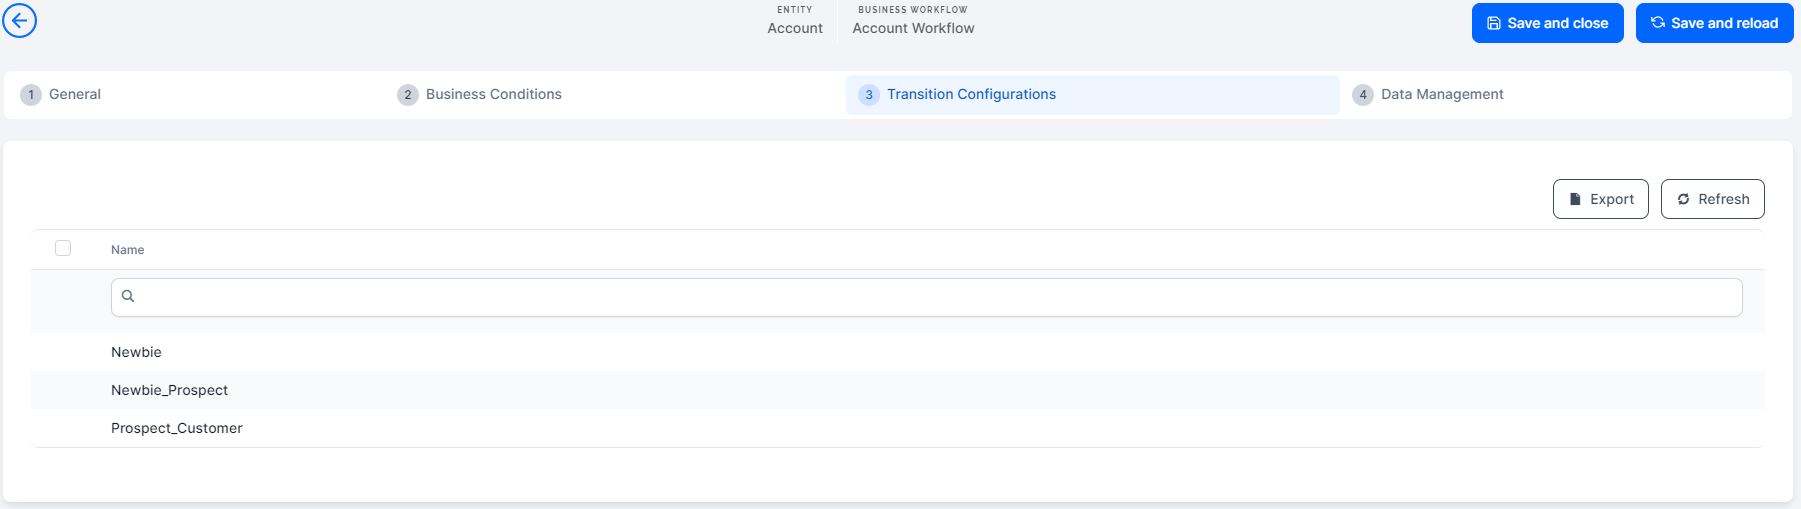
In this tab, the list of transitions is displayed.
![]()
On this page you can only edit a transition.
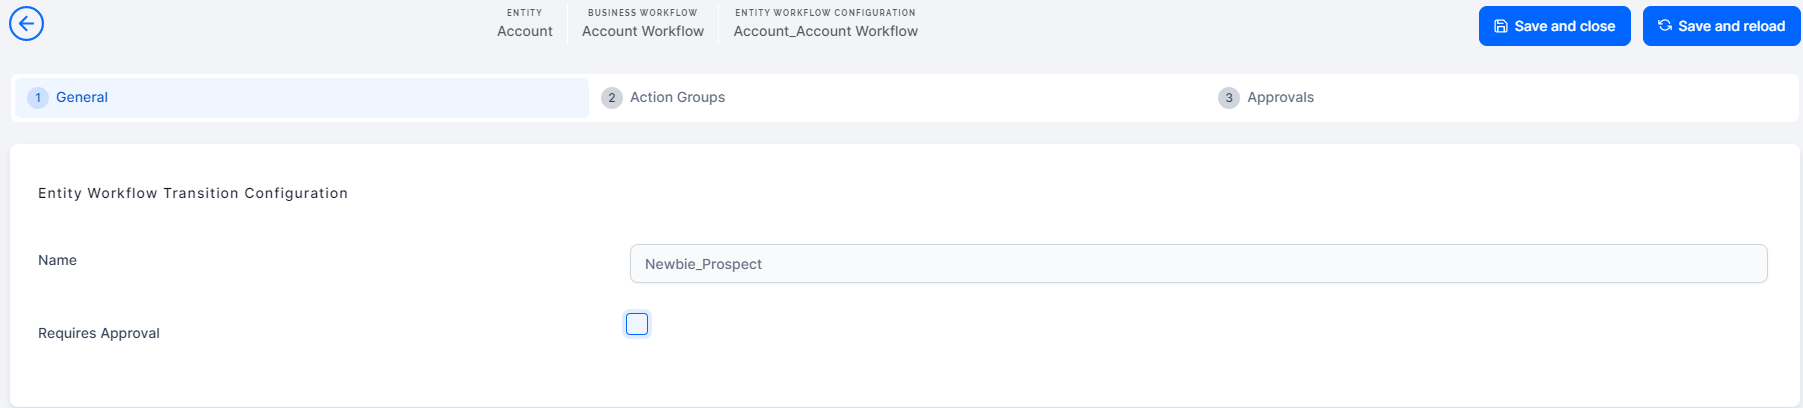
- Click on one of the transitions displayed. The General tab opens.
- The name cannot be changed. The Requires Approval boolean marks whether the transition has to be approved by a back-end officer. If the boolean is true, then the change in status can only be performed if the back-end officer approves it.
- Click the Action Groups tab. Click Insert to add a new action group.
- The General tab opens.
- Insert a name, code and description for the Transition Action Group.
- Click Save and reload to display the following tabs: Actions Before and Actions After.
- Click the Actions before or the Actions after tabs. Click Insert to add a new entry. The General tab opens.
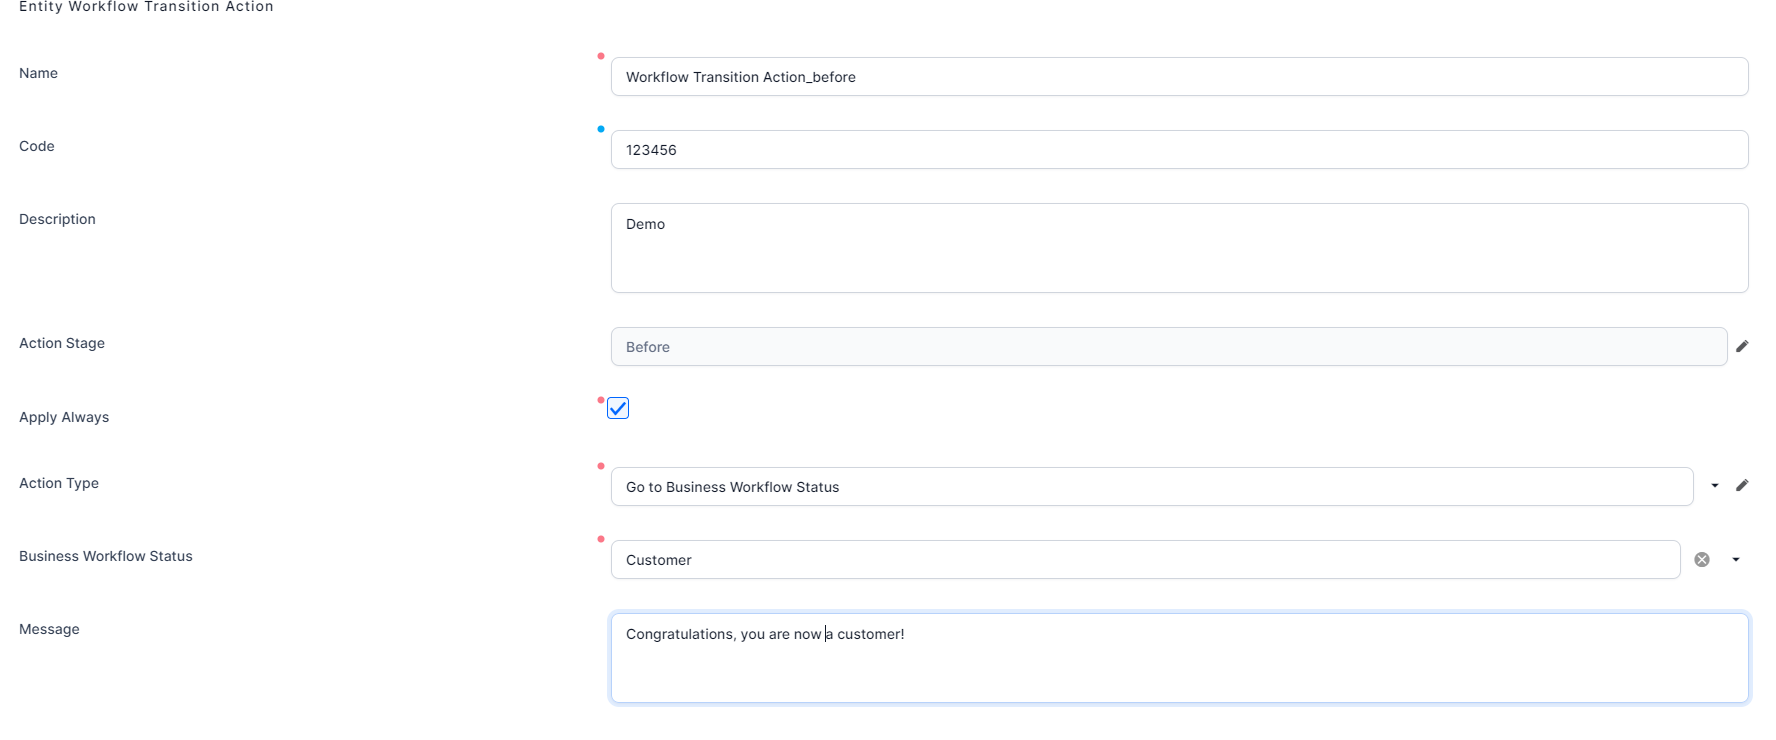
Fields Description Name Insert a suggestive name of the action. Code Insert a unique code for the action. Description Insert a suggestive description for the action. Action Stage This field is read-only. It is automatically filled in by the system with Before or After depending in which grid the user wishes to insert the action and its trigger. Apply Always If true, then the action and its trigger (later applied) will always execute. Action Type Select from the list: - Go to Business Workflow Status
- Run Custom Script
- Cancel Transition.
Go to Business Workflow Status Business Workflow Status Select from the list the status to which the action points. Message Insert a suggestive message to be displayed to the user in the FintechOS Portal. Run Custom Script Custom Script Insert the script to run when it is triggered. Cancel Transition Error message Insert a suggestive message to be displayed to the user in the FintechOS Portal. 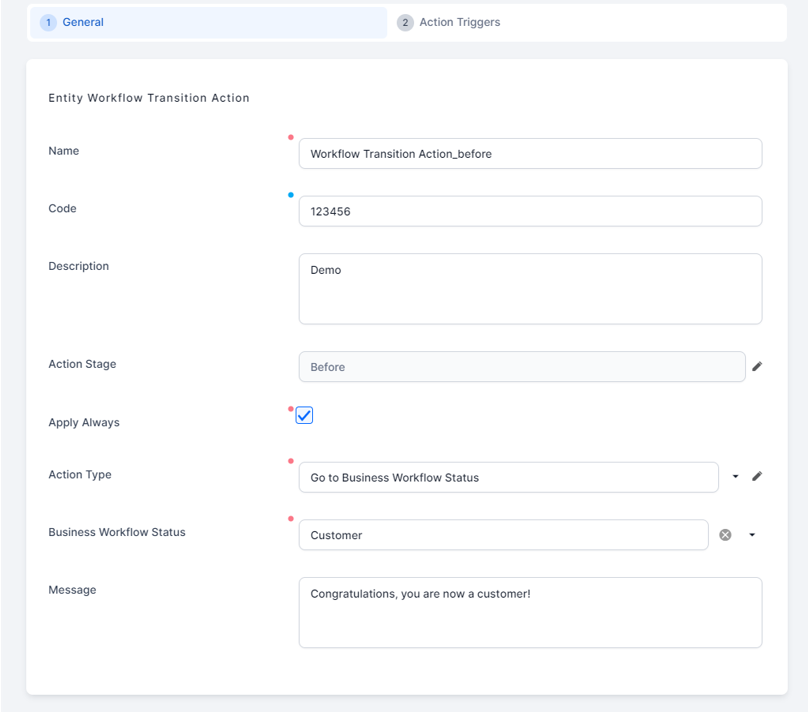
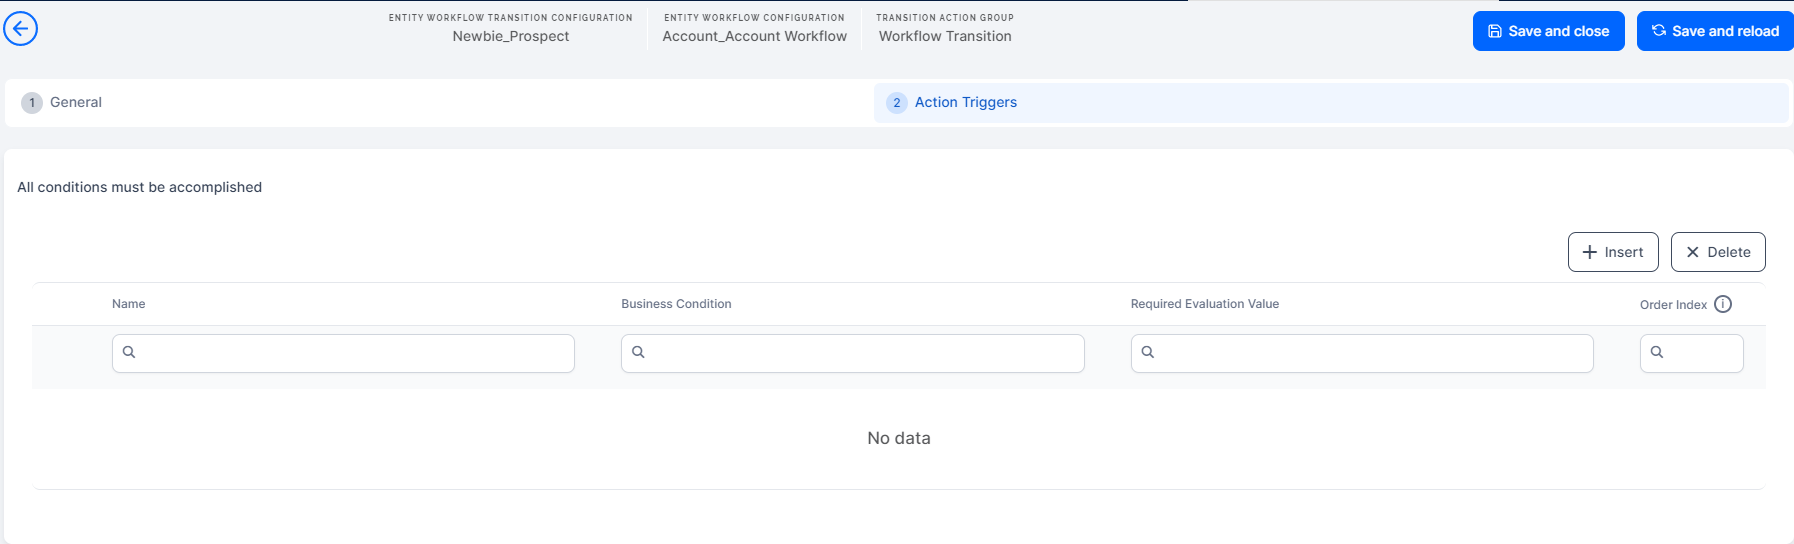
- Click Save and reload, the Action Triggers tab will be displayed.
- Click Insert . The Add Action trigger page will open.
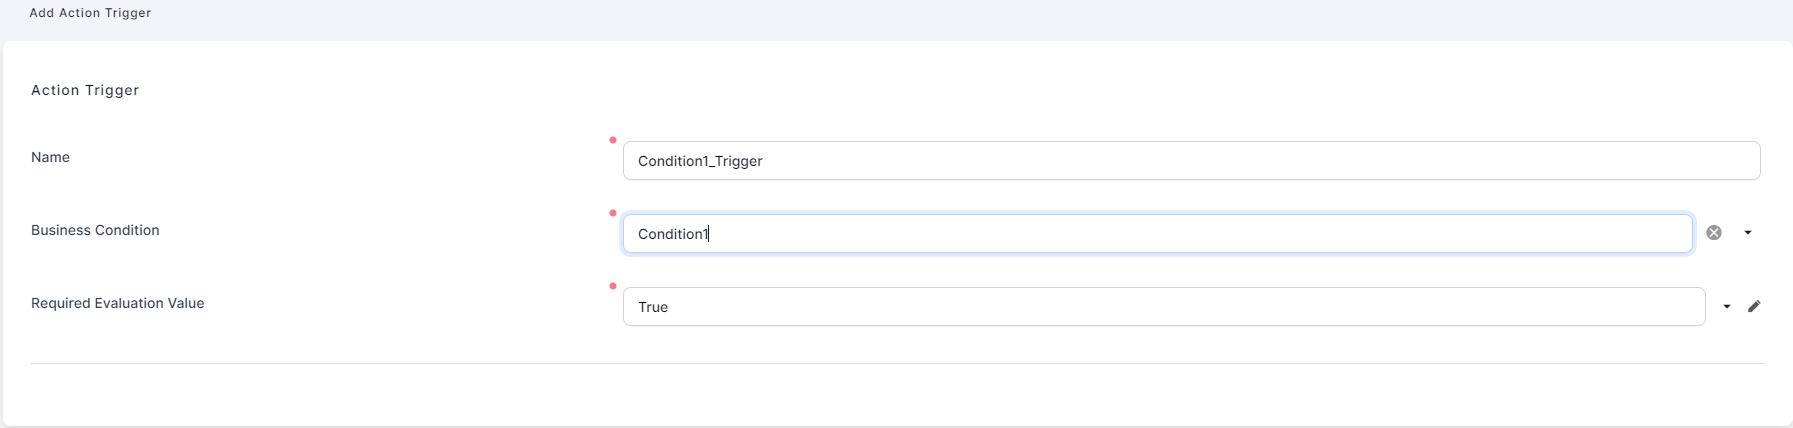
- Fill in the following fields:
- Name: Insert a suggestive name for the trigger.
- Business Condition: Select from the list the condition to be applied.
- Required Evaluation Value: Select from the list the value to which you wish the condition to be assessed:
- True
- False
- Click Save and close.
- Navigate to the Approvals Tab which corresponds to a transition.
- Click Insert. For details on configuring Approvals, see Define Workflow Transition Approvals.
- Click the Insert button from the grid. The page named Add Record Protection by Business Workflow Status opens.
- In the field Business Workflow Status, select from the lookup the status to be protected.
- In the field Record Action Type, select from the lookup the protection level:
- update
- delete.

- Click Save and close.
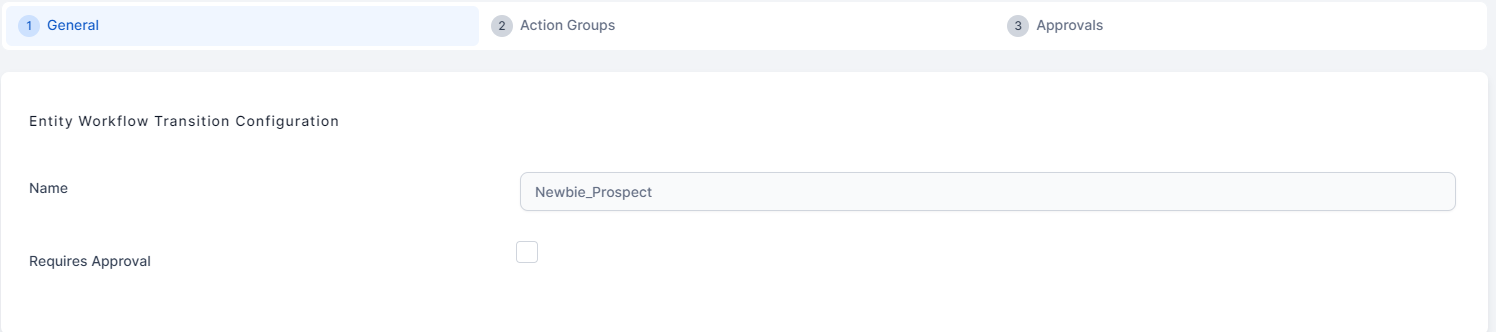
Edit Workflow Transition Configuration
You can add specific actions to be performed before or after status change by editing the workflow transition configuration.
It is possible to access the same page following two paths:
- From the main Studio menu, navigate to Automation Blocks > Business Workflow Configurations. Next, open the workflow you are working on from the list and click on the third tab named Transition configurations. It displays a list of all the transitions created. Select the transition you are interested in. The ENTITY WORKFLOW TRANSITION CONFIGURATION page opens.
- From the main Studio menu, navigate to Fintech Automation > Business Workflows > Business Workflow Designer. Next, open the workflow you are working on from the list and click the Designer tab. Then, select the transition and click the Config Transition arrow on the right side of the screen. The ENTITY WORKFLOW TRANSITION CONFIGURATION opens.
- In the Edit Workflow Transition Configuration the General tab contains the name of the transition and the Requires Approval bool.
- In the Transition Action Groups section, click Insert. The Transition Action Group page appears.
- Enter the Name of the action group, the Code and the Description which will be used by the system.
- Click Save and reload. The Actions before and the Actions after tabs will become available.
- Add actions to be performed on workflow transition. The procedure for adding actions is the same for both before and after actions.
You can add before, after or before and after business workflow status change by adding actions in the Entity Workflow Transaction Actions Before section, respectively Entity Workflow Transaction Actions Before section, or both. The procedure for adding actions is the same:

- Click Insert from the section corresponding to when you want the action to be performed (before or after status change). The Add Entity Workflow Transition Action page appears.
- Enter the Name of the action to be used by the system.
- Enter the Code of the action. It must be unique.
- Enter the description of the action.
- The Action stage is displayed: before/ after. The field is automatically filled in.
- Tick the Apply Always checkbox to ensure business consistency,
- Select the Action Type from the following available values:
- Go to Business Workflow Status. You have to select the Business Workflow Status to which the workflow transitions.
- Custom Script. You have to enter the script Code to be executed on workflow transition.
- Cancel Transition. You have to enter the Error Message to be displayed if the business condition fails.
- Enter the message for the user to read when the action is triggered. For example, this is how it will be rendered in the FintechOS Portal when the action is triggered and the message is displayed at the bottom of the page.
- Click Save and Reload.
- Add as many actions as you need, then add the business conditions which if met will trigger specific action execution.
- The Action triggers tab will be available after the action was saved.
- In the Edit Transition Action Group page, scroll-down to the Action Business Conditions section and click Insert. The Add Action Business Condition page appears.
- Enter the Name of the action business condition to be used by the system.
- Select the Business Condition from the list of previously added business conditions.
- Select the Required Evaluation Value. If you want the action to be run if the business condition is met, select True; otherwise select False.
- Click Save and Reload.