ftos.documents.generateById
Starting with v24.3.0, this is renamed from callReport to ftos.documents.generateById.
Calls a document report based on the report ID.
If you use the date parameter, then you can retrieve a report item that fulfills the following condition: startDate <= date <= endDate. This means that only reports that are valid and not expired are retrieved. If not report meets the condition, then the report marked as default is retrieved.
This is a business logic method for business service components.
Syntax
method ftos.documents.generateById(reportId: string, entityId: string, reportOptions: IReportOptions): string| Parameter | Description |
|---|---|
reportId
|
Unique internal identifier of the document report you wish to call. |
recordId
|
Unique internal identifier of the entity record you wish to run the document report on. |
date
|
Optional parameter for returning the ID of the report valid at the specified date (yyyy-mm-dd). Available starting with FintechOS v24.0.1. |
reportOptions
|
Optional parameter available starting with FintechOS v24.4.2, that works only with PDFs and lets you provide your own data for filling the PDF. This parameter has the following properties: Copy
The data structure is just a list of placeholder values you want to put into the PDF. The keys (placeholder_1, placeholder_2, etc.) are the names of fields/placeholders in the PDF, while the values are whatever you want to fill into those fields (text, numbers, booleans, etc.). When you use the |
Examples
The following example generates a PDF report using a specific template and fills it with the provided customer data so it can be attached to the correct record in the system.
const recordId='42de428f-be8f-488a-8bc4-1b7a5ccd05fc';
const pdfFormData = {
"FullName": "JaneDoe", // Optional - Text field: No maximum length specified
"ID": "1234JD", // Optional - Text field: Maximum length 10
"Gender": "Female", // Optional - Radio button: Male | Female
"Married": true, // Optional - Check box: True | False
"City": "New York", // Optional - Combo box: New York | London | Berlin | Paris | Rome
"Language": "English", // Optional - List box: English | German | French | Italian
"Notes": "", // Optional - Text field: No maximum length specified
"RequiredField": "", // Required - Text field: No maximum length specified
};
const reportId= '3b1141d6-35e3-4cb5-a621-84da6d9669cd';
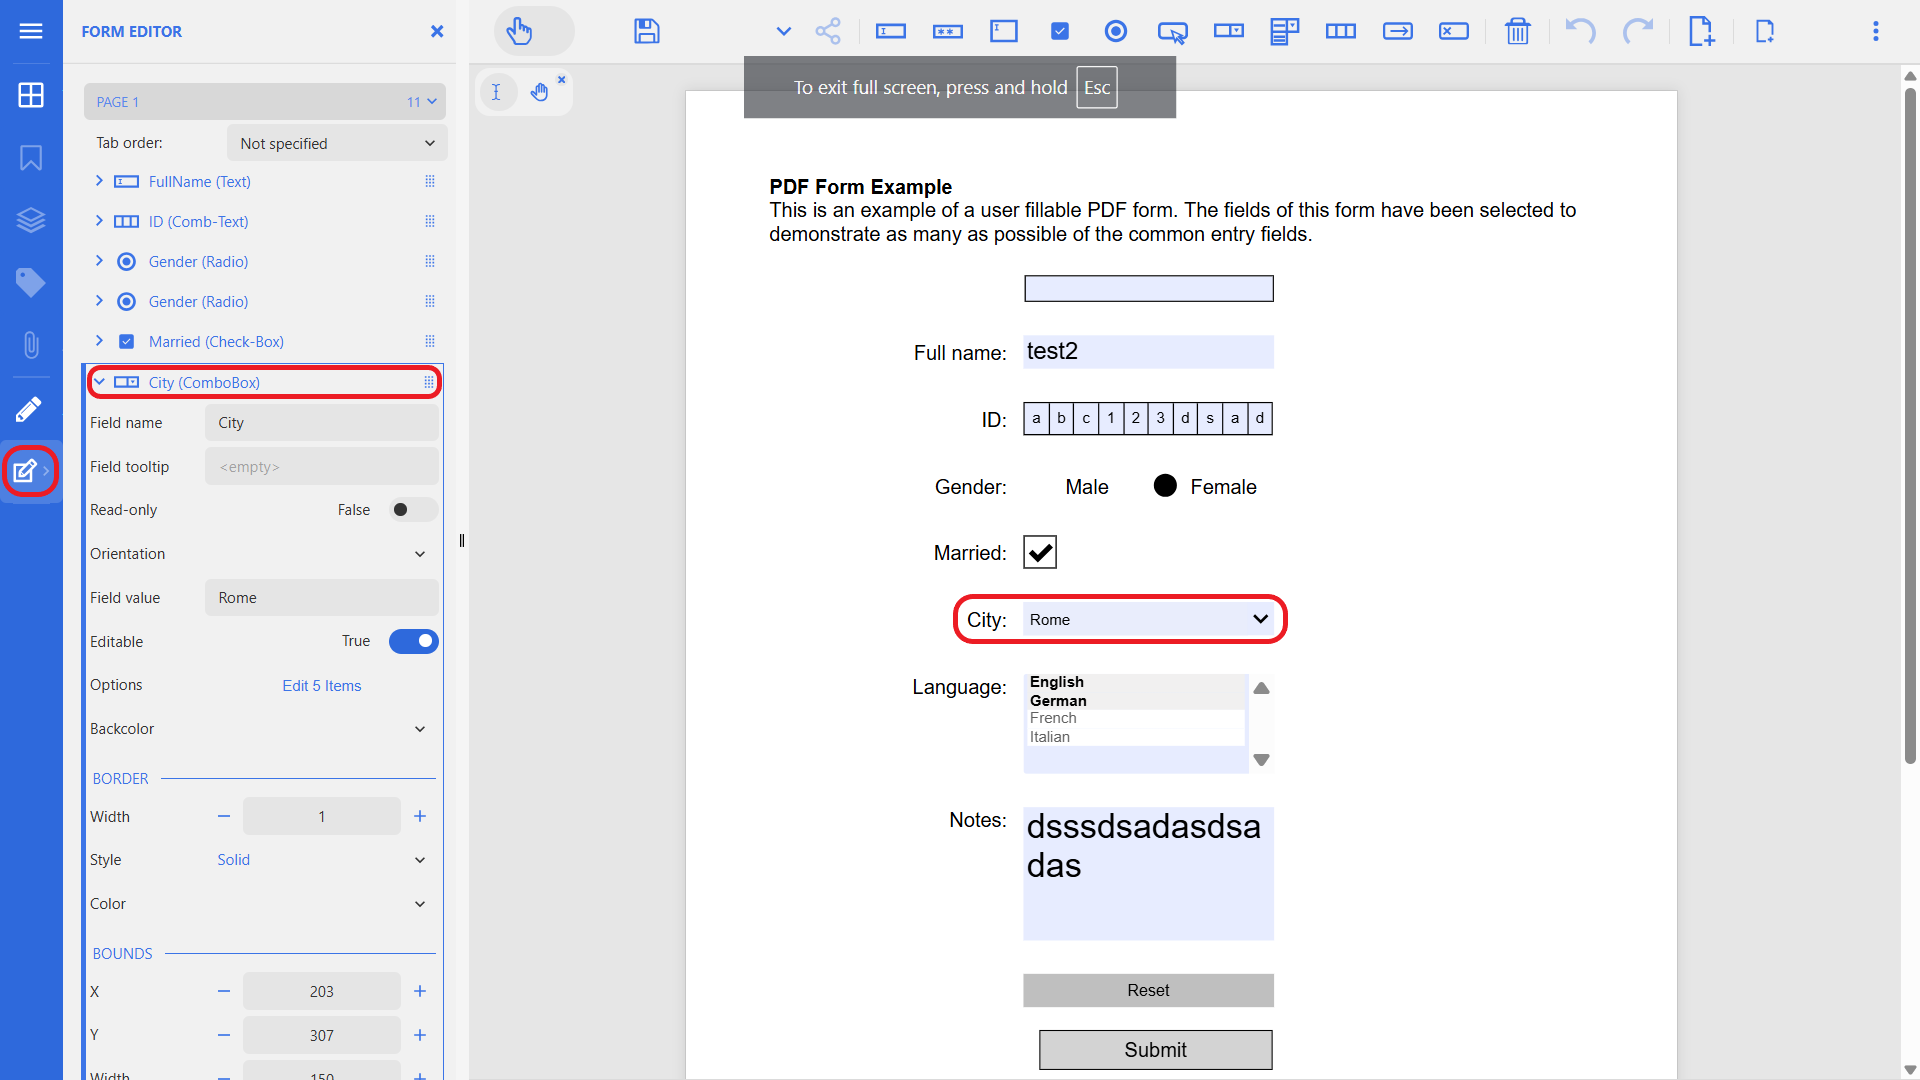
ftos.documents.generateById(reportId, recordId, "12/15/2025", true, { "data": pdfFormData });Make sure the fields in your scripts match the ones in the pdf. To check, in Studio, in the Add Digital Document form, click the Edit pdf button and navigate to the main menu on the left > Form Editor. The field names displayed here correspond to the ones in the code sample.
In this example, we call the 5dd10203-70be-429c-9444-e24b92700b1b report, which generates a customized welcome message PDF on the Customers entity, for the customer with the following ID: 656f62dd-60f5-43ba-86d0-ba8c43acd719.
ftos.documents.generateById('5dd10203-70be-429c-9444-e24b92700b1b', '656f62dd-60f5-43ba-86d0-ba8c43acd719');In this example, we call the 5dd10203-70be-429c-9444-e24b92700b1b report, which generates a customized welcome message PDF on the Customers entity, for the customer record that is open in the current digital journey.
ftos.documents.generateById('5dd10203-70be-429c-9444-e24b92700b1b', ftos.context.id);