FintechOS Identity Provider
Starting with release 22.1, the FintechOS Platform uses the FintechOS Identity Provider as the default authentication layer for the FintechOS applications and services. Alternate authentication methods are provided only for backward compatibility.
For more information, see Deprecated Identity Providers.
The FintechOS Identity Provider is an OpenID compliant identity and access management solution based on the Keycloak authentication server. All FintechOS Platform components, such as FintechOS Studio, FintechOS Portal, or FintechOS API, are represented in the FintechOS Identity Provider as different clients of the same FintechOS realm.
User credentials and roles set up in FintechOS Studio are stored by the FintechOS Identity Provider. When creating, updating, or deleting a user account in FintechOS Studio, the changes are automatically propagated in the FintechOS Identity Provider.
Identity Brokering
The FintechOS Identity Provider supports identity brokering, allowing users to log in to FintechOS applications and services using any external identity provider that supports the OpenID Connect standard. You can find examples for common external identity providers configurations below:
- Using Azure AD as External Identity Provider
- Using Google as External Identity Provider
- Using Okta as External Identity Provider
- Using AWS Cognito as External Identity Provider
FintechOS Identity Provider Settings
In the FintechOS Cloud Configuration Manager, set up the following secrets:
| Key Path | Key Name |
|---|---|
| kv/<environment>/<application>/app-settings | EBSDefaultAuthentication |
| kv/<environment>/<application>/app-settings | core-setting-external-auth-provider-key-url |
| kv/<environment>/<application>/app-settings | core-setting-external-auth-provider-issuer |
| kv/<environment>/<application>/app-settings | openid-client-id |
| kv/<environment>/<application>/app-settings | openid-client-secret |
| kv/<environment>/<application>/app-settings | openid-discovery-endpoint |
| kv/<environment>/<application>/app-settings | openid-callback-url |
| Key Name | Key Description |
|---|---|
| EBSDefaultAuthentication |
Specifies the identity provider:
IMPORTANT! In a non-standard scenario where a regular portal using FintechOS Identity Provider is linked to a B2C portal using legacy authentication, it is recommended to have each portal reside on a separate domain. The requests will pass successfully only if coming from FTOS IDP towards B2C (the other way around, errors may occur).
|
| core-setting-external-auth-provider-key-url | Link to the FintechOS Identity Provider public keys used to validate the digital signatures of the access tokens. E.g.: https://myHPFI.myDomain.com/auth/realms/fintechOSRealm/protocol/openid-connect/certs |
| core-setting-external-auth-provider-issuer | FintechOS Identity Provider instance identifier as provided in the issue field of the authentication token. This value is case sensitive. E.g.: https://myHPFI.myDomain.com/auth/realms/fintechOSRealm |
| openid-client-id | Your FintechOS Platform component's corresponding Client ID as defined in the FintechOS Identity Provider. E.g.: admin-portal, myInnovationStudio. In the FintechOS Identity Provider admin console, you can find the list of Client IDs in the Clients section of your FintechOS realm. 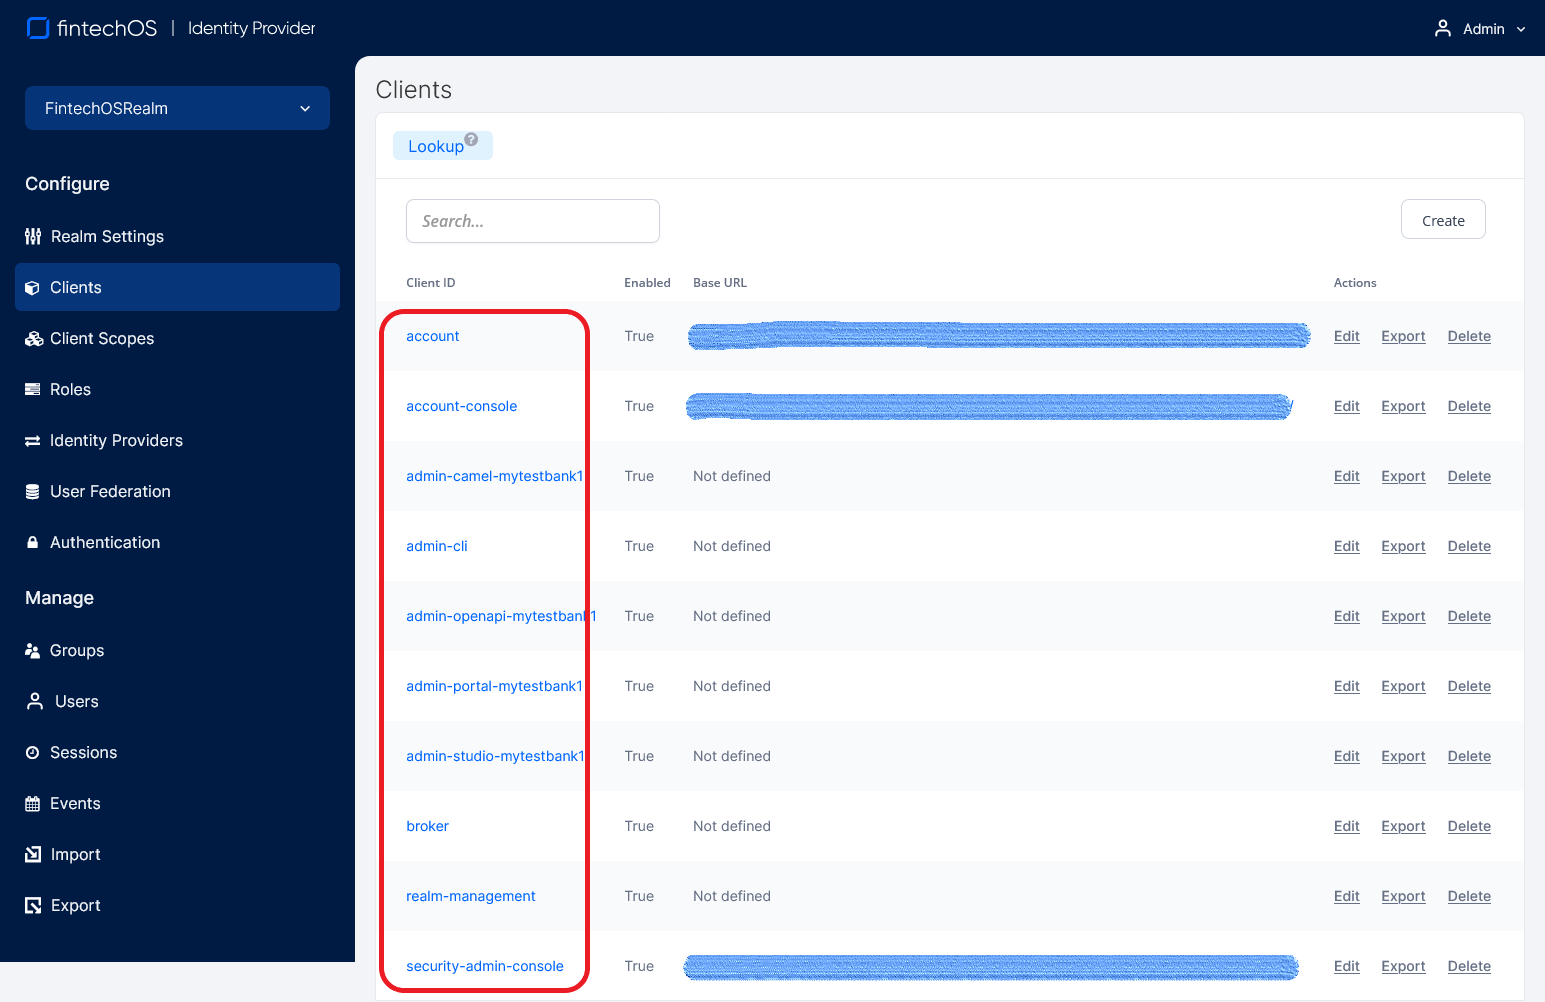 |
| openid-client-secret | Your FintechOS Platform component's corresponding client secret generated by the FintechOS Identity Provider. In the FintechOS Identity Provider admin console, you can find the client secret in the Credentials tab of your client's page. 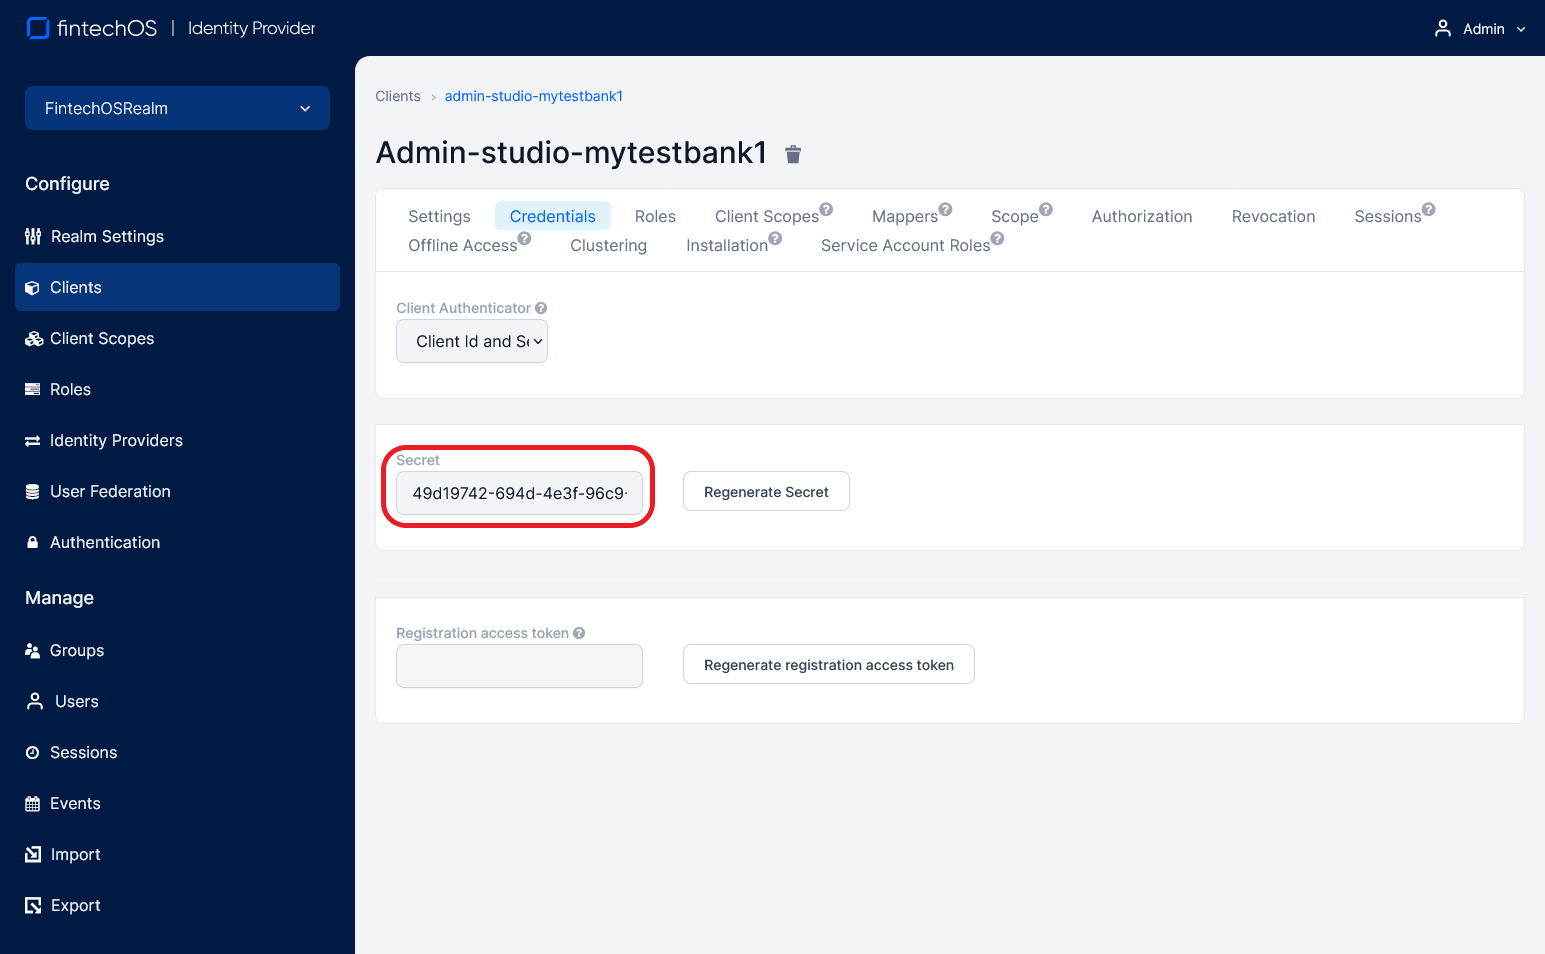 |
| openid-discovery-endpoint | FintechOS Identity Provider endpoint. E.g.: https://myHPFI.myDomain.com/auth/realms/fintechOSRealm/.well-known/openid-configuration In the FintechOS Identity Provider admin console, you can find the discovery endpoint address in the Realm Settings section. 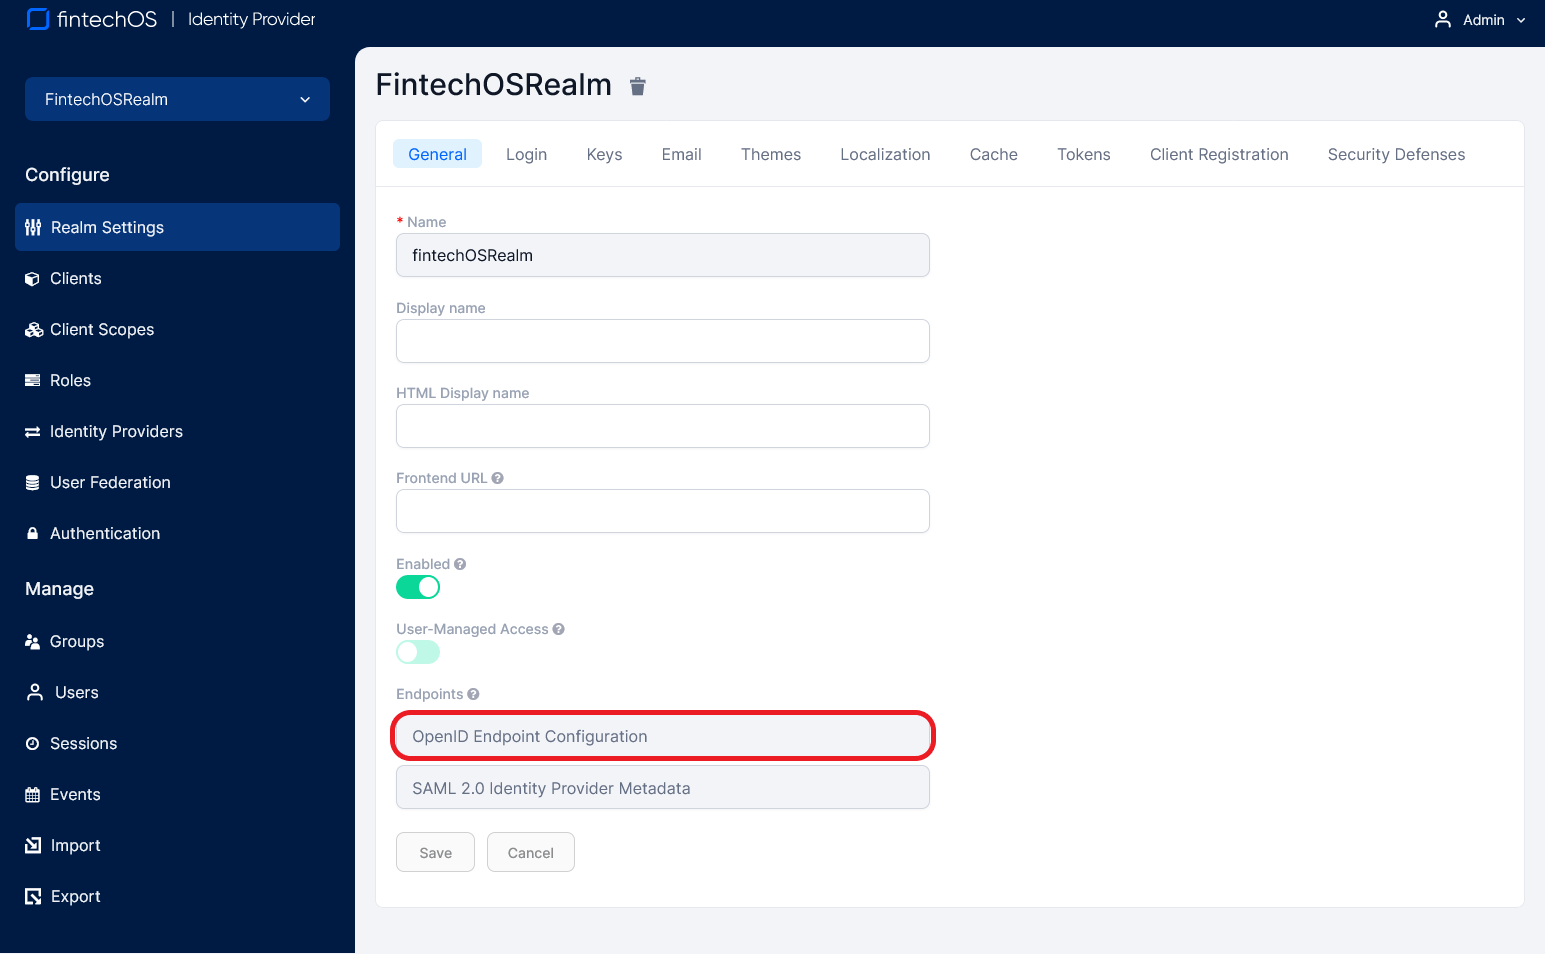 |
| openid-callback-url | URL where the user agent is redirected after a successful login. The default value is {<Studio/Portal base URL>/Account/LogonCallback. A matching entry must be configured in the FintechOS Identity Provider as a valid redirect URI for the client.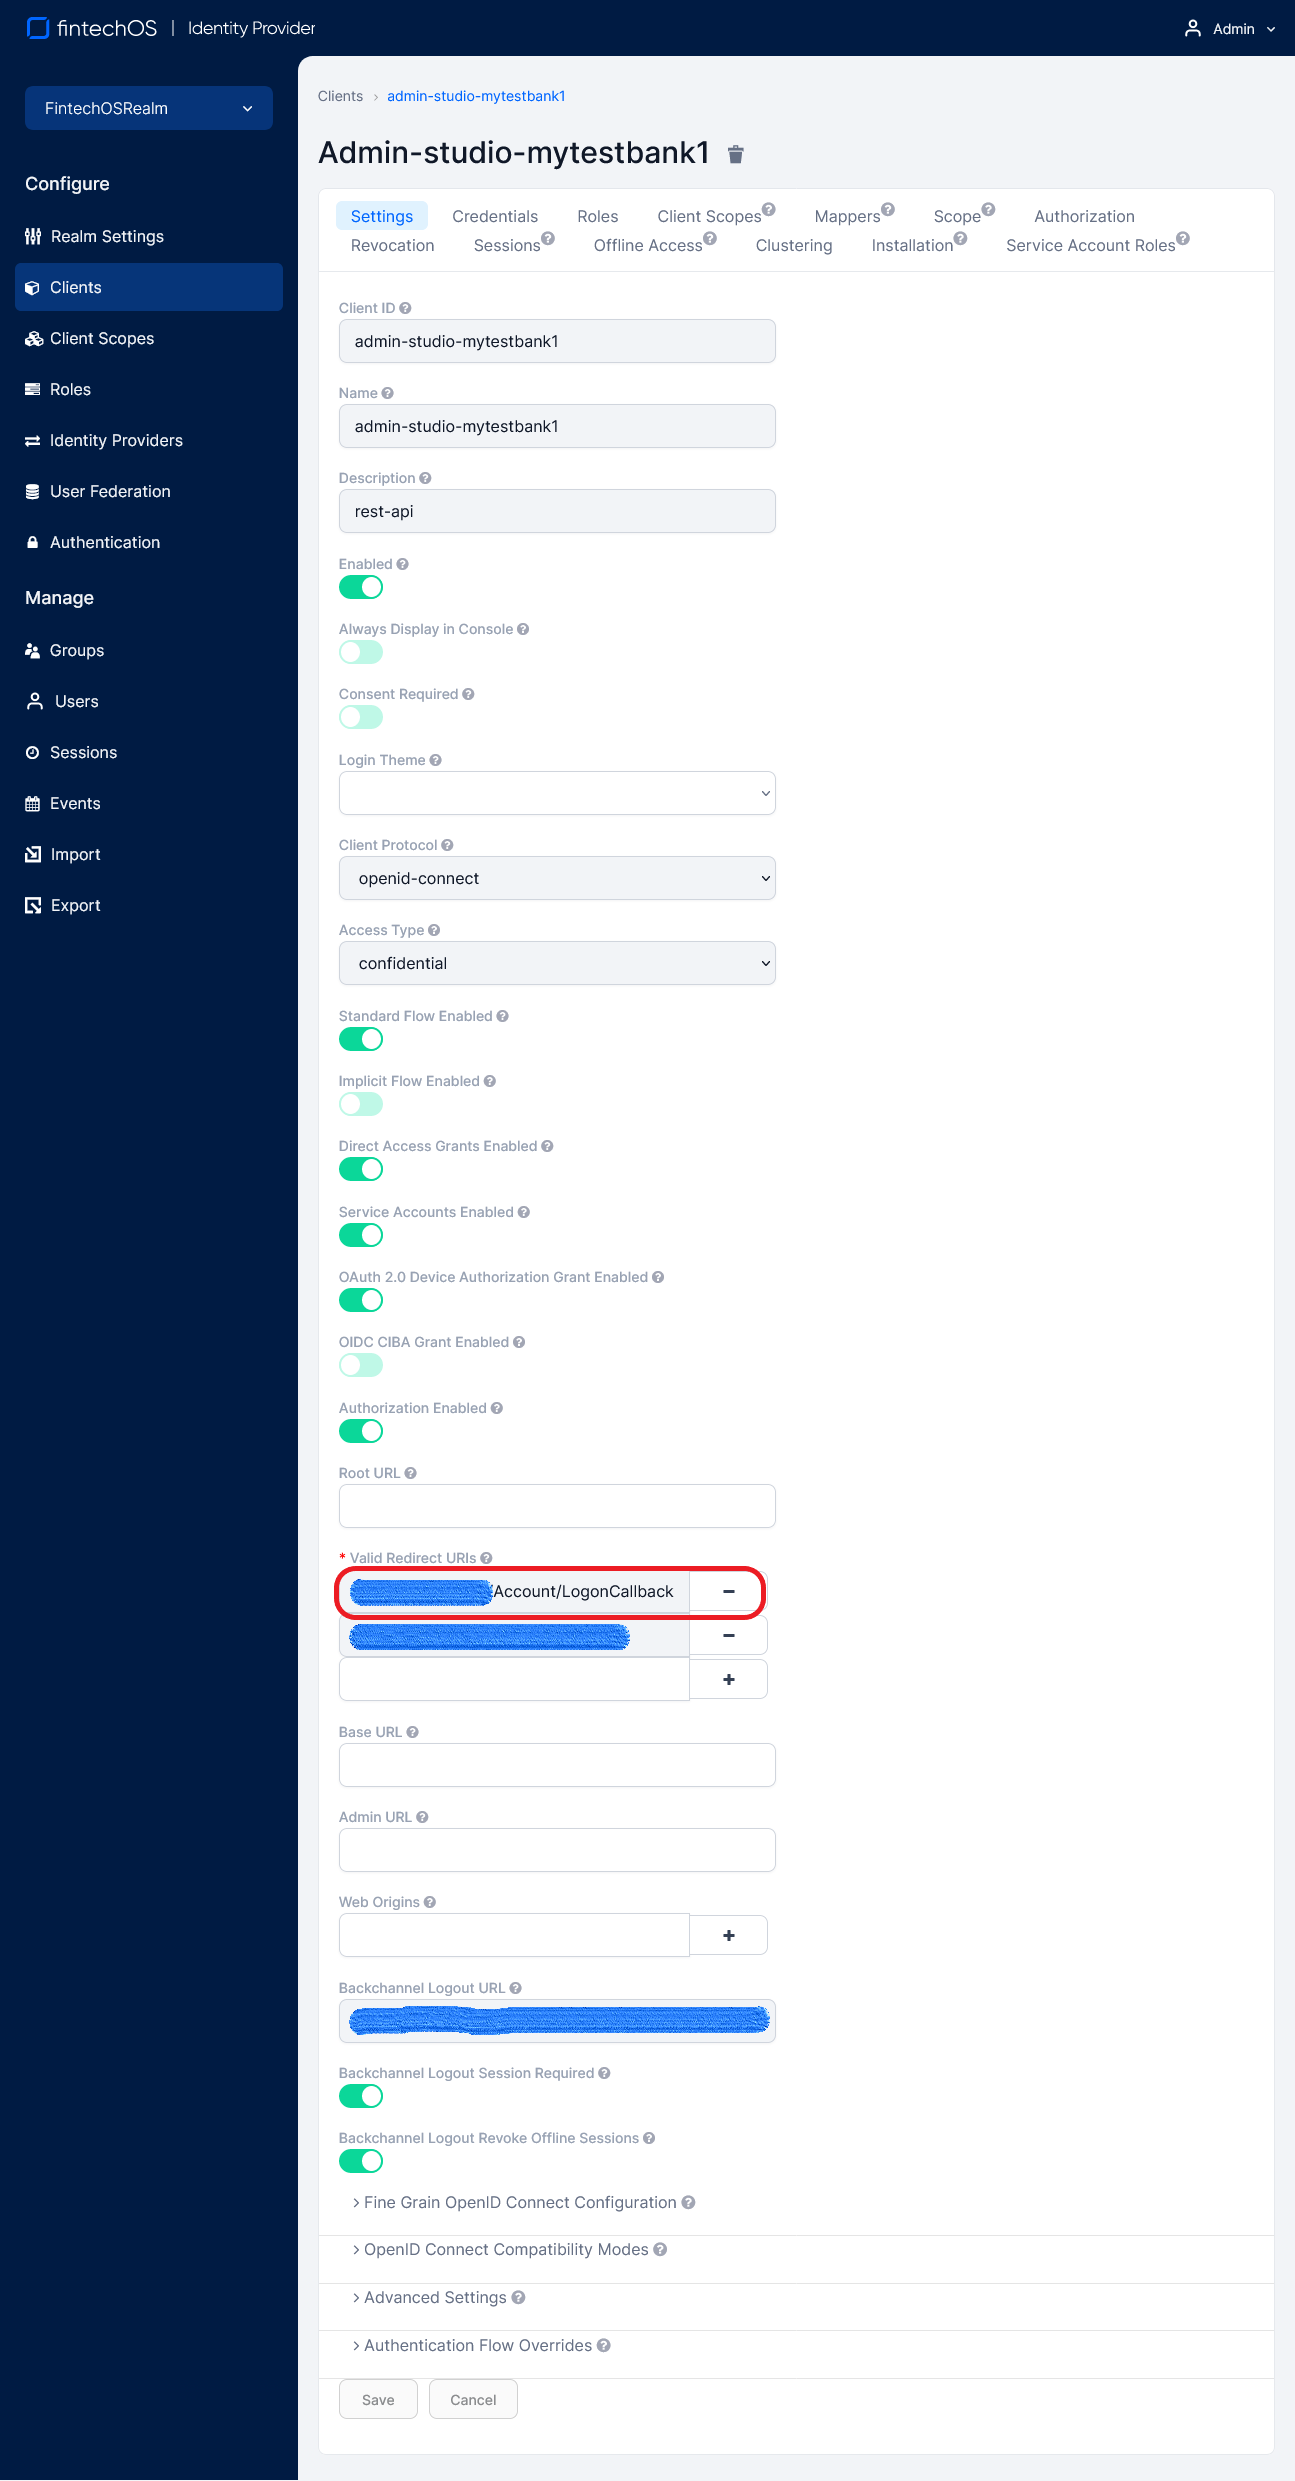 |
<app-settings>
    ...
    <!-- Set FintechOS Identity Provider authentication-->
    <add key="EBSDefaultAuthentication" value="FTOSOIDC" />

    <!-- External authentication provider settings-->
    <add key="core-setting-external-auth-provider-key-url" value="{AccessTokenPublicKey}" />
    <add key="core-setting-external-auth-provider-issuer" value="{AccessTokenIssuer}" />

    <!-- Replace these values with your FintechOS Identity Provider configuration: -->
    <add key="openid-client-id" value="{ClientId}" />
    <add key="openid-client-secret" value="{ClientSecret}" />
    <add key="openid-discovery-endpoint" value="{DiscoveryEndpointUrl}" />
    <add key="openid-callback-url" value="{CallbackUrl}" />
    ...
</app-settings>
Create Service Accounts
Service Accounts are a type of priviledged accounts that gives the user elevated rights within the platform. Such accounts are set up in the FintechOS Identity Provider and are visible in Studio as well. They are client accounts and are not subject to regular password policies. This decreases the level of support needed to operate the platform and minimizes business disruption. Follow the steps below to create a service account:
-
Log in to the FintechOS Identity Provider admin console.
- Select your FintechOS Platform realm.
- Select the Clients blade, select Create Client.
- Type in a name for the service account.
- In the Capability Config section, switch Client authentication on, and select Service accounts roles, click Save.
- To assign a role, go to Service accounts roles and select Assign role.
- Choose a role from the list.
- To make the account visible in Studio, in the Postman collection, add the new service account username to
auth.clientid. - In the Postman collection, get the token for the user, and then use GetEntities Metadata. The user is now visible in Studio > Security > System Users.

To unassign a role from a Service Account, use the options in the System Users menu entry.
Add Roles to Service Accounts
FintechOS Studio clients require full privileges for membership management (CRUD operations with users, password change/reset, etc.). Roles for service accounts can be added from the FintechOS IDP or Studio. The following steps show how to add roles from the FintechOS IDP. Check the Manage Users page for how to add roles from Studio.
- Log in to the FintechOS Identity Provider admin console.
- Select your FintechOS Platform realm.
- Select the Clients blade.
- Open the Studio client.
- Go to the Service Account Roles tab.
- In the Client Roles drop-down, select realm-management and assign all the available roles.


Users Log in the Portal or Studio
When accessing the FintechOS Platform Portal or FintechOS Studio, users who have an active OpenID session are logged in automatically. Otherwise, they are displayed the FintechOS Identity Provider single sign-on login page and will use the OpenID account credentials to log in to the FintechOS Platform Portal or FintechOS Studio.
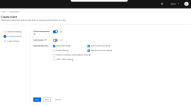
Activate User Login Logs
To view user logins on a certain environment, you need to use the Save Events option in the Identity Provider. The data retrieved is user ID, IP address, session ID, errors.
-
Login to the FintechOS Identity Provider for your environment.
-
Go to Realm settings > Events > User event settings.
-
Toggle Save events to On. The logging is activated and in IDP database, the Event_Entity table is populated with information about the login sessions. An entry is created at each successful user login.
-
Use a query in the database to retrieve the list, for example:
SELECT id, client_id, details_json, error, ip_address, realm_id, session_id, event_time, type, user_id FROMevent_entity WHERE type = 'LOGIN';.
To retrieve data about the current logged in user in Studio, use the ebs.getCurrentUserSessionsHistory Client SDK method.
FintechOS Platform User Account Automatic Synchronization
When a user logs in to FintechOS Platform Portal or FintechOS Studiousing the FintechOS Identity Provider single sign-on, the following information stored in the corresponding FintechOS Platform user account is updated automatically based on the FintechOS Identity Provider account settings:
- First Name
- Last Name
- Security roles
- External user ID (uniquely identifies the user by an external identity provider)