Azure Active Directory Authentication
If your organization is using Azure Active Directory (Azure AD) for identity and access management, you can map Azure groups to FintechOS Security Roles using the OpenID authentication protocol. This allows users to log in to FintechOS using their existing Azure AD credentials.
Configure OpenID Settings
Add the following keys to the <appSettings> node in the web.config file of your web service (Portal/Studio):
<add key="EBSDefaultAuthentication" value="AzureAD" />
<!-- BEGIN AzureAD IDOPEN ID CONFIGURATION -->
<add key="openid-client-id" value="Azure directory (tenant) id (GUID)" />
<add key="openid-application-id" value="Azure application id (GUID)"/>
<add key="openid-client-secret" value="Azure application secret"/>
<add key="openid-callback-url" value="http://${portalRoot}/Account/LogonCallback" />
<add key="openid-discovery-endpoint" value="https://login.microsoftonline.com/${tenantId}/.well-known/openid-configuration" />
<!-- USER MAPPING SETTINGS -->
<add key="openid-auto-user-roles" value="Registered User,My default role" />
<add key="openid-auto-user-organization" value="ebs" />
<add key="openid-auto-user-businessunit" value="root" />
<add key="openid-auto-user-type" value="Back Office" />
<add key="openid-auto-user-remote-roles-add" value="0 or 1"/>
<add key="openid-auto-user-remote-roles-sync" value="0 or 1"/>
<!-- END AzureAD IDOPEN ID CONFIGURATION -->
To find the Azure directory (tenant) id (GUID) and the Azure application id (GUID):
- Open the Azure Portal.
- Select the App registrations service.
- Select the application you wish to use as a source for identity credentials.
- The Azure directory (tenant) id (GUID) and the Azure application id (GUID) will be displayed in the Overview section of the application.
Configuration Keys
| Parameter | Value |
|---|---|
openid-auto-user-roles |
Platform role names, separated by commas. These roles will be added automatically when the Azure AD user is mapped to a FintechOS user. |
openid-auto-user-organization |
Platform organization name. The mapped user will be added in this organization. |
openid-auto-user-businessunit |
Platform business unit name. The mapped user will be added in this business unit. |
openid-auto-user-remote-roles-add |
When set to 1, the roles from Azure AD will be added to the mapped user on user creation, adding the roles found in the values for web.config key="openid-auto-user-roles" (has effect only at user creation). See below how to expose the Azure AD roles in custom claims consumable by FintechOS. Azure AD will be added to the mapped user, |
openid-auto-user-remote-roles-sync |
When set to 1, the roles from Azure AD and the default roles are always synchronized at login. Any roles manually added to Azure AD user are lost. |
Parameters
| Parameter | Value |
|---|---|
${portalRoot}
|
Root URL for the FintechOS web service. |
${tenatnId} |
Azure tenant ID. |
Set up Login/Logout Redirect URIs
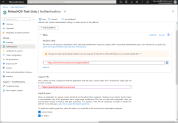
In the Azure Portal, in the Authentication section of your registered application, fill in the:
- Login redirect URI:
{$portalRoot}/Account/LogonCallback - Logout redirect URI:
{$poratalRoot}/Unauthorized
Groups Mapping
When a user is authorized with Azure AD, a corresponding system user is created in FintechOS. Default roles for this user, organization, business unit, and user type can be configured in web.config. Any Security Role which has not already been created in the system and is mentioned in OpenIdUserConfiguration.xml it will be automatically created.
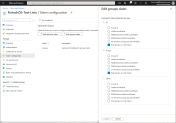
To synchronize groups created in Azure AD with FintechOS, the administrator of the Azure AD application must include an optional claim named groups in the token configuration.
To configure the mappings, an XML file named OpenIdUserConfiguration.xml must be placed in the root folder of the web application. Azure AD sends group IDs with the OpenID token, so the mapping must be done between the Azure Group ID and QWPlatform security roles.
<root>
    <SecurityGroup>
        <Name>b681734a-5601-435c-b817-465f8e20b7fb</Name>
        <DisplayName>GROUP1</DisplayName>
        <DefaultBusinessUnitName>root</DefaultBusinessUnitName>
        <SecurityRoleName>Registered Users</SecurityRoleName>
    </SecurityGroup>
        ...

    <SecurityGroup>
        <Name>84d47d54-0956-4f9a-b37d-81880374fd46</Name>
        <DisplayName>GROUP2</DisplayName>
        <DefaultBusinessUnitName>root</DefaultBusinessUnitName>
        <SecurityRoleName>Developer,Registered Users</SecurityRoleName>
    </SecurityGroup>
</root>Any changes to
OpenIdUserConfiguration.xml require a manual Application Domain restart.

