Create a Payment Proposal
Payment proposals can be made anytime after the FNOL is initiated. They have a dedicated page in the Core Claims Admin digital journey. Click the Payment tab. The Payment window is displayed. You notice that some fields are already populated with data extracted from the policy.
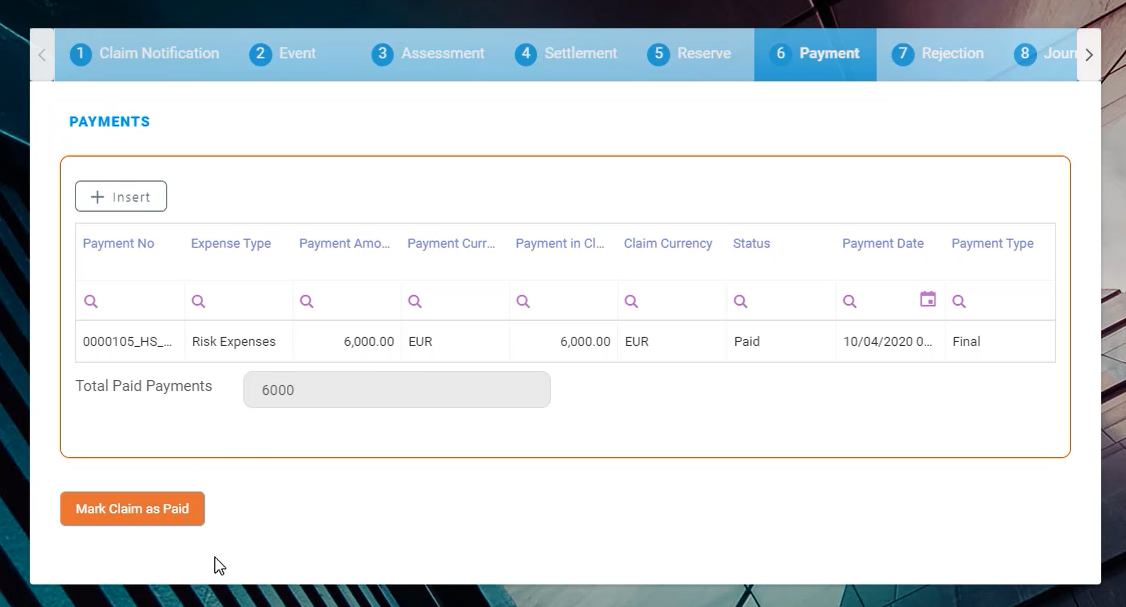
Click Insert to add a new Payment Proposal. The Payment flow becomes active. This flow has four steps and helps you to manage the claim's payment proposals. Proceed from left to right, in the following order:
Complete the fields from the Payment proposal table.
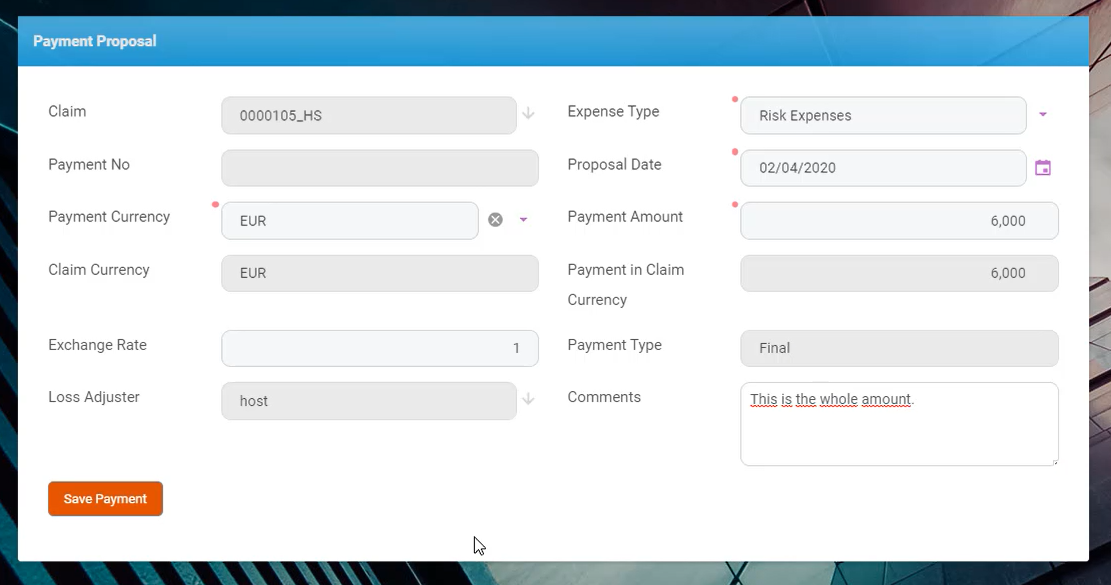
Below is a description of the table:
| Field | Type | Description. |
|---|---|---|
| Claim | Option set | It is read-only. It is the claim number. |
| Payment No | Text | It is the number of the payment. |
| Payment Currency | Option set | It is the currency for the payment. |
| Claim Currency | Text | It is the currency for the claim. |
| Exchange Rate | Number | For inserting the exchange rate values. |
| Loss Adjuster | Option set | It is the person recording the Claim. |
| Expense Type | Options set | It is required to fill in. It is the type of expense for which this payment is done. |
| Proposal Date | Date | It is required to fill in. |
| Payment Amount | Number | It is required to fill in. |
| Payment in Claim Currency | Number | It is auto-filled. |
| Payment Type | Text |
It is read-only. It can be: Final or Partial. |
| Comments | Text area | For any details regarding the payment. |
Click Save Payment. A new step becomes available.
Go to the Approve payment step. Complete the fields from the Approve payment table.
Below is a description of the table:
| Field | Type | Description |
|---|---|---|
| Approval Date | Date time | It is the time of the approval . It is auto-filled. |
| Claim Manager | Option set | It is the person who makes the approval. |
| Observations | Text area | For any details regarding the approval. |
Click Approve or Unapprove. For the Unapprove flow please see the details from the Business Statuses model.
After you clicked Approve, the third step Accept Payment becomes available. Complete the fields from the Accept Payment table.
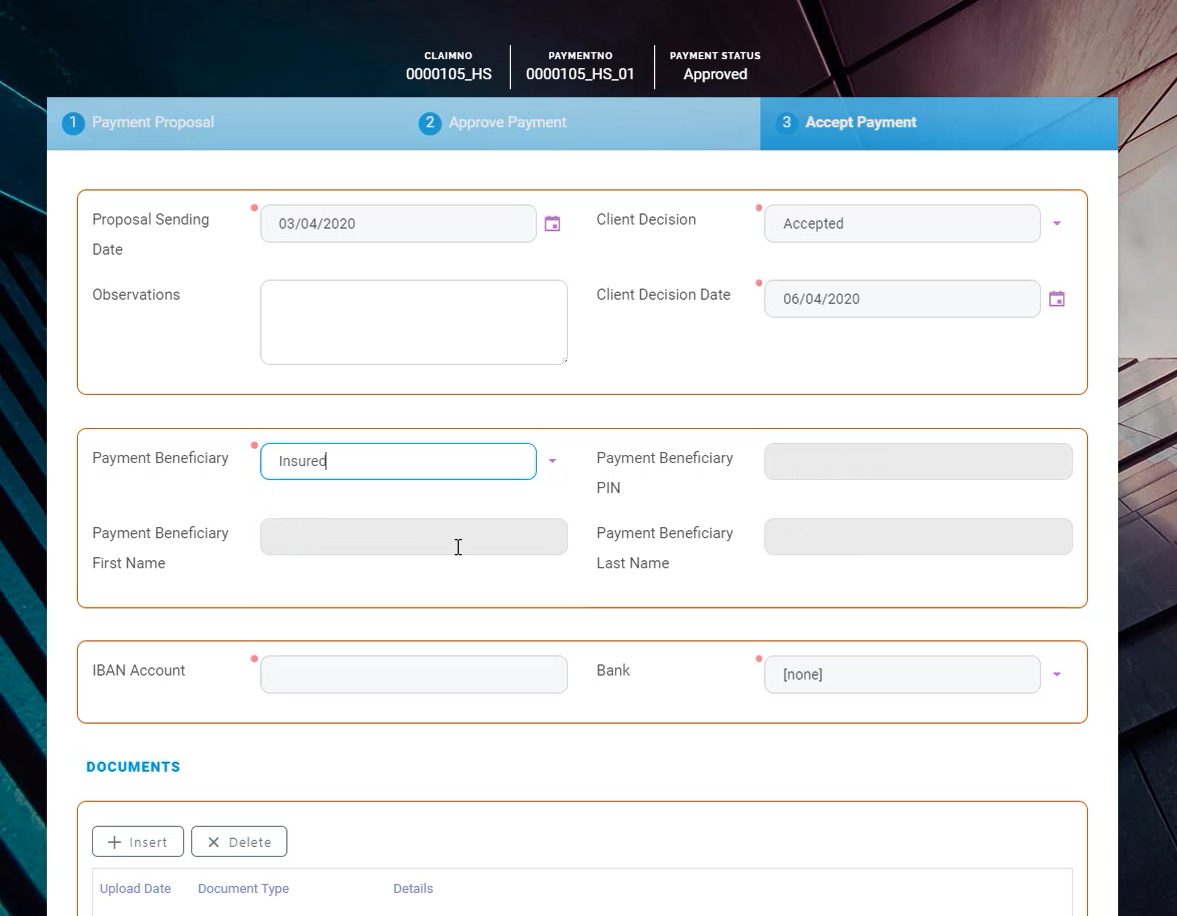
Below is a description of the table:
| Field | Type | Description |
|---|---|---|
| Proposal Sending Date | Date | It is required to fill in. |
| Client Decision | Option set | It is required to fill in. |
| Observations | Text Area | Add any relevant observations. |
| Client Decision Date | Date | It is required to fill in. |
| Payment Beneficiary | Option set | The Loss Adjuster choose the beneficiary. |
| Payment Beneficiary First Name | Text | It is the name of the person. |
| Payment Beneficiary PIN | Text | It is the PIN of the person. |
| Payment Beneficiary Last Name | Text | It is the name of the person. |
| IBAN Account | Text | The IBAN of the beneficiary. |
| Bank | Option set | Bank corresponding to the IBAN. |
Client Decision Date must be set after the Proposal Sending Date.
Under Documents, click Insert to add a payment request/ mandate/ other documents.
Click Save Client Decision.
Go to the Payment step. Next to Payment Schedule, click the Calendar icon to set the date and then click Schedule.
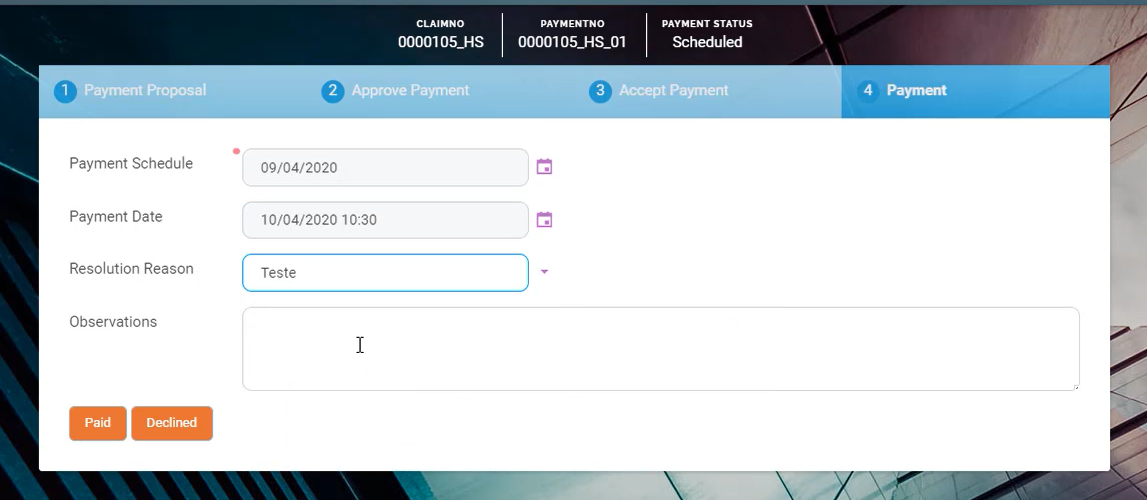
After clicking Schedule, three new fields become available: Payment Date, Resolution Reason and Observations.
| Filed | Type | Description |
|---|---|---|
| Payment Schedule | Date | It is required. |
| Payment Date | Date time | It must be after the payment schedule. |
| Resolution Reason | Option set | |
| Observations | Text | For details regarding the resolution. |
Click Paid or Declined.
After clicking Paid, click Mark Claim as Paid or click Insert to add new payments.
The next step of the Core Claims Admin digital journey is to manage any claim related information. Go to the Rejection, Journal & Third Party Details for more information about these journey steps.