Attaching a Report to the Entity pointing to the Document
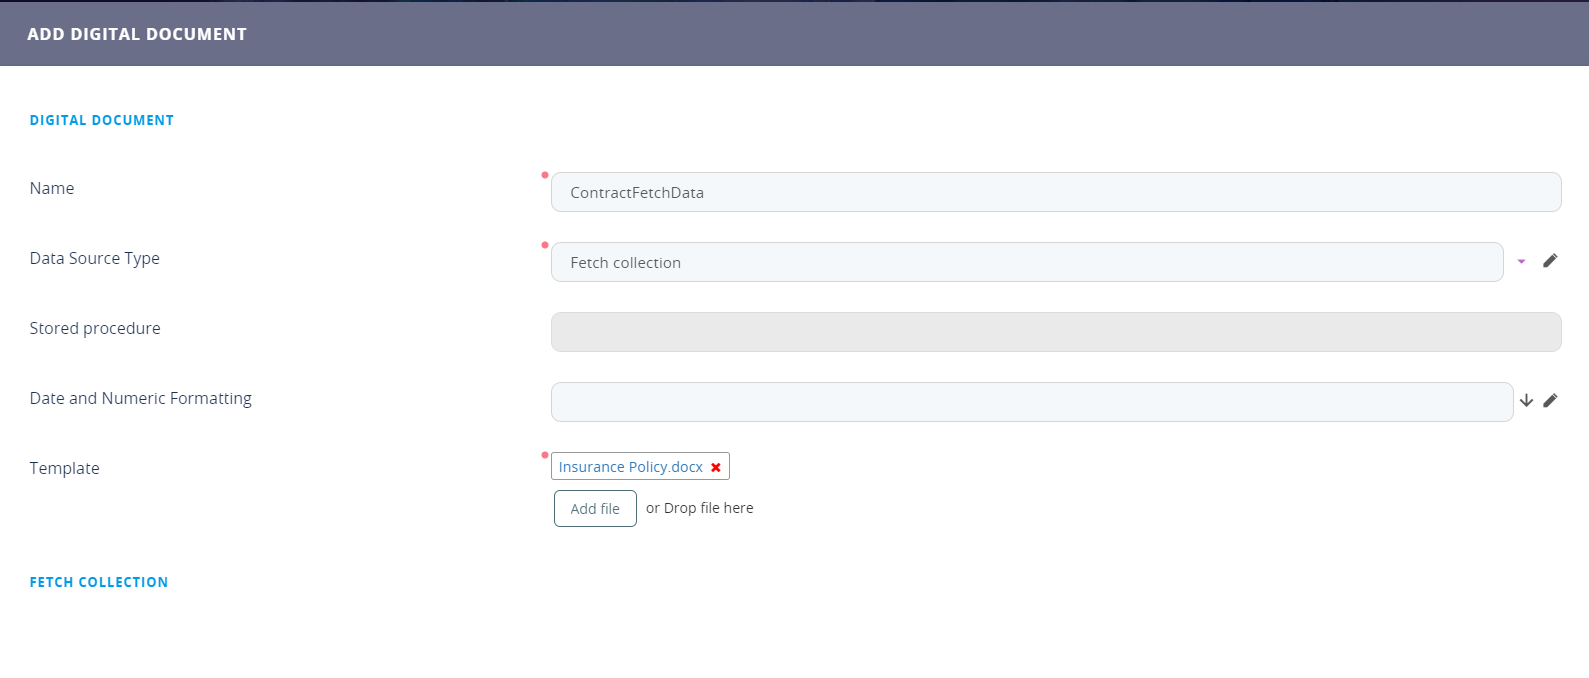
To create a document successfully, the user needs to create a report type ''document'' where a report item will be added.
- Open FintechOS Studio.
- Click the Main Menu icon at the top left corner.
- Click Evolutive Data Core > Data Model Explorer. The Business Entities List page appears.
- Search for the entity the user wishes to attach the document to. Double-click the entity to open its configurations.
- Navigate to the Data Model where the attributes are.
- At the top of the grid, click Insert.
- Fill in the fields for the attribute where the documents will be stored.
Field Data type Description Name Text Insert a suggestive name. Attribute type Option set Select from the from-down list, the File type. Display name Text Insert a suggestive name. Description Text Area Insert a suggestive description. Tooltip Text Area Insert a message to be rendered on the field when hovering over it. Table column name Text This field is automatically filled in. Restrict files number Boolean If true, then the number of files to be stored here is restricted to a specific number, e.g. 10578 documents. Maximum number of files Whole number If the boolean from above is true, insert the number here. If false, ignore this field. Required Level Option set Select where this attribute is required in a data form:
- none
- recommended
- required.
Is readonly Boolean If true the field cannot be modified. Is securable Boolean If true, only the specific security roles are allowed to see it. For details, see Creating Security Roles. 
- Click Save and Close.
- Navigate to Analytics.
- Select Reports. The Reports List page appears.
- Click Insert. The Add Report page appears.
Field Data type Description Name Text Insert a suggestive name. Display name Text Insert a suggestive name. Scope Option set Select Entity. Type Option set Select Document. Entity Lookup Select the entity where the user inserted the attribute - type file. Output method Option set Select attach to entity. Destination field Text Insert the name of the attribute- type file- created earlier. Destination File Name Text It is the name of the folder in the server where the document will be downloaded. Report Document Type Option set Select PDF. - Click Save and reload. The Edit report page displays.
- To match the documents processor with the report, navigate to the Report items grid. Click Insert to add an item.
- The page Add Report item is displayed. Fill in the following fields:
Field Data type Description Name Text
Insert a suggestive name. Start date Date Select the date when the report item will start. End date Date Select the date when the report item will end. Report document Lookup Select from the list the document template created in this automation processor. Is default Boolean If the boolean is true, then the document template will be the default one for this report. Report Lookup It is automatically filled in with the name from the report. - Click Save and close.