Creating A New Product Admin Configuration
Banking products can only be used in contracts if they are attached to a product admin configuration record in Approved status. Make sure you create for each banking product that you want to use in contracts a product admin configuration record.
To create a new product admin configuration:
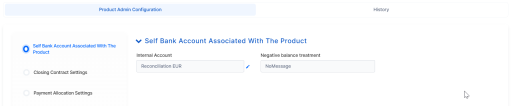
Each banking product must be associated to a bank account to be used for transactions, for money movements. This is known as a reconciliation account. The reconciliation account must have the same currency as the product, because the conversions are performed from and into this account.
-
In the Self Bank Account Associated with the Product section, fill in the Reconciliation Account, selecting from the drop-down list the reconciliation account to be used for the banking product attached to this configuration. The list is already filtered to display only the accounts in the previously selected product's currency.
-
Select a value for the Negative Value Treatment drop-down to specify how Loan Management treats situations when the funds of the reconciliation account associated with the banking product used in the contract would go below zero if a disbursement event would be approved. The possible values are:
-
Error- there is an error message displayed if the disbursement event that is being approved would result in a negative balance of the associated reconciliation account. The event can't be approved and the balance can't go below zero. Select this value if you want to block any transactions that would result in a negative balance of the reconciliation account associated to the banking product. -
Warning- there is a warning message displayed if the disbursement event that is being approved would result in a negative balance of the associated reconciliation account. The event can be approved and the balance can go below zero. -
NoMessage- there is no error or warning message displayed if the disbursement event that is being approved would result in a negative balance of the associated reconciliation account. The event can be approved and the balance can go below zero.
NOTE TheReconciliationAccountTreatmentsystem parameterNegative balance treatmentvalue. Loan Management takes into consideration the settings used at the product admin configuration level (theNegative balance treatmentfield's value). Thus, if the value is specified at the configuration, then that value takes precedence over the system parameter's setting. -
-
Click the Save and Reload button.

Configure the default closure settings for contracts based on the banking product with this service configuration.

-
In the Closing Contract Settings section, fill in the following fields:
-
Buffer Close Days: Enter the number of days used as buffer before automatically closing the contract when the contract reaches maturity and its balance reaches zero. If
Buffer Close Days > 0, thenContract Is Closed Automatically = False. -
Close Real Time: If you select this checkbox, the contract based on a banking product with this configuration is closed in real-time, when the contract reaches maturity and its balance reaches zero, without waiting for the end of day processes. If
Close Real Time = True, thenBuffer Close Days = 0andContract Is Closed Automatically = True. -
Closing Is Flexible: If you select this checkbox, the closure details of the contract can be modified at the contract creation.
-
Contract Is Closed Automatically: If you select this checkbox, the contract is closed automatically at maturity, if the balance reaches zero. If
Contract Is Closed Automatically = False, thenClose Real Time = False.
-
-
Click the Save and Reload button.
In the Payment Allocation Settings section you can decide which allocation method should be used to determine the order in which credit items are prioritized when repaying loans, credit accounts, and so on. You can also define the grace period settings for contracts based on the banking product with this service configuration.

-
Fill in the following fields:
-
Payment Allocation Method: The payment allocation method represents the recovery order of amounts from payment notifications. Select a payment allocation method from the list.
-
Grace Days for Repayment: Insert the number of days for which the bank expects a payment without calculating penalty.
-
Penalty for grace period: If you select the checkbox, the penalty interest is applied on the loan contract without taking into consideration the grace period defined at contract level, being calculated for the difference between system date - due date, if the grace period passed and the customer didn't pay the due amounts. If you leave this checkbox unselected, the penalty interest is applied on the loan contract taking into consideration the grace period defined at contract level, being calculated for system date - due date + grace days for repayment.
-
Direct Debit Settlement Account: If you select the checkbox, the banking product with this configuration has the automated settlement of repayment notification functionality (the payment allocation) turned on by default at the contract level. You can turn the automated settlement off either at the product admin configuration level or at the contract level. Default value:
true.NOTE
The automated settlement of repayment notification, or direct debit settlement account, is the functionality whereby, if funds are available on the settlement account and the contract has repayment notifications pending for recovery, Loan Management automatically uses the available balance up to full settlement of repayment notifications.
The automated settlement ofInstallmenttype repayment notification functionality (the payment allocation) can be turned on or off, thus allowing the financial institution to manage the contracts in case of blocked accounts and control the allocation of funds to outstanding notifications in case of need to impose a block on the settlement account, or manage the settlement of multiple loans from the same settlement account when short on funds and exceptional rules might apply.
If the functionality is turned off, the contract is pending for manual allocation. You can turn it back on and leave Loan Management to allocate the funds according to its automated processes, using any funds that become available in the settlement account in order to cover pending notifications.
-
-
Click the Save and Reload button.
You can add the roles of the participants that are mandatory to exist at the contract level for contracts based on the banking product with this configuration. In other words, when creating contracts based on banking products with service configuration with Merchant role, you must add a customer with the same Merchant role as contract participant, otherwise, the contract cannot be approved. When Search Limit is selected for a role, Loan Management checks if the contract participant with this role has an attached limit configured with a limit type associated to the same role, in this case Merchant Exposure.
-
In the Mandatory Roles for Contract Approval section, click Insert to open the Add Mandatory Roles page and fill in the following fields:

-
Role: Select the role of the participants that are mandatory to exist at the contract level for contracts based on banking products with this configuration.
-
Search Limit: When
Search Limitis selected for a role on a banking product, Loan Management checks if the contract participant with this role has an attached limit configured with a limit type associated to the same role.
If you select a role not associated with a customer limit type in Loan Management, theSearch Limitfield becomes read-only and unselected.
-
-
Click the Save and Reload button.

You can adjust settings, such as Enforce Minimum Days or Minimum Days Approval, for certain transactions associated to this product.
-
Click Insert to open the Add Product Transaction Settings form.
-
Click the drop-down next to Transaction Type and select a type of transaction.
-
Tick the box to Enforce Minimum Days. This indicates whether the minimum days for approval should be enforced.
-
Type in a number for Minimum Days Approval. Defaulted to 0, it represents the minimum approval days required for a transaction.
-
Click Save and Close.
![]()
Configure whether a contract based on the banking product with this service configuration can have Returned Amount or Goods transactions or not, and the specific conditions for these transactions. The Returned Amount or Goods transaction type should be used when a customer returns all or part of a loan or mortgage in a short while after contract creation, if the product admin configuration was defined to allow such transactions. You can set up Return Fee type commissions to return all or some of the claimed commission to the borrower.
The Return Of Money or Goods section is displayed for banking product types of the following types: loans, mortgages, and leasings.

-
Fill in the following fields:
-
Allow Return Of Goods: Select this checkbox if the contracts based on the banking product with this service configuration accept
Return of Goodstransactions. Default value:False.NOTE
IfAllow Return Of Goods = True, then theReturned Amount of Goodstransaction is automatically added to the Allowed Transactions section.If selected, the
Accepted Days For ReturnandReturn Messagefields are displayed, otherwise, these fields are not visible. -
Accepted Days For Return: Specify the number of days after contract creation during which the return of goods transaction can be created and approved.
-
Return Message: Select the behavior of messages generated by Loan Management for situations when the
Returned Amount or Goodstransaction's approval date + the number of accepted days for return >= the current date. Possible values are taken from theWarning Error Treatmentoption set. According to the desired behavior, choose:-
Error, if the transaction should not be approved and an error message should be displayed; -
Warning, if the transaction can be approved, but a warning message should be displayed; -
NoMessage, if the transaction can be approved without any messages.
-
-
-
Click the Save and Reload button.
The write off functionality is intended for non-performing loans. Loan Management can automatically write off non-performing loan contracts after their maturity day passes and the remaining value on the contract is under the specified threshold. You can also perform write-off transactions, even if the remaining amounts on the contract are above the defined threshold. The write-off transaction takes the remaining amount from the specified internal write-off account and credits the loan account.
The Write Off Settings section is displayed for banking product types of the following types: loans, mortgages, current accounts with overdraft, credit cards, and leasings.
In the Write Off Settings section, you can configure the default write-off settings for contracts based on the banking product with this service configuration.

-
Fill in the following fields:
-
Allow Write Off: Check this box to instruct Loan Management to allow write-off transactions on contracts based on the banking product with this configuration. Default value:
False.NOTE TheWriteOfftransaction type is automatically added to the Allowed Transactions section if you select this option.The following fields only appear if
Allow Write Off = True: -
Write Off Account: Select the financial institution's internal write-off account to be used for write-off transactions for contracts based on the banking product with this configuration. The
DefaultWriteOffReconciliationAccountBankingProductsystem parameter -
Write Off Threshold: Enter the maximum value of remaining amounts on the contract for Loan Management to perform automated write off after the contract's maturity day passes.
-
-
Click the Save and Close button.
The Mass change settings section allows you to perform bulk changes to contracts with variable interest. Using this you can trigger a contract reevaluation to update the base interest rate and trigger updates to the payment schedule subsequently. You can also adjust the date when the contract reevaluation is done in accordance with the change in the base interest rate.

-
Fill in the following fields:
-
Mass Change Type: allows you to change the following:
-
Number Of Days From Activation: in the No Of Days From Activation field set the number of days after activation when the contract reevaluation will be triggered.
-
Specific Dates: you can configure a list of certain days in a month for triggering the interest reevaluation. The format here is "dd_mm, dd_mm,...".
-
Interest Periodicity: this triggers the contract reevaluation in accordance to when the base interest is changed.
-
No Mass Change: choose this for when no mass change is to be made.
-
-
-
In the Skip Days From Activation field, set the number of days to be skipped from when the activation was made. After these days are up, the contract reevaluation is made.
-
Use the Holiday Shift box to adjust the calculation based on the calendar of national holidays in your country:
-
Holiday Method: set Forward if the reevaluation should be triggered the next business day after a holiday. Otherwise, choose Backward.
-
Holiday Country: choose the holiday calendar based on country.
-
-
The Reference Date Type Rule allows you to choose the interest rate from a specific date to be used in the reevaluation.
-
System Date: the interest rate from the reevaluation date set in the previous steps.
-
Specific Day Of Month: the interest rate from a specific day of the month.
-
No Of Days Before: the interest rate from a certain number of days before the reevaluation date.
-
-
Click the Save and Close button.
To view how to use the Mass Change Console go to the Mass Changes on Contracts page.
You can use complex formulas to calculate different elements of banking products, such as commissions and fees. Banking formulas, once included in the product definition, have to be fed with data at the customer journey level. The calculated result is later consumed within customer journeys; the resulting applicable rate can be fed into contract context.
Loan Management consumes banking formulas included in the product definition. When using a formula associated to a banking product within a contract, you must specify the formula mapping, that is the input data to be used for the formula in the context of Loan Management.
In the Products Formula Mapping section, if the selected banking product has one or more associated formulas, then you can configure the formula mapping for each formula.
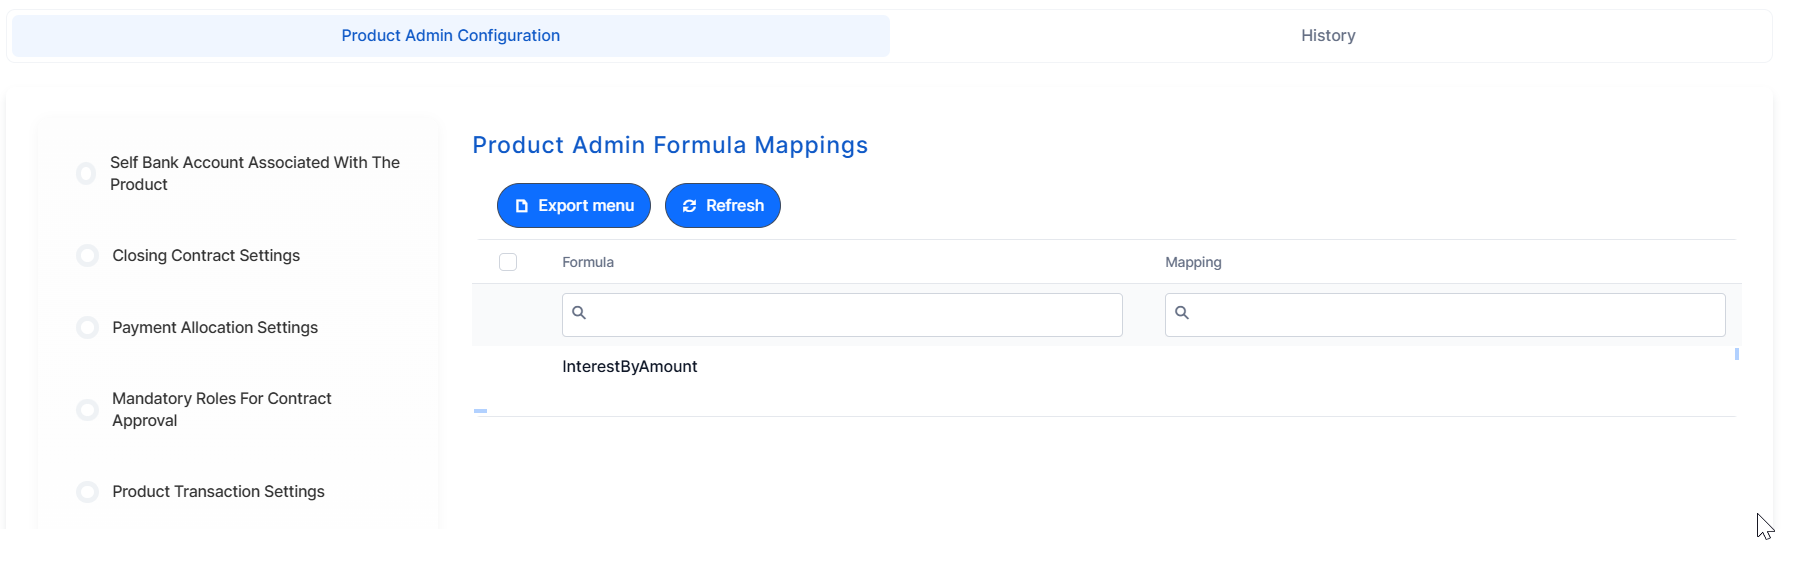
To configure the mapping:
-
In the Products Formula Mapping grid, double click the desired formula.
-
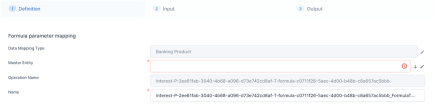
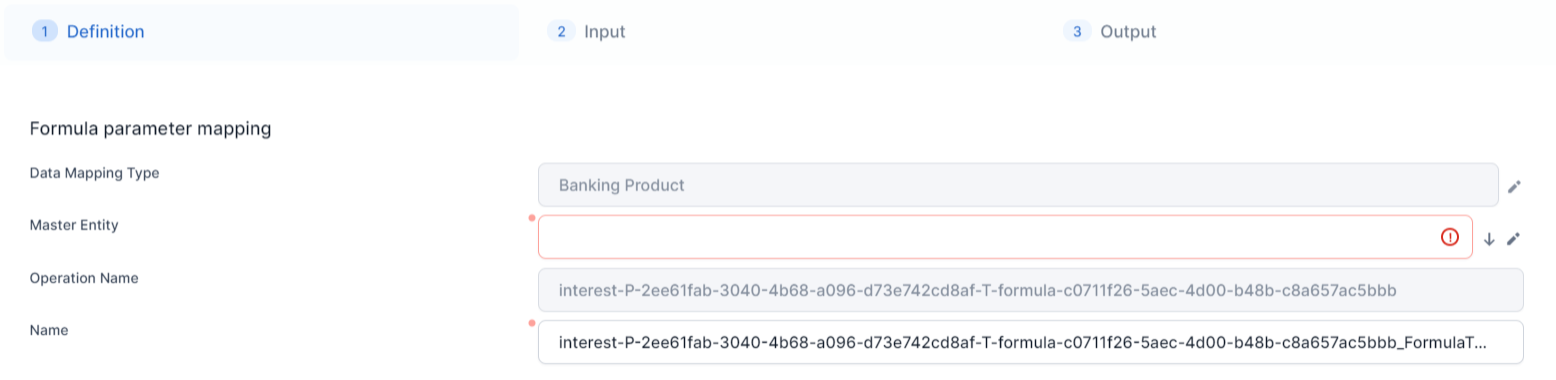
If there is no mapping defined yet, then on the newly displayed Formula parameter Mapping page, click the down arrow next to the Master Entity field and select the entity on which the mapping should be applied at the Loan Management level. Continue with mapping the Input and Output parameters. Read more about formula mappings here.
-
Click the Save and Close button.
The GL Settings tab is available only when Loan Management is implemented along with Subledger.
In the GL Accounts tab, you can set specific accounts to be used by the Subledger system for transactions performed on contracts based on banking products with this service configuration. Thus, you can overwrite the generic settings of the Subledger, instructing it to use the accounts specified here.
-
To add specific accounts to be used by Subledger, click Insert and fill in the following fields in the displayed Add Banking Product GL Account page:
-
Accounting System: Select from the list the desired accounting system. The list contains the records created in the
Accounting Systementity. -
Accounting Scope: Select from the list the corresponding accounting scope. The list contains the records created in the
Accounting Scopeentity. -
Item: Select from the list the corresponding transaction item. The list contains the records created in the
Transaction Item Accounting Configentity. -
GL Account: Select from the list the corresponding GL account. The list is filtered based on the previously selected accounting system. It contains the accounts defined in the
Accounting Chartentity that were added to the chosen accounting system record.
-
-
Click the Save and Reload button.
After defining the relevant details of the product admin configuration, proceed to approval.