Configure the Insured Objects
An object groups together individual properties (dimensions) that transcend an insurance product. For example, for a motorcycle, you might want to define the brand, model, and the year of manufacture, amongst others. On the other hand, for a person (as a particular life insurance object type), you might want to define age, weight, medical conditions, and employment status.
This functionality allows you to create diverse object types, from types representing very specific insurable objects - such as house objects, or car objects, to health and life objects, and even more abstract objects - such as cyber insurance objects. Additionally, your objects are independent from insurance products, so that you can easily operate with and maintain them.
Once defined, and Approved, you can embed the same object into different insurance products, and offer it to different audiences. For example, an apartment object can be included in two or more property insurance products, each of the products having different types of coverages, premium calculation formulas, and underwriting rules.
Create an Insured Object Type
In FintechOS Studio, in the Insured Object Types section, you have an overview of all the object records registered in your system. Follow the steps below to create an insured object type.
-
In the main menu, navigate to Product Factory > Product Configurator > Insured Object Types. The Insured Object Types List is displayed.

-
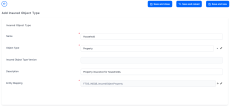
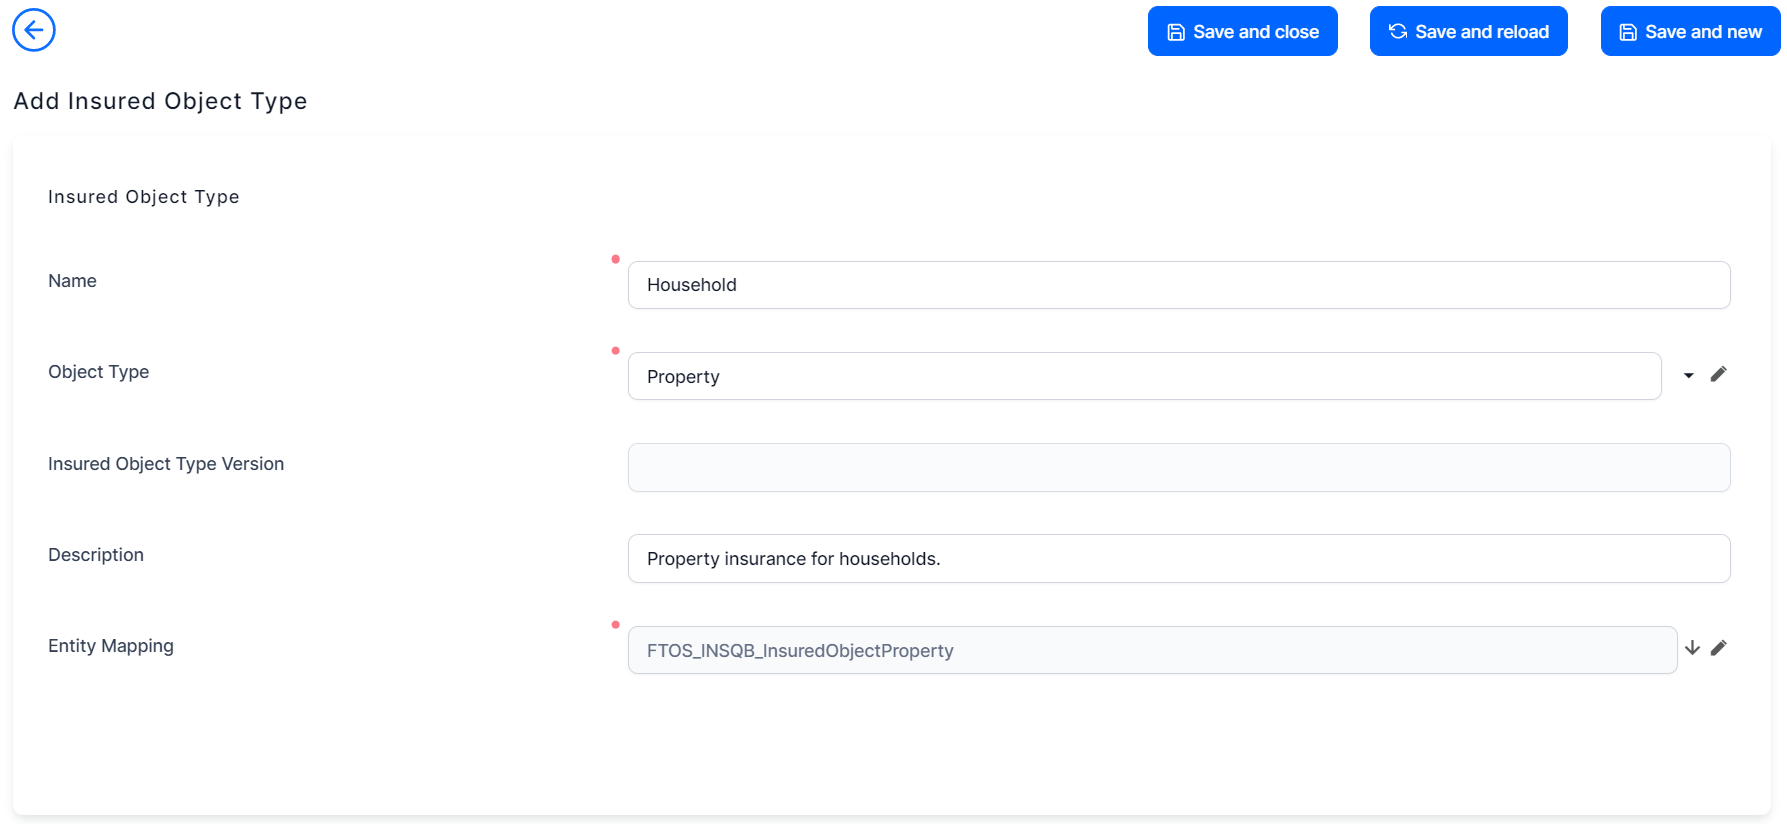
Click Insert to create a new object type. The Add Insured Object Type page is displayed.
-
Fill in the details for the insured object and select the right entity for it to be mapped.
-
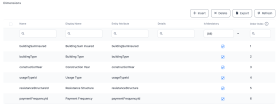
Click Save and Reload. The Dimensions and the Declarations grids are unfolded.
-
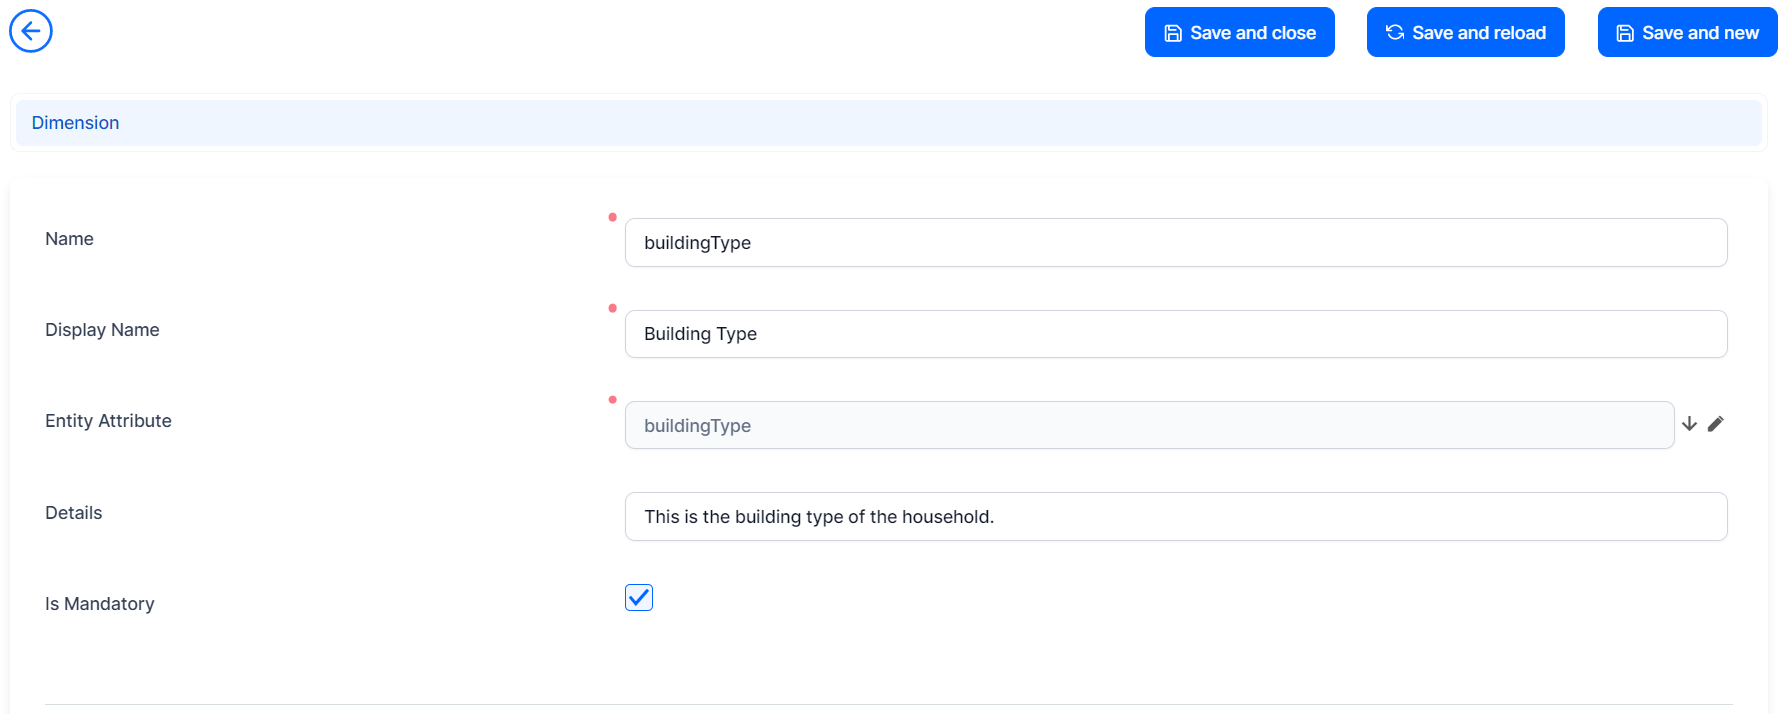
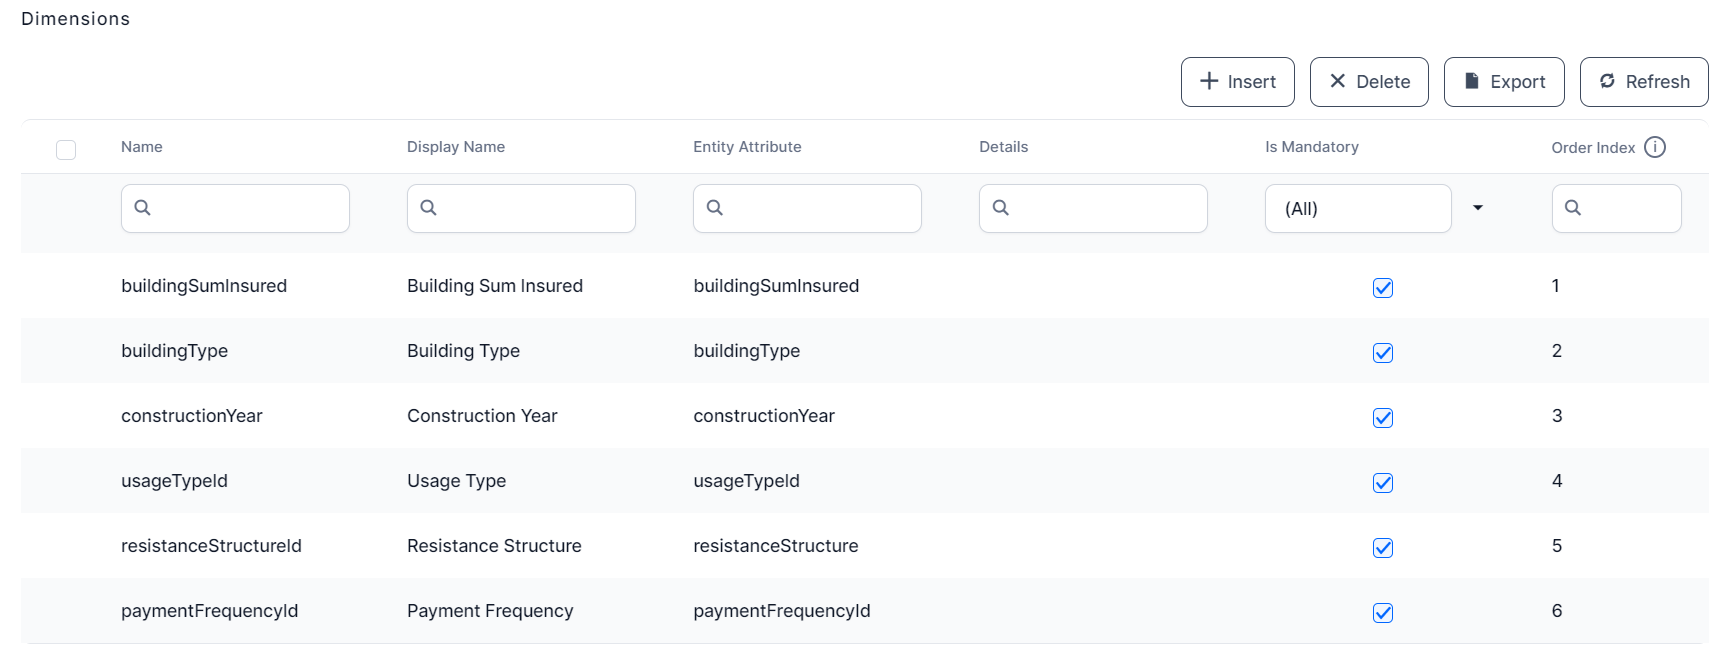
In the Dimensions grid, click Insert to add a new dimension for the insured object. The dimension editor is displayed.
-
Fill in the details of the insured object dimension.

-
Click Save and Close. All the dimensions records you create are displayed in the Dimensions grid.
-
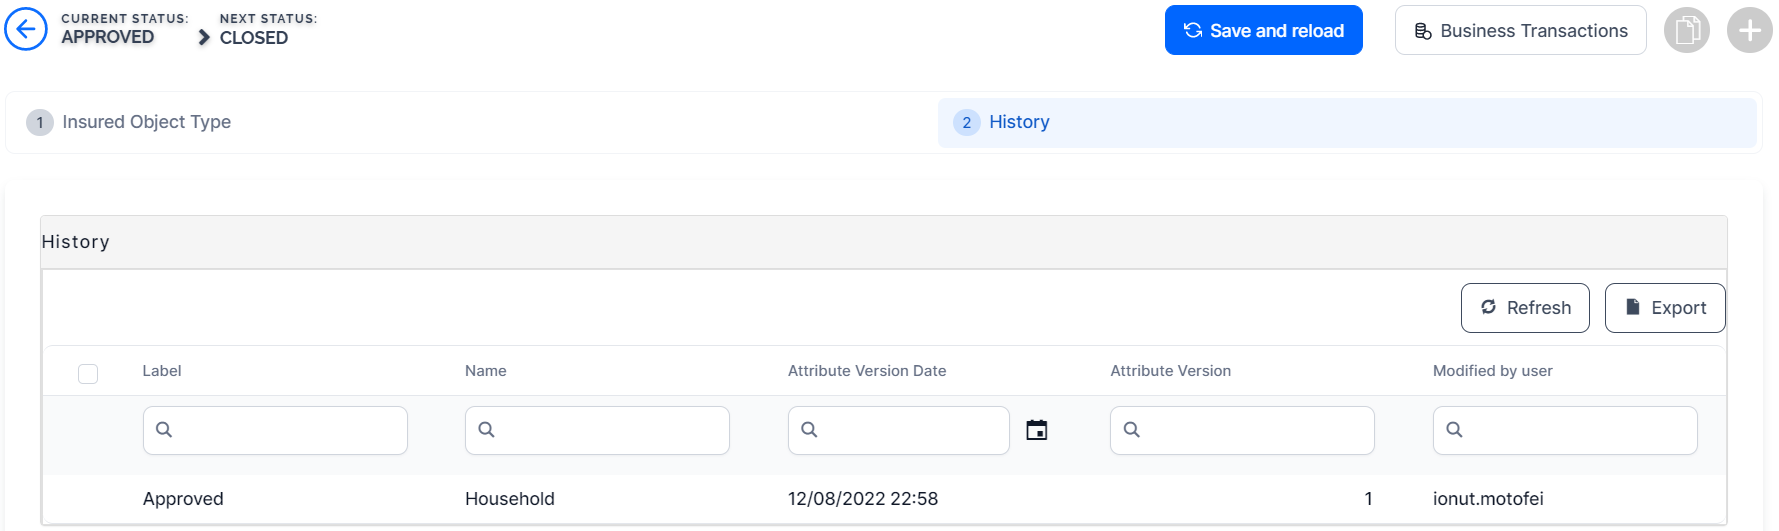
Access the History tab of the insured object to view all the versions that were created for said object.


Manage the Object Versions
In its life cycle, the insured object type can go through the following business statuses: Draft, Approved, Unapproved, Closed, Version Draft, Version Unapproved, Version Closed.
Below is an example of the Insured Object Type business workflow, including the versioning:

Follow the below steps for versioning an Insured Object Type in Approved status (namely attached to a Product):
- Open the Insured Object Types List page.
- From the list, choose the desired Insured Object Type record.
- Click the Plus button to launch the versioning process. The object becomes editable.
- Use the form to make your adjustments.
- Once finished, use the status picker, change the status of the newly created version from Version Draft to Approved.

- After versioning, the object view opens and you can see your adjustments. You can also check the versioning log in the object's History tab.
- Click Save and close, at the top right corner of your screen.
