Define Workflow Transitions
How to add a transition from the Designer tab
- Drag and drop the states you wish to create a transition between. Drag them from the left panel to the white panel.

- Click on Yes to agree to the creation of the transition.
- After it has been created, to configure additional features (action groups and approvals) select Configuration transition from the right side of the designer.
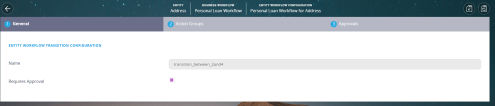
- To see how to configure these tabs, access Edit Workflow Transition Configuration.
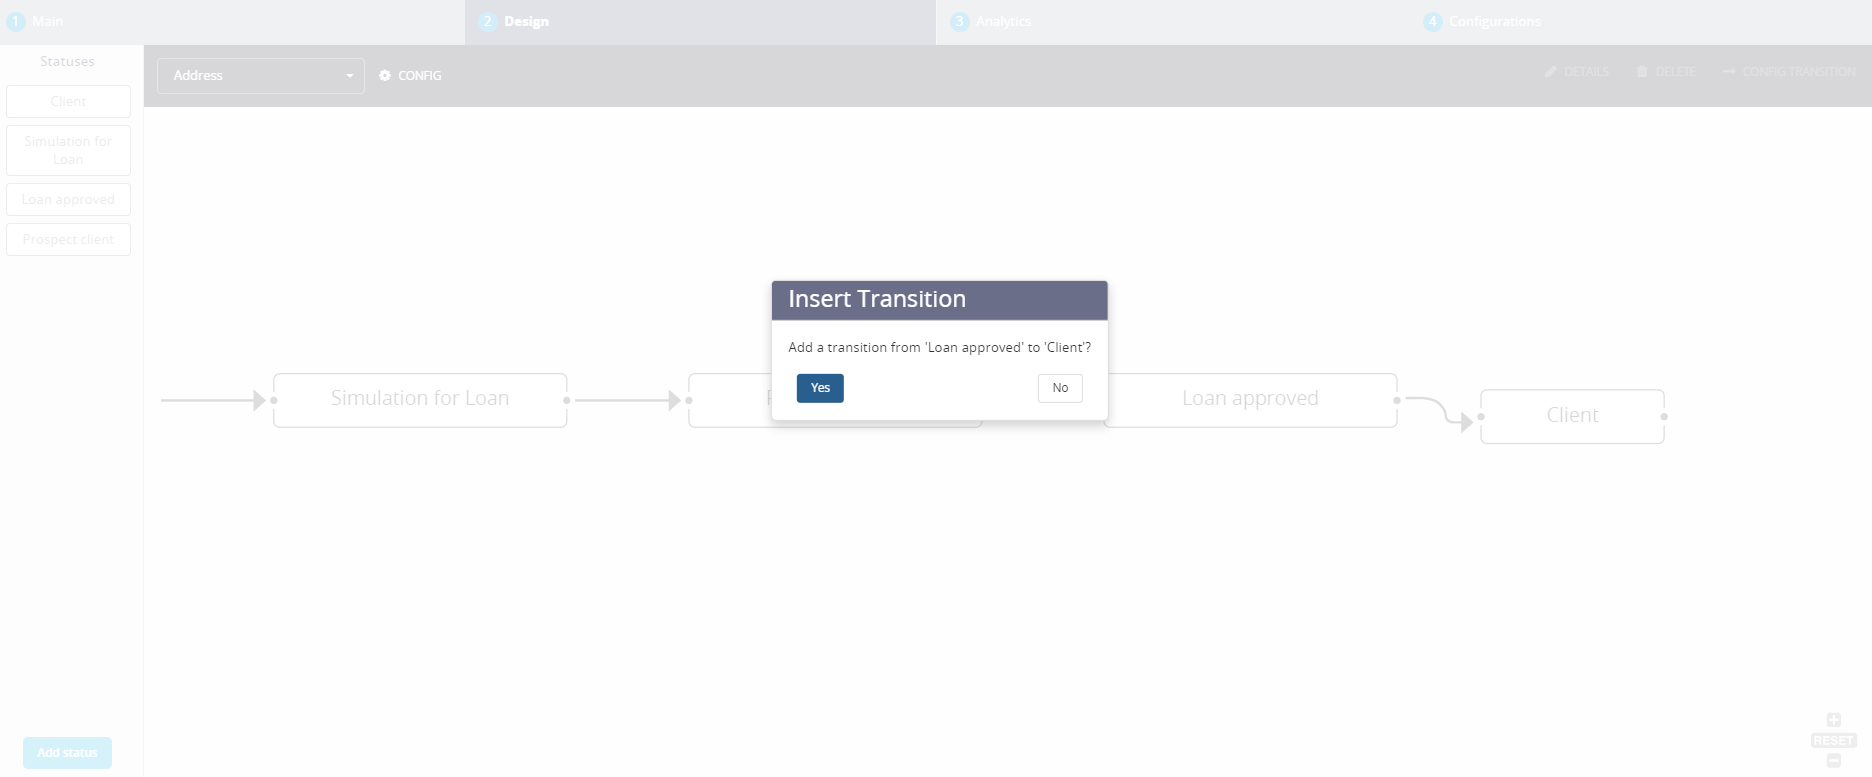

The design of the lines form the diagram marks different configurations.

The dash types mark the configurations. The unidirectional arrow with a straight line is a transition with no configurations, e.g. Simulation to Approved. The unidirectional line with an ''i'' symbol signifies a transition with an action group, e.g. Prospect to Simulation. The dash line signifies a true boolean do not allow manual transition between the two statuses. e.g. Prospect to Loan Denied.
How to add a transition from the Configurations tab
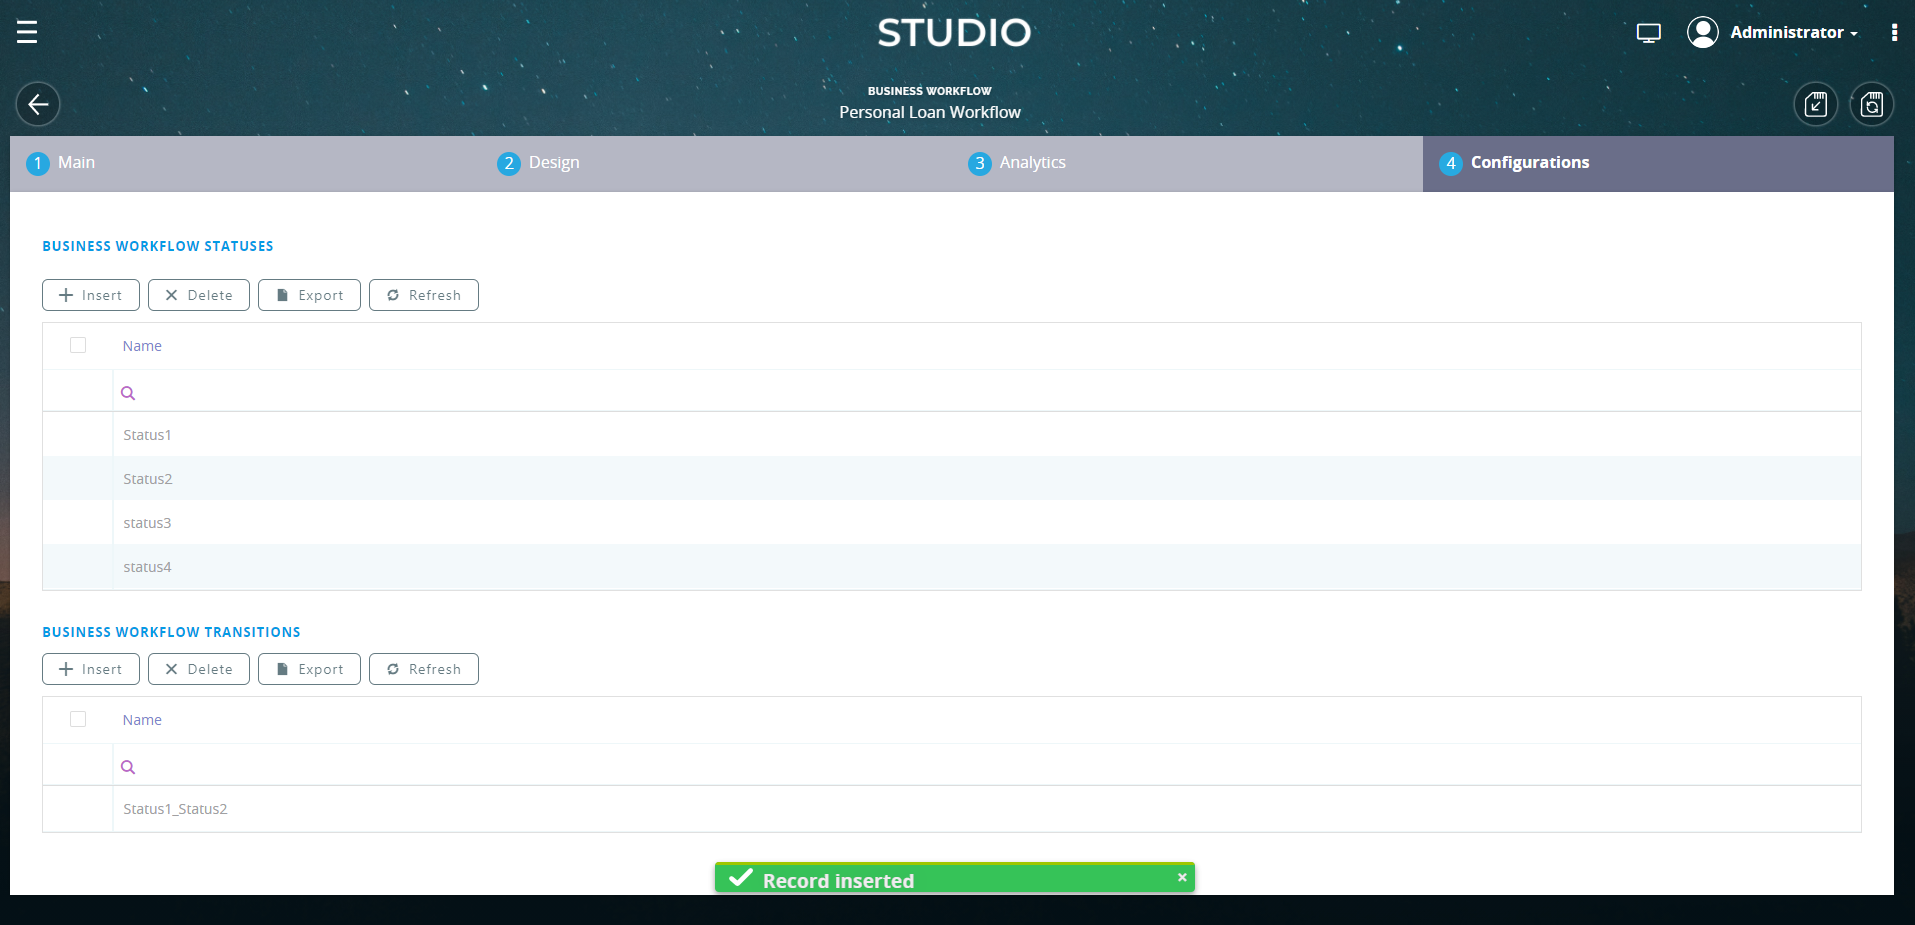
- In the Edit Business Workflow page, click on the Configurations tab.
- Click the Insert button for the BUSINESS WORKFLOW TRANSITIONS grid. The Add Business Workflow Transition page appears.
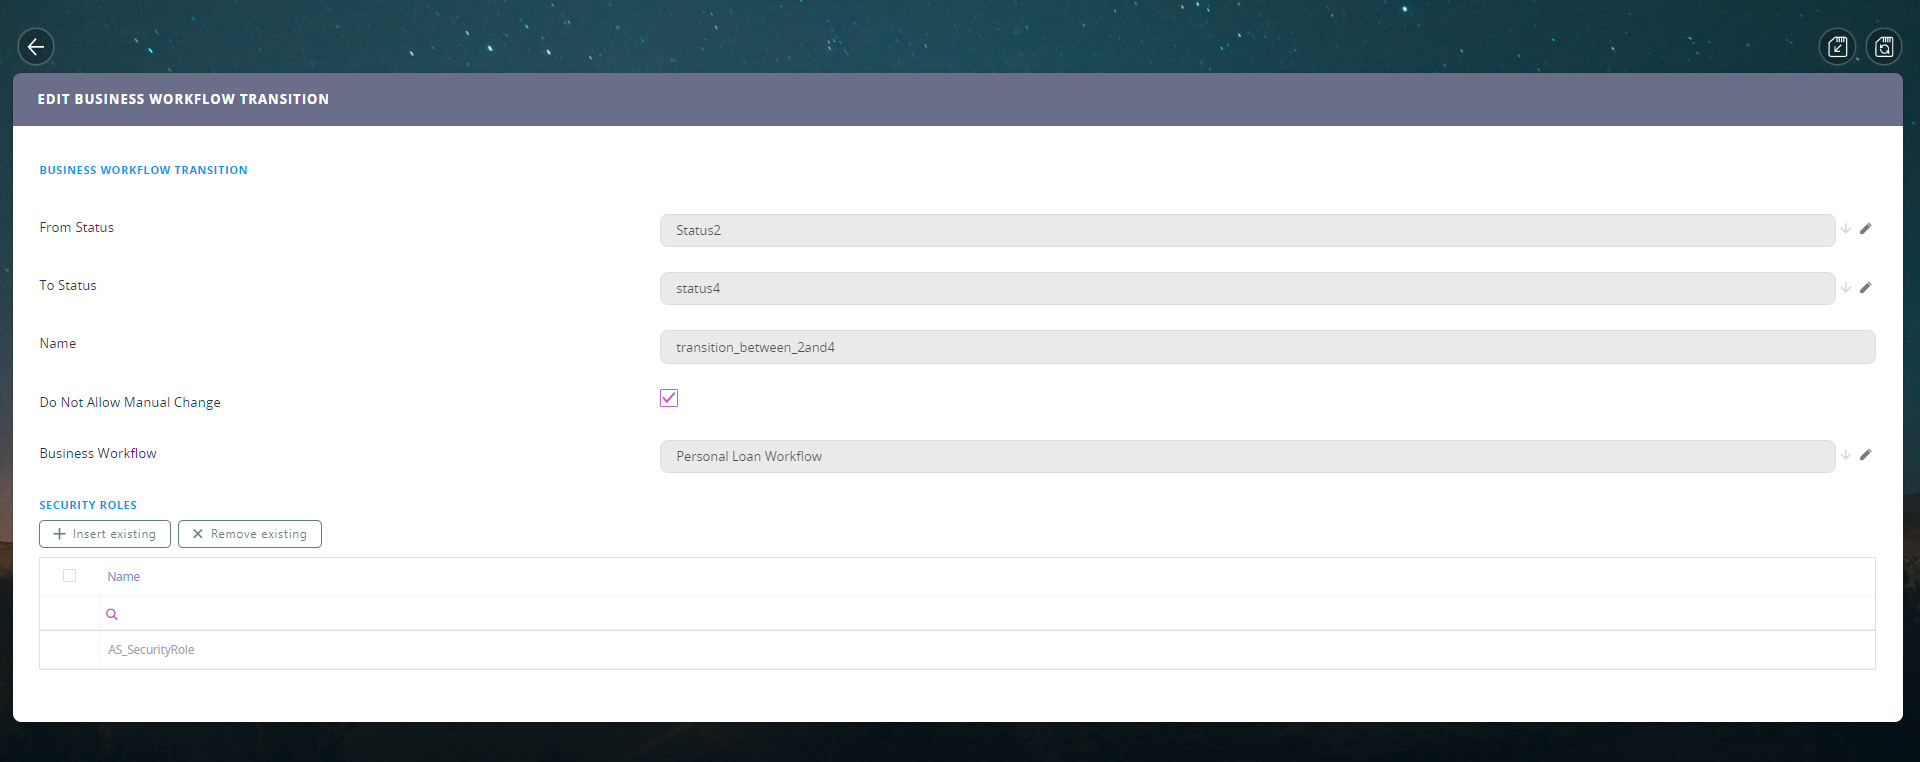
- From the From Status field, select the status from which the workflow transitions.
- From the To Status field, select the status to which the workflow transitions.
- The name is automatically filled in with the concatenation of the names entered in the From Status and To Status fields. If this is the initial workflow transition it follows the following naming convention: "_ToStatus". However, it can be changed to the desired name for the transition.
Tick the Do Not Allow Manual Change checkbox if you want the workflow transition to be automatically triggered based on strict business rules.
- The Business Workflow field is non-editable and displays the name of the business workflow for which you define the transitions.
- If you allowed manual changes (ticked clear the Do Not Allow Manual Change checkbox) and want all users to manually perform the workflow transition, skip steps 2 and 3, go to step 4, for example.
- If you want only users with specific security roles to perform the business status transition, click the Save and Reload icon at the top-right corner of the page. The Security Roles grid appears.
- To add a specific security role, from the Security Roles section, click the Insert existing button and from the pop-up that appears, double-click the security role. Repeat this step to add as many security roles as your business requires.
- Click the Save and Close button (
 ) at the top right corner of the page.

Follow the procedure above as many times as business status transitions you need to meet your business needs.
After you define all the business workflow transitions, if some business transitions will be automatically triggered by specific rules, you need to define the workflow rules.
If you want to visually see the workflow statuses and transitions, click the Designer ( ) button. The Workflow Designer appears.