Use Fluent Query to Fetch Data
There are multiple ways to write an SQL statement to query the database such as getByQuery, using fetch or using Fluent Query.
Task at hand
Query the database to return data from the entity Account. You can use the platform entity Account that already exists in your environment after installation on the environment.
Before you begin
- Access the entity Account and create the following attributes:
UniqueID
applicationNr income PIN
country country applicationAmount creditProposalDate creditProposalDate fullName
consent to GDPR applicationAgency age
currency birthPlace address
applicationTypeId city contractTypeId email
consent to Terms and Conditions - Insert a data form on the FintechOS Portal for this entity and populate the attributes above with records.
1 Create the server-side script
Follow the path: FintechOS Studio > Advanced > Server Automation Scripts.
The General page opens.
Click the Insert button.
Insert a name, display name for the script, in this case FTOS_Query_Account.
For Script type, select on demand. Such a script type is executed on the server and require an endpoint.
In the code box, write:
var A = server.query.getAlias('Account');
var myFluentQuery = server.query.from('Account', A)
 .selectColumns (A.UniqueID, A.PIN)
 .execute();
setData(myFluentQuery);
Click the Save and reload button. The grids Server Automation Script Libraries and Endpoint open.
For details, see Automation Scripts.
2 Create the endpoint
Navigate to the Endpoints grid and click Insert.
Write a name and display name, in this case FTOS_Endpoint_AB.
Click the Save and reload button. Add the security roles to the endpoint. A must is the registered role.
For more details, see Creating Endpoints.
3 Create a data form to view the information
Follow the path: FintechOS Studio > Evolutive Data Core > Data Model Explorer.
Navigate to the entity created. Click on Data Form.
Click the Insert button. Insert a name and display name for the form, in this case FTOS_DataView.
Click the Save and reload button.
Navigate to the UI tab and open the UI Designer. Add a container and place a button inside.
In the right panel, where the configurations for the button have opened, select the following:

| Field | Data |
|---|---|
| Select the button type | Call custom processor |
| Fill in the button text | Press me |
| Fill in the button ID | Insert an ID to be used later in the Advanced tab. |
| Custom processor | Select from the drop-down the endpoint created, in this case FTOS_Endpoint_AB. |
| Appearance | Edit it as you wish. |
Click on Apply changes and then Update template to exit.
Navigate to the Advanced tab. In After Events, there is a code snippet. The number is the ID of the button.
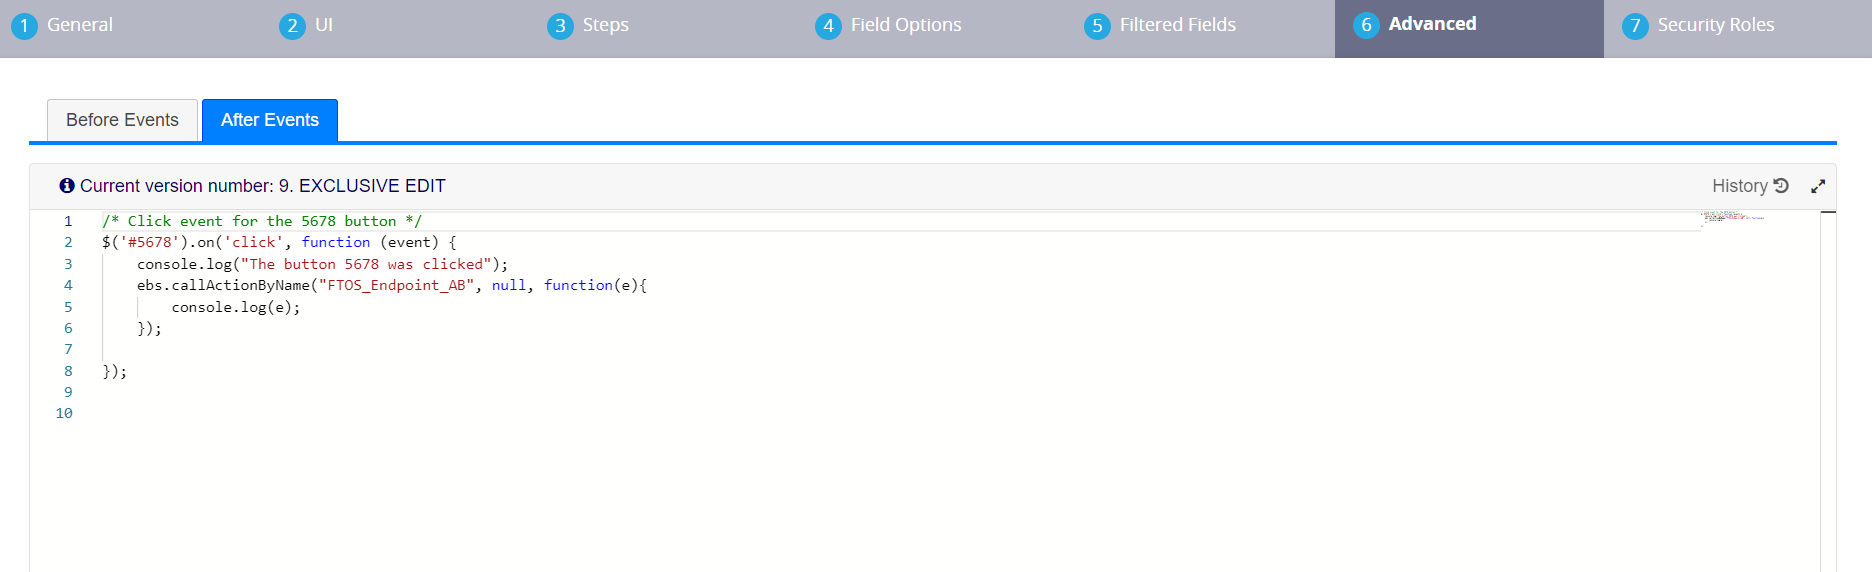
/* Click event for the 5678 button */
$('#5678').on('click', function (event) {
    console.log("The button 5678 was clicked");
    ebs.callActionByName("FTOS_Endpoint_AB", null, function(e){
        console.log(e);
    });

});
Click the Save and reload button.
For more details, see Data Forms.
4 Place the data form in the FintechOS Portal
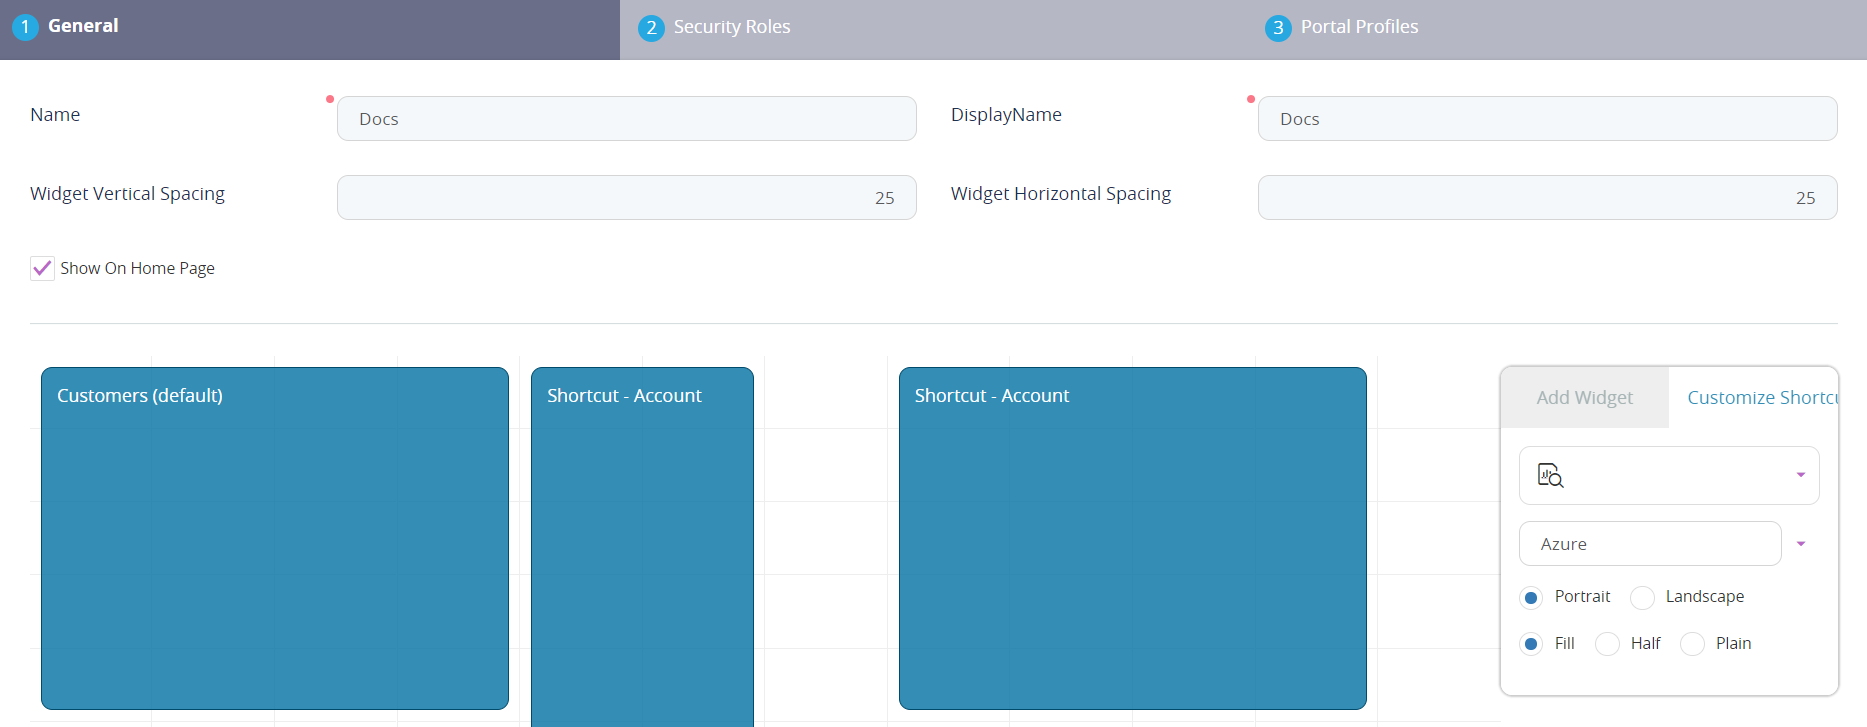
Follow the path: FintechOS Studio > Digital Frontends > Digital Experience Portals > Dashboard.
Select the dashboard where you wish to place it. Add a widget, select type shortcut, select the type of shortcut as entity, select the entity Account from the drop-down list, the name of the data view.
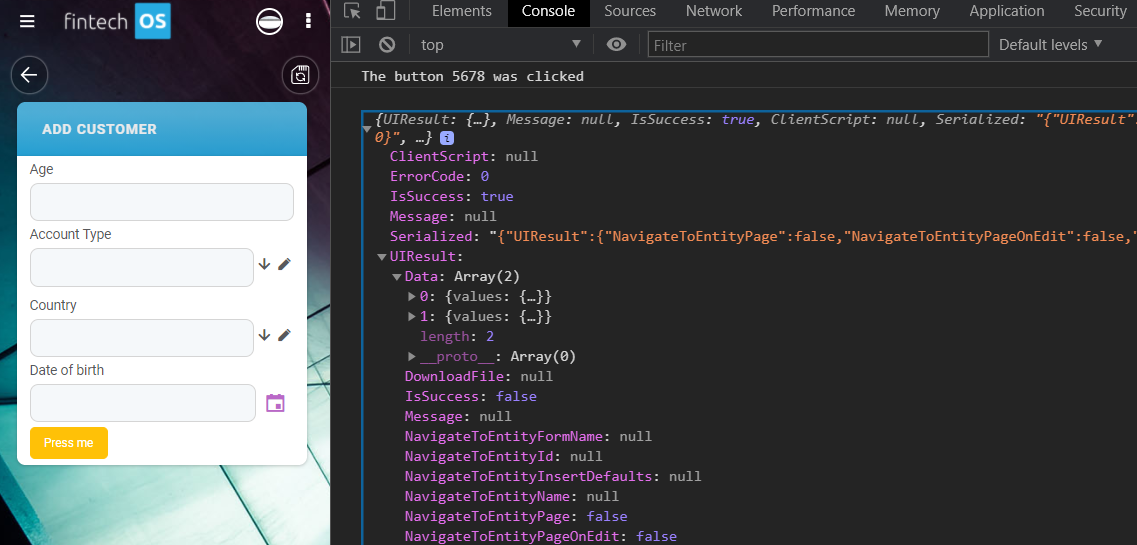
Navigate to the FintechOS Portal, then to the corresponding dashboard.
Click on the data form. Open the console, clear the console and press the button. Press the arrow from the UI result, and then again click in the UI result, and then the arrow in Data to read the query.
For more details, see Adding Widgets to Dashboards.
Congratulations! You have used Fluent Query.