Create a Journey with Advanced Code
FintechOS offers the possibility for developers and consultants with programming knowledge to design the journey exactly as the business analyst or the team has envisioned it to be. Sometimes, no-code needs to accommodate some low-code to trigger some actions. The Advanced tab in a journey does just that. In case, users wish to write up their own code, and not fiddle around with the buttons and UI, this part of the configurations is useful. To this purpose, there are two libraries Client and Server SDK with objects and methods documented.
The order in which the advanced code is executed is:
- Before Events of the whole Form Driven Flow. It only executes once when you open the journey. Afterwords, the HTML of all the steps is loaded, not displayed.
- After Events of the whole Form Driven Flow. This will execute for each step.
- After Events of Step 1. At this point click the Next button to trigger the save or update into the database.
- Before Section Save of Step 1.
- After Section Save of Step 1.
- After Events executes again.
- After Events of Step 2.
- Before Section Save of Step 2.
- After Section Save of Step 2 and so on.
In After Events it is possible to write JavaScript/ JQUERY/ FintechOS SDK.
show message to a user
redirect to another page
create a query
Task at hand
Create a form driven flow with the business process of single customer view with 3 steps with code snippets create for a step and for the whole flow itself:
|
Advanced field |
Event triggered |
|---|---|
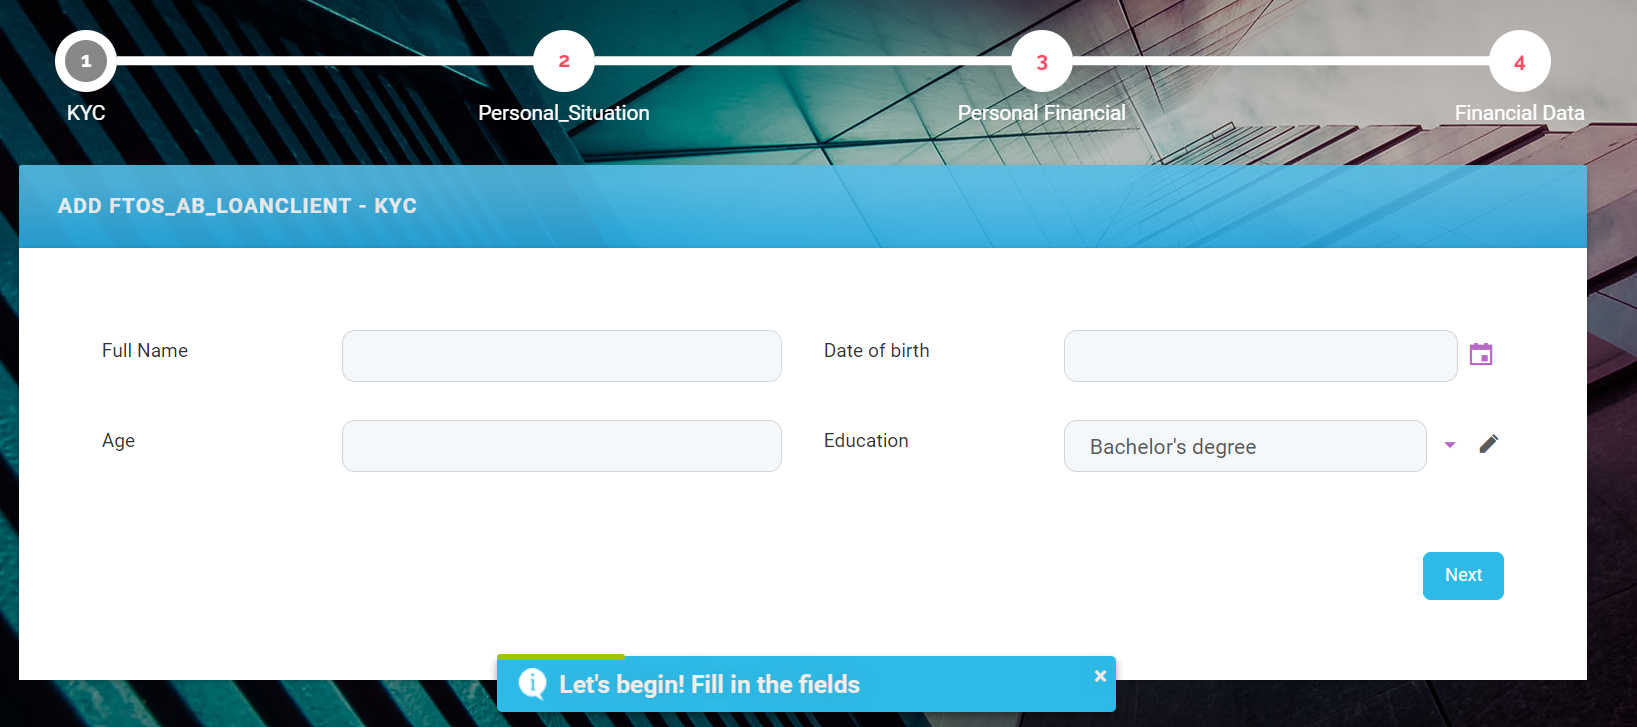
| Before Events of the whole Form Driven Flow | Show the user a message: ''Let's begin! Fill in the fields.'' |
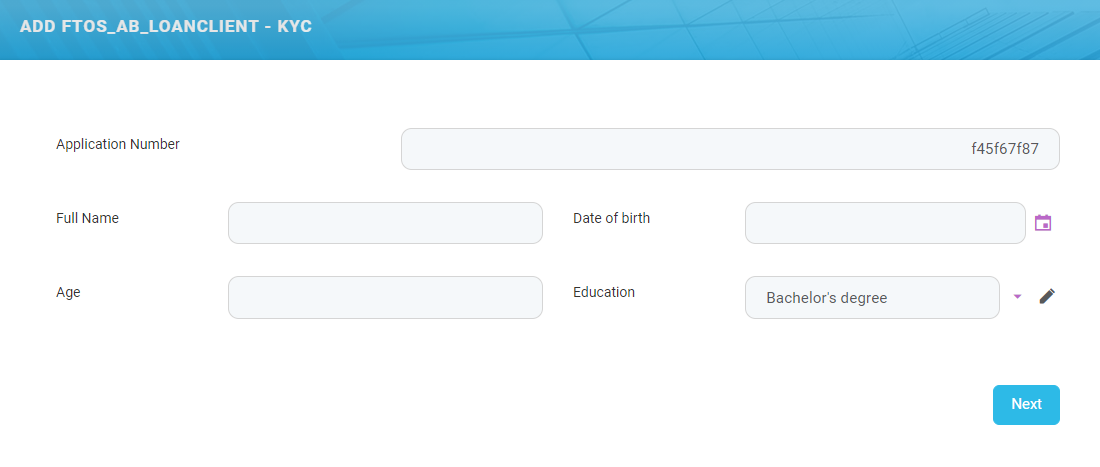
| After Events of the whole Form Driven Flow | Display the value of the field named applicantnumber as f45f67f87. |
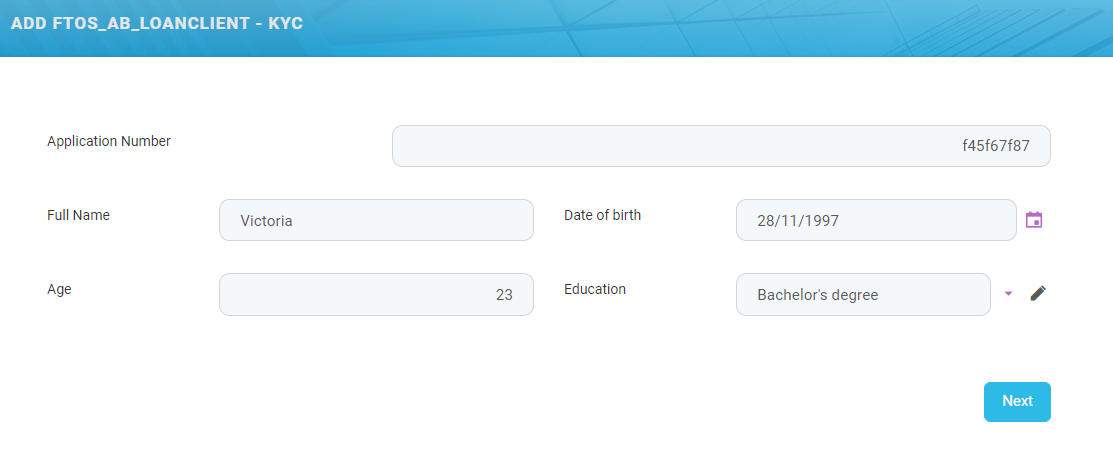
| After Events of Step 1 | Turn the first letter of the field First name a capital letter. |
| After Section Save of Step 1 | Make the field Income read-only. |
The form driven flow must be wizard-mode for the Before Section Save and After Section Save to be displayed.
Before you begin
Before you launch into the present task, configure the following:
- Create an entity FTOS_AB_Account with the following attributes:
UniqueID
ApplicationNo income PIN
country country applicationAmount creditProposalDate creditProposalDate firstName
consent to GDPR applicationAgency age
currency birthPlace address
applicationTypeId city contractTypeId email
consenttoTermsandConditions - Create a form driven flow with three steps and the name FTOS_AB_LoanCustomer. Each step must have the field applicantnumber and Step 1 must have the first name and income.
1 Configure the Before Events
Follow the path: FintechOS Studio > Digital Journey> Form Driven Flow.
The page named Form Driven Flow List is displayed. Search for the FTOS_AB_LoanCustomer. Double-click it.
Navigate to the Advanced tab of the whole form driven flow:
In the Before Events of the whole flow, insert the code which will be executed once at the beginning of the flow:
ebs.showMessage ("Let's begin! Fill in the fields", "info");Click the Save and close button.
2 Configure the After Events
In the section named After Events, insert the code:
formData.model.ApplicationNo = 'f45f67f87';
3 Configure the After Events of Step 1
In the section named After Events, insert the code:
function capitalize(word) {
    return word.substr(0, 1).toUpperCase() + word.substr(1);
}
ebs.addFormChangeEvent(formData.name, "retailApplicationId_FullName", function() {
    var res = capitalize(formData.model.retailApplicantId_FullName);
    formData.model.retailApplicantId_FullName = res;
})
4 Configure the After Section Save of Step 1
In the section named After Section Save, insert the code:
function capitalize(word) {
    return word.substr(0,1).toUpperCase() + word.substr(1);
}
ebs.addFormChangeEvent(formData.name, "retailApplicationId_FullName", function() {
    var res = capitalize(formData.model.retailApplicantId_FullName);
    formData.model.retailApplicantId_FullName = res;
})