Build a Complex Security System
Multiple people are accessing a FintechOS instance, but not all users are meant to access certain entities, read customer data while some are not allowed to modify an entry or delete it. To make sure each user sees what his or her profile matches to, a special diagram of role and business units must be provided.
Task at hand
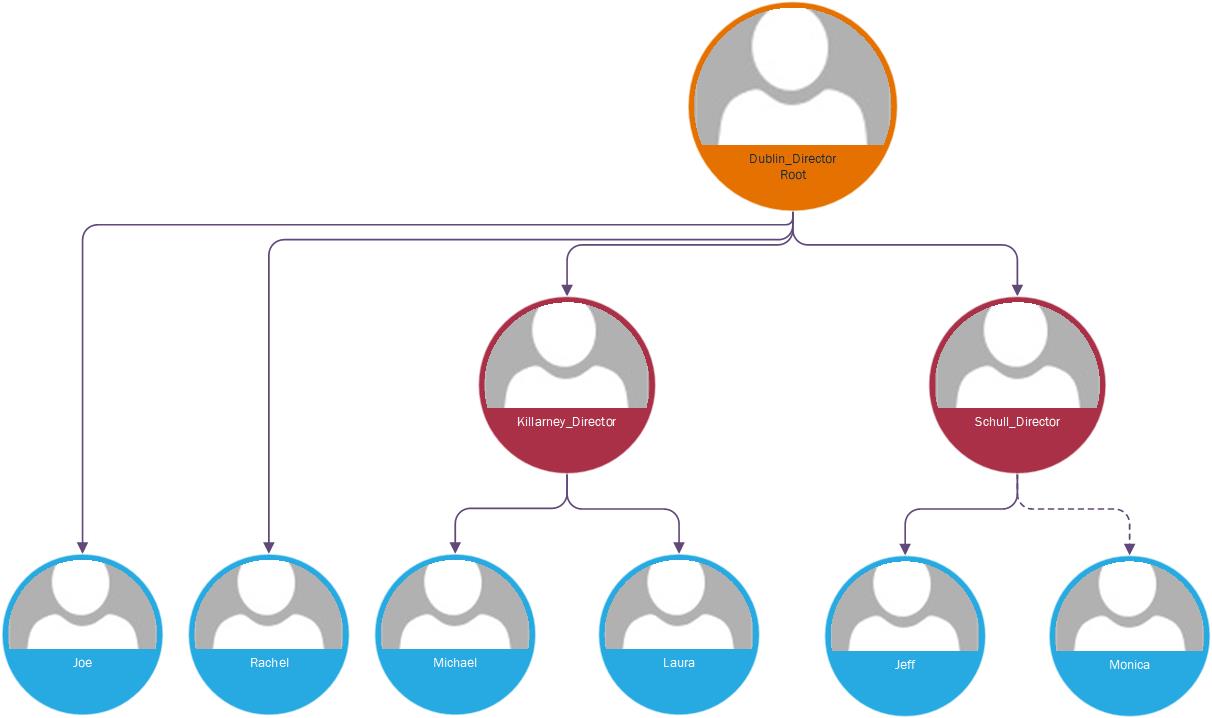
We are taking a look at an Organizational Chart for the insurance company, Bias Pro. This company operates in Ireland with three major branches, one in Dublin, one in Killarney and one in Schull. The Dublin director can read, insert, update and delete all the data from the company. The director of the other two branches can read, insert, update and delete everything in their branch. The directors have two employees each, one can read and insert, update, but not delete (Employee_3), the other can insert, read, update and delete at the level of the branch they belong to (Employee_4). The employees cannot read what the employees from the other branch are doing. The employees from Dublin are Joe and Rachael. The employees from Killarney are Michael and Laura. The employees from Schull are Jeff and Monica. However, the Killarney and Dublin directors cad read what another director has been doing, but not create, update or delete.
Before you begin
- Create a testing entity e.g. FTOS_Pricing and expose its data view and form in the FintechOS Portal.
- In the data form create some records.
1 Create the business units
Follow the path: FintechOS Studio > Security > Business Units.
Click the Insert button to add a business unit. There will be three business units created:

| Business Unit | Fields |
Details |
|---|---|---|
|
Dublin |
Name |
Dublin |
|
|
Parent |
root |
|
Killarney |
Name |
Killarney |
|
|
Parent |
Dublin |
|
Schull |
Name |
Schull |
|
|
Parent |
Dublin |
Click the Save and close button.

Hence, by this set-up the Dublin business unit is the company itself while the other two are subsidiary branches in the company.
For more details, see Business Unit.
2 Create the security roles
Follow the path: FintechOS Studio > Security > Security roles.
Given the CRUD operations, several security roles will have to be created.
| Security role | Fields |
Details |
|---|---|---|
| Dublin_Director | Name | Dublin_Director |
|
|
Security items | On the entity FTOS_Pricing, he has insert, delete, update and read at the organizational level. |
| Killarney_Director | Name | Killarney_Director |
|
|
Security items | On the entity FTOS_Pricing, he has insert, delete, update and read at the business unit level. He has the read operation at the level of the organization. |
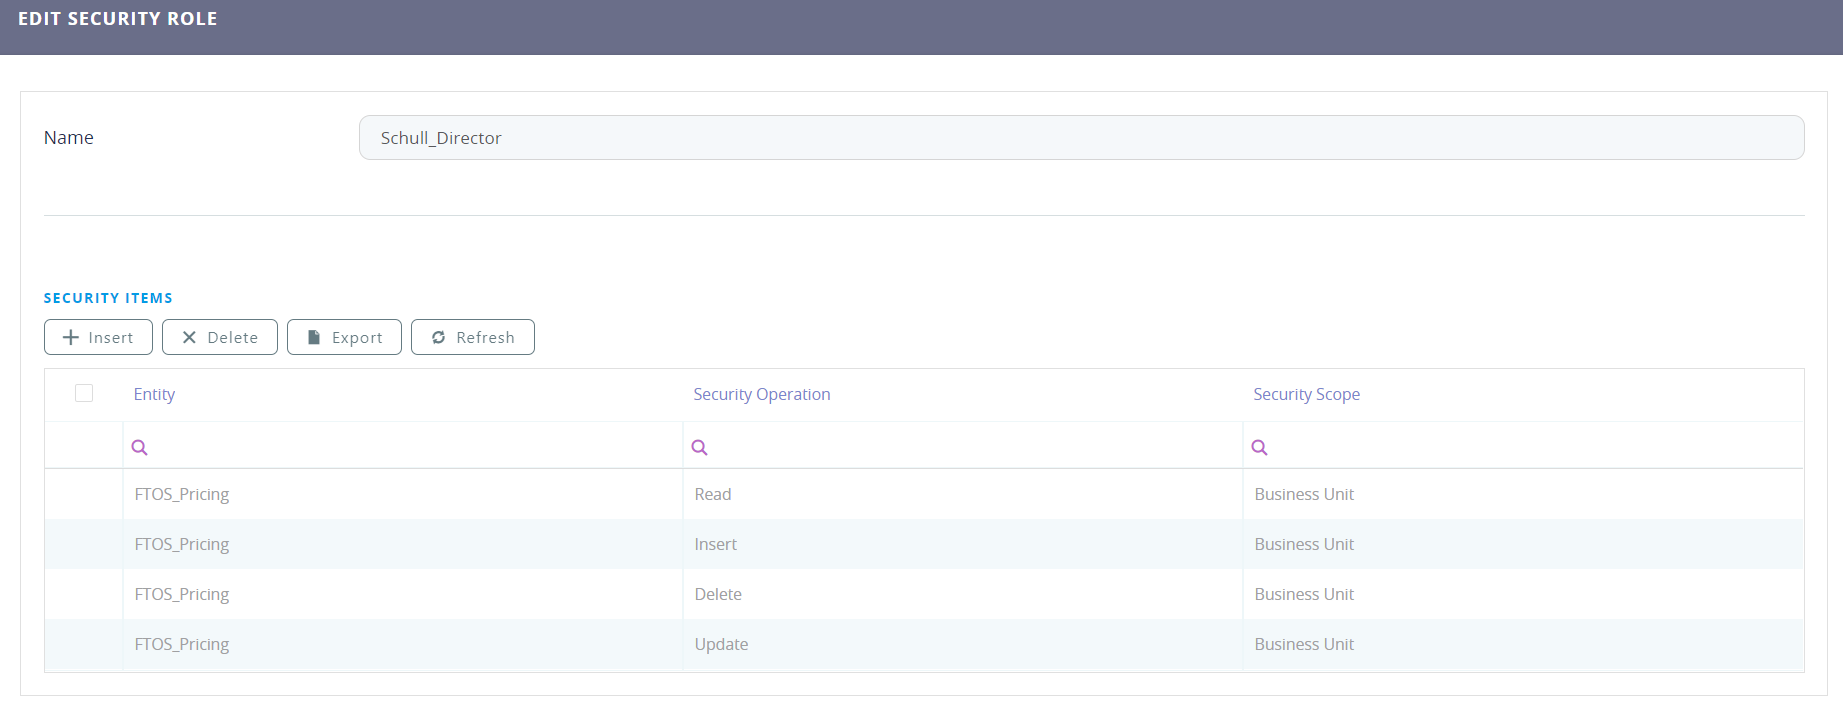
| Schull_Director | Name | Schull_Director |
|
|
Security items | On the entity FTOS_Pricing, he has insert, delete, update and read at the business unit level. He has the read operation at the level of the organization. |
|
Employee_3 |
Name |
Employee_3 |
|
|
Security items |
On the entity FTOS_Pricing, he has insert, delete, update and read at the business unit level. |
|
Employee_4 |
Name |
Employee_4 |
|
|
Security items |
On the entity FTOS_Pricing, he has insert, update and read at the business level. |
For each of the employees, it is important to have the appropriate roles.
| Business Unit | Employee | Security role | Fields | Details |
|---|---|---|---|---|
| Dublin | Joe | Employee_3 | Name | Dublin_Joe |
|
|
| Security items | On the entity FTOS_Pricing, he has insert, update and read at the business level. |
| Rachel | Employee_4 | Name | Dublin_Rachel |
|
|
| Security items | On the entity FTOS_Pricing, he has insert, delete, update and read at the organizational level. |
| Killarney | Michael | Employee_3 | Name | Killarney_Michael |
|
|
| Security items | On the entity FTOS_Pricing, he has insert, delete, update and read at the business unit level. |
| Laura | Employee_4 | Name | Killarney_Laura |
|
|
| Security items | On the entity FTOS_Pricing, he has insert, update and read at the business unit level. |
| Schull | Jeff | Employee_3 | Name | Schull_Jeff |
|
|
| Security items | On the entity FTOS_Pricing, he has insert, update and read at the business unit level. |
| Monica | Employee_4 | Name | Schull_Monica |
|
| Security items | On the entity FTOS_Pricing, he has insert, delete, update and read at the business unit level. |
For more details, see Security Roles.
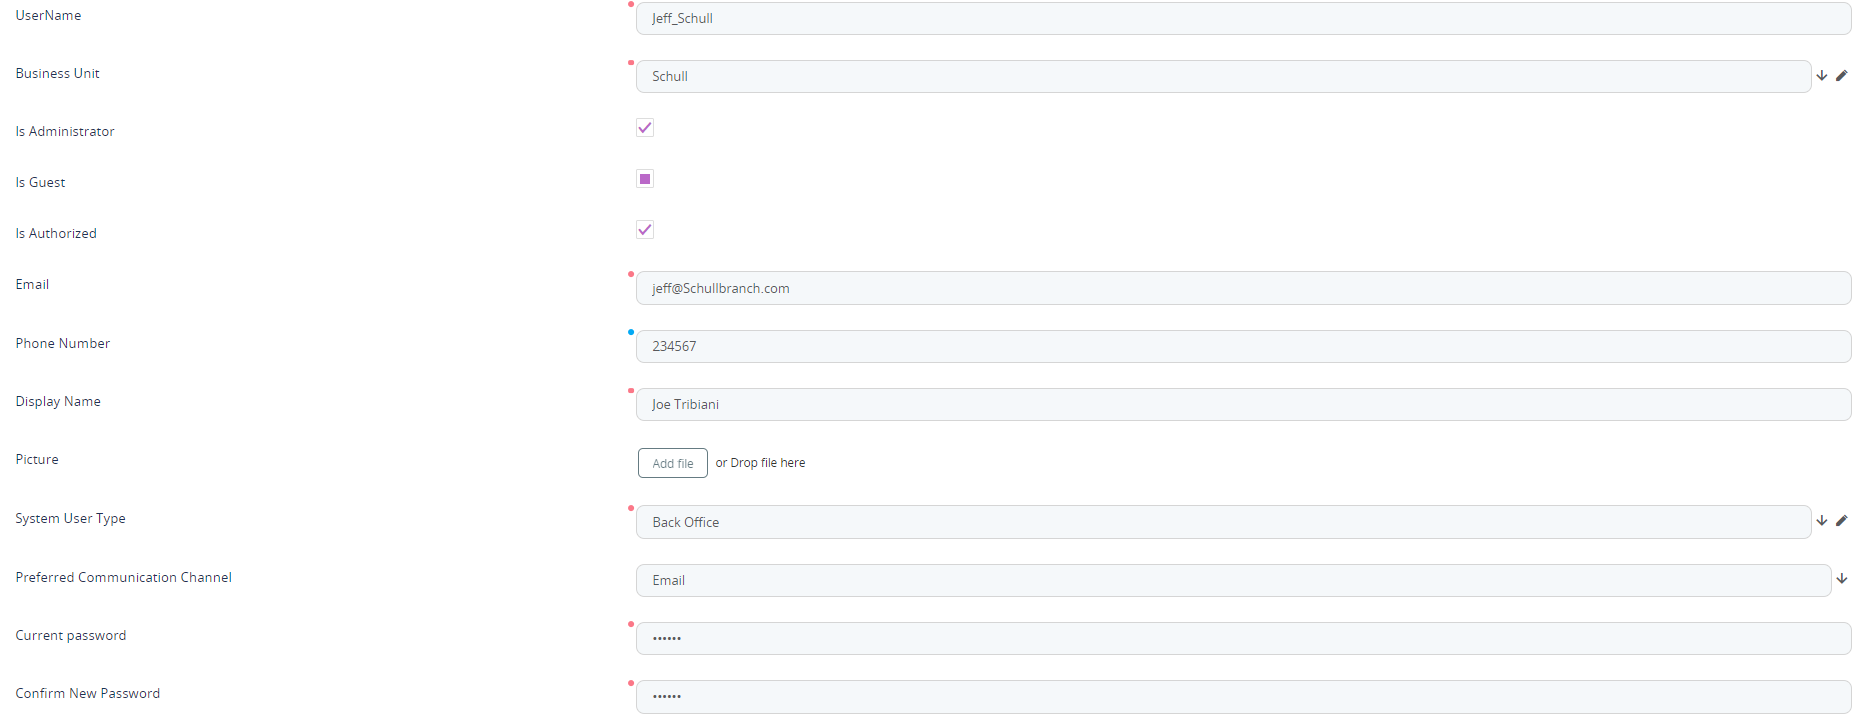
3 Create the system users
Follow the path: FintechOS Studio > Security > System user.
| Fields | Details |
|---|---|
| UserName | Insert the names of the employees and the directors. |
| Business Unit | For each employee and director select the unit created in step 1. |
| Is Administrator | Check the boolean. |
| Is Guest | Do not check the boolean. |
| Is Authorized | Check the boolean. |
| Insert the email from each person. | |
| Phone Number | Insert the phone number. |
| Display Name | Insert the display name of each user. |
| Picture | Insert a picture of each employee. |
| System User Type | Select the Back Office from the list. |
| Preferred Communication Channel | Select email. |
| Current password | Insert a password. |
Confirm New Password | Type the password again. |
Click the Save and reload button. The Security role grid will open. For each person add the role created in step 2 as indicated in the chart. For more details, see Users.
Congratulations! You have now an organizational chart.