Build a Relationship (Entity Relationship modelling)
A database is comprised of entities and the relationships between them. The data model hence created, stores information, which can be made available and be used in other business needs such as reports and decision-making. By establishing foreign keys, connections between such entities are possible. For more details, see Evolutive Data Core.
This tutorial is for building relationships between platform entities.
A relationship as created in the steps below can help you use the functionality Filtered Fields, for example. This functionality filters the data of an attribute based on what is selected in the first. In a form driven flow with the fields country and city, by using filter fields and a relationship between entity Country and City, when a user selects Ireland as country, in city only the cities from Ireland are shown.
Task at hand
For example, we have two entities named FTOS_Pricing and FTOS_Receipt. Between these two entities, we will create a relationship. There are three ways to do that in FintechOS:
- create a look up attribute.
- use the Data Model Designer.
- use the Relationship Referencing/ Relationship Referenced grids in Edit Business Entity.
Before you begin
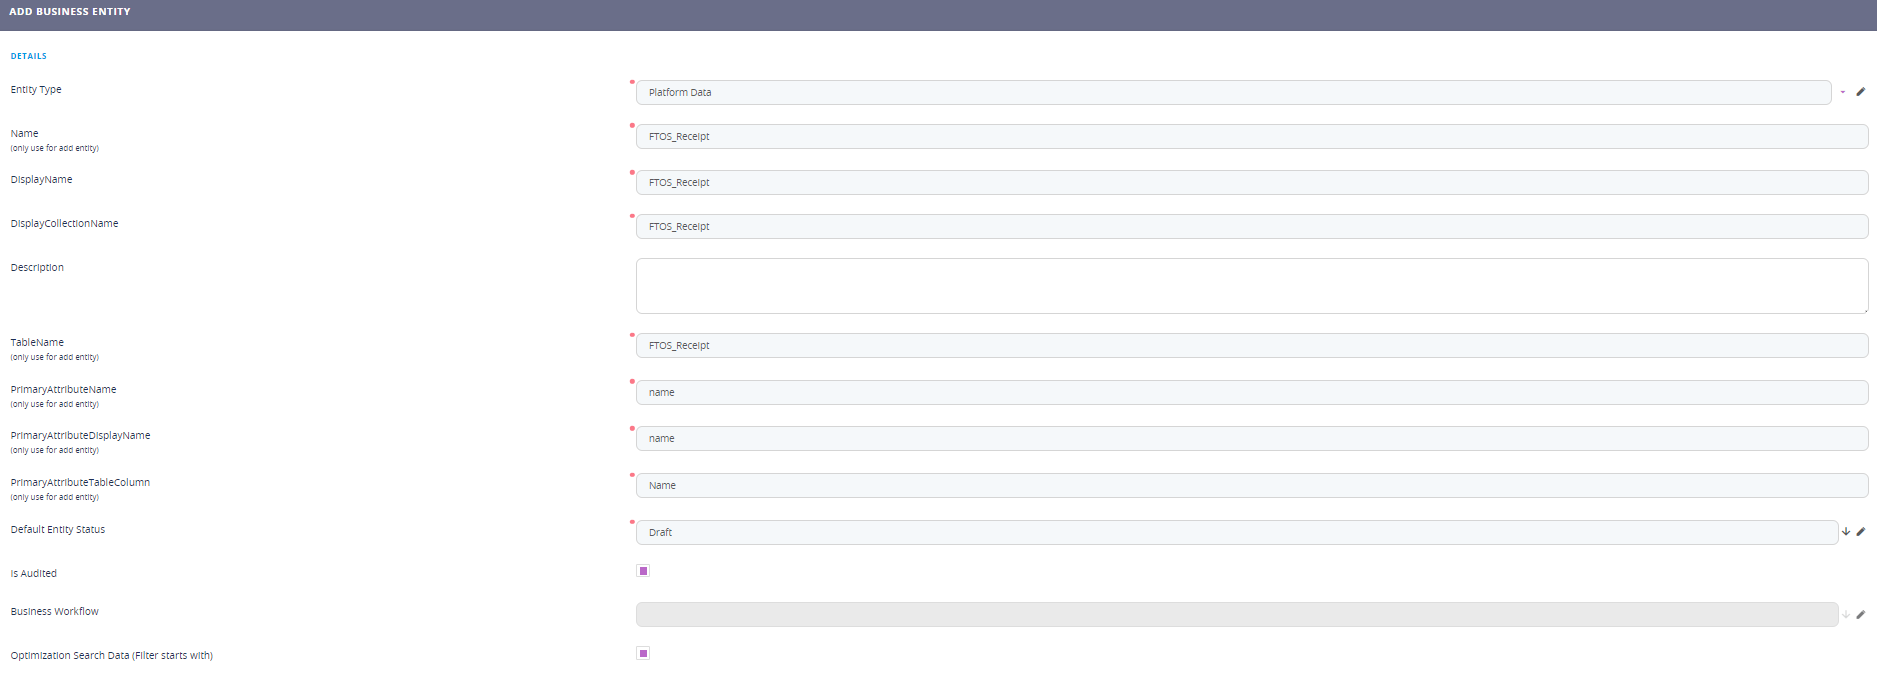
- Create the two platform entities named FTOS_Pricing and FTOS_Receipt with the following entities. The primary key is generated automatically by the system when saving the entity. The pricing entity is the parent, referencing entity, and the receipt entity is the child, referenced entity.
FTOS_Receipt ID code receipt (Not to be misunderstood as PK). Unique identifier. It is a unique number given to every receipt created. 
FTOS_Pricing Type Price per item Numeric. It is the price of every item you are selling. Currency Money.
1 Create a look up attribute
Follow the path: FintechOS Studio > Evolutive Data Core > Data Model Explorer.
Open the entity FTOS_Receipt.
Navigate to the Data Model button.
Click the Insert button.
Insert the attribute named Pricingid, type look-up (It is the primary key from the parent entity). Insert a display name (Pricing).
In Lookup to entity, select the parent entity, FTOS_Pricing.
In Lookup relationship type, select Dictionary.
Click the Save and close button.
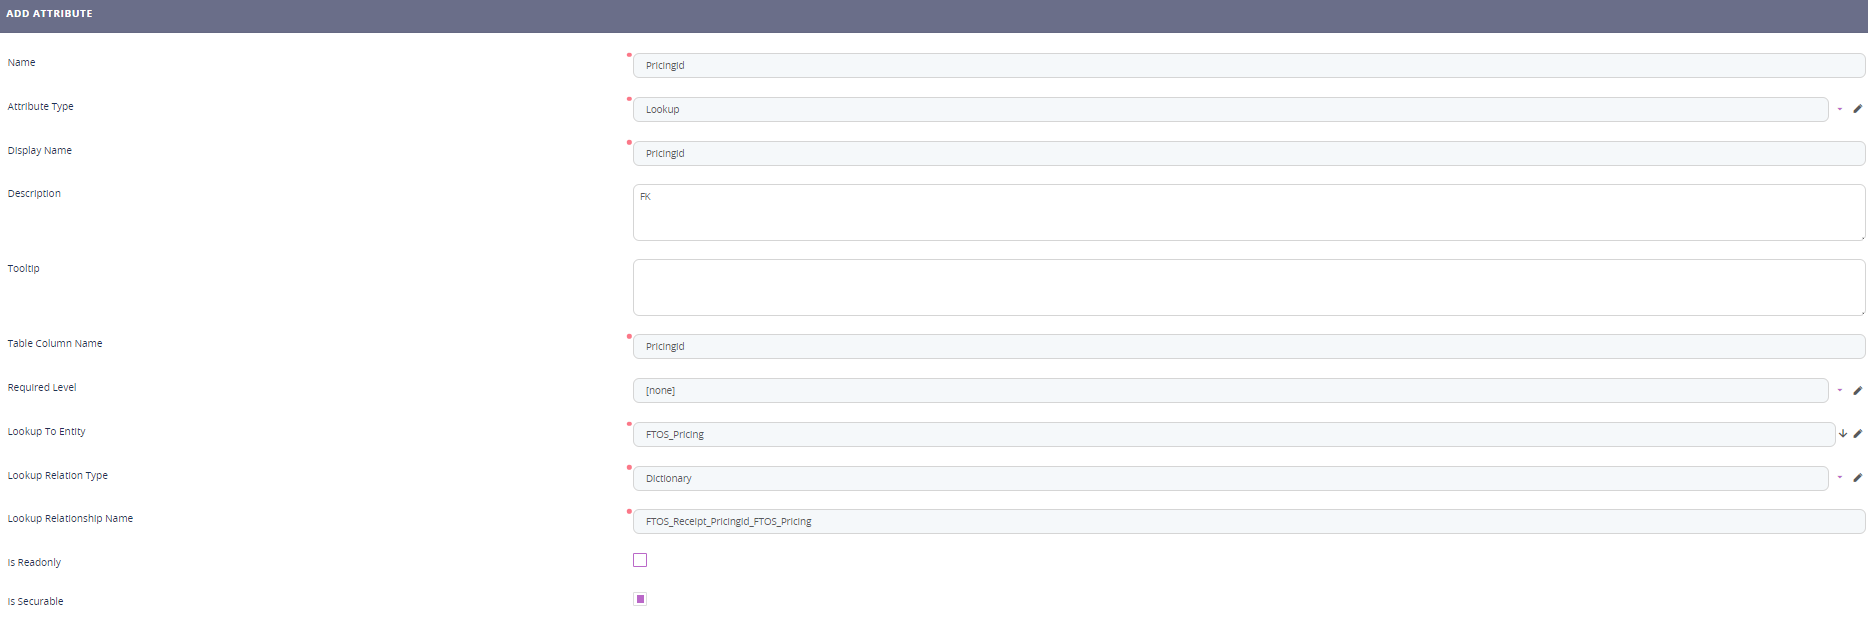
Congratulations! You have created a relationship named FTOS_Receipt_Pricingid_FTOS_Pricing.
2 Use Data Model Designer
Follow the path: FintechOS Studio > Evolutive Data Core > Data Model Designer.
Create a new data model by clicking on Add business data model named FTOS_ERD_Demo and click Ok.
Drag from the left panel the two entities to the centre panel. From the child entity drag the arrow to the parent, i.e. from FTOS_Receipt (referenced entity, child) to FTOS_Pricing (referencing entity, parent).
A new window will pop-up. Fill in the name of the attribute, Pricingid.
Insert a display name. The Relationship type is many-to-many automatically, and it cannot be changed.
Insert a Relationship constraint type 0.
Click the Save and close button.
Congratulations! You have created a relationship.
3 Relationship Referencing/ Relationship Referenced grids
Follow the path: FintechOS Studio > Evolutive Data Core > Data Model Explorer.
Open the entity FTOS_Receipt.
Navigate to the Relationship Referencing button. From here, it is the same process as in step 1.
Click the Insert button.
Insert the attribute named Pricingid, type look up (It is the primary key from the parent entity). Insert a display name (Pricing).
In Lookup to entity, select the parent entity, FTOS_Pricing.
In Lookup relationship type, select Dictionary.
Click the Save and close button.

Congratulations! You have created a relationship. You are now prepared to use these relationships in digital journeys to build complex and avant-garde data collections.