Custom Product Types
In addition to the Built-In Product Types, you can create custom types tailored to your business requirements. This can be done by duplicating an existing type (either a built-in product type or a previously created custom type), then adding or removing sections and items according to your needs.
Create a Custom Product Type
- In FintechOS Studio, go to Main Menu > Products > Products.
- From the Settings drop-down, select Product Types.
- Double click an existing product type to open it.
- From the ellipsis menu (...), select Duplicate.
- Provide a name for the new type and click Duplicate.
- The product type is created and opened in a Draft state. As long as the product type stays in this state you can edit it.
Edit a Product Type
Any product type that is in a Draft state can be customized:
- Click the title and edit the text field to rename the title.
- Click the icon at the top left corner of the screen and select one of the available options to change the icon.
- Use the drop-down at the top right corner of the screen to switch the class between Personal, Business, and Corporate.
- Select Show the class name as part of the product type name to prepend the class name to the type name when editing a product in the Product Designer. E.g.: A product in the Personal class that uses the Holiday Loan product type will be displayed as Personal Holiday Loan in the designer.
Customize Product Type Sections
The Main Info section is always displayed at the top of the product. Unlike the other sections, it cannot be removed or repositioned further down the page. Regular sections can be enabled or disabled and repositioned higher or lower on the page.
Customize the Main Info Section for Banking Products
For banking products, you can customize the following fields and default values you wish to display in the Main Info section.
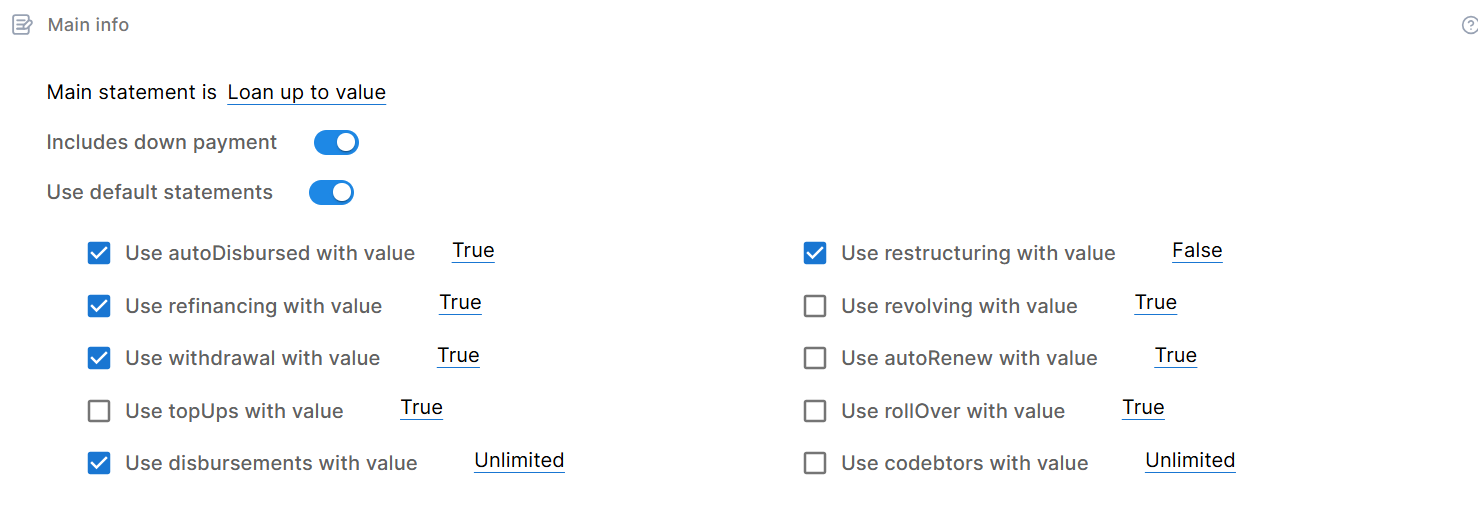
- Main statement is - This option allows you to configure the currency, amount limits, and time ranges for loan repayments or deposit terms.
- Amount and Term Interval - For loan products, sets limits for the amount that can be loaned in a specified currency and the repayment time range. E.g.: Loan amount from 1,000 to 10,000 Euro with a term of 1 to 5 years.
- Deposit Amount and Term Interval - For deposits, sets limits for the amount that can be deposited in a specified currency and the time range for the deposit's term. E.g.: Deposit amount up to 100000 $ with a term of 1 to 5 years.
- Only Currency - For products where you only specify the currency with no limits on amounts or time ranges.
- Loan up to value - For loan products where you only set limits for the amount that can be loaned in a specific currency, but don't set limits for the repayment time range.
- Includes down payment - Adds a field to configure an up-front partial payment (e.g.: for loan products such as mortgages).
- Use default statements - Additional options you wish to include in the main section. Tick the checkmark on the left of the option to include the option in the product type and configure the setting on the right of the option to set up a default value for it.
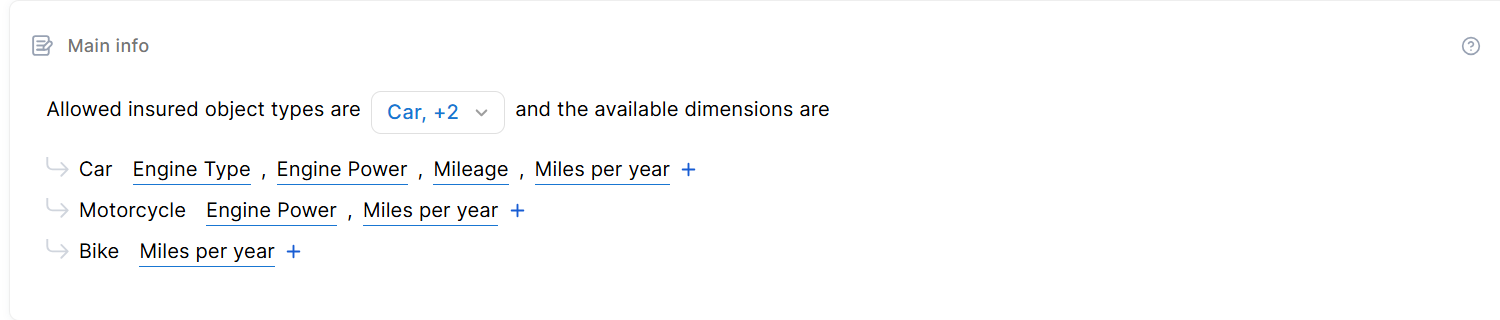
Customize the Main Info Section for Insurance Products
For insurance products, you can define which insured objects and related dimensions are available in the Main Info section for products based on the product type.
Customize Regular Sections
To add a section to the product type, scroll down to the bottom of the page and select it from the Add section drop-down.
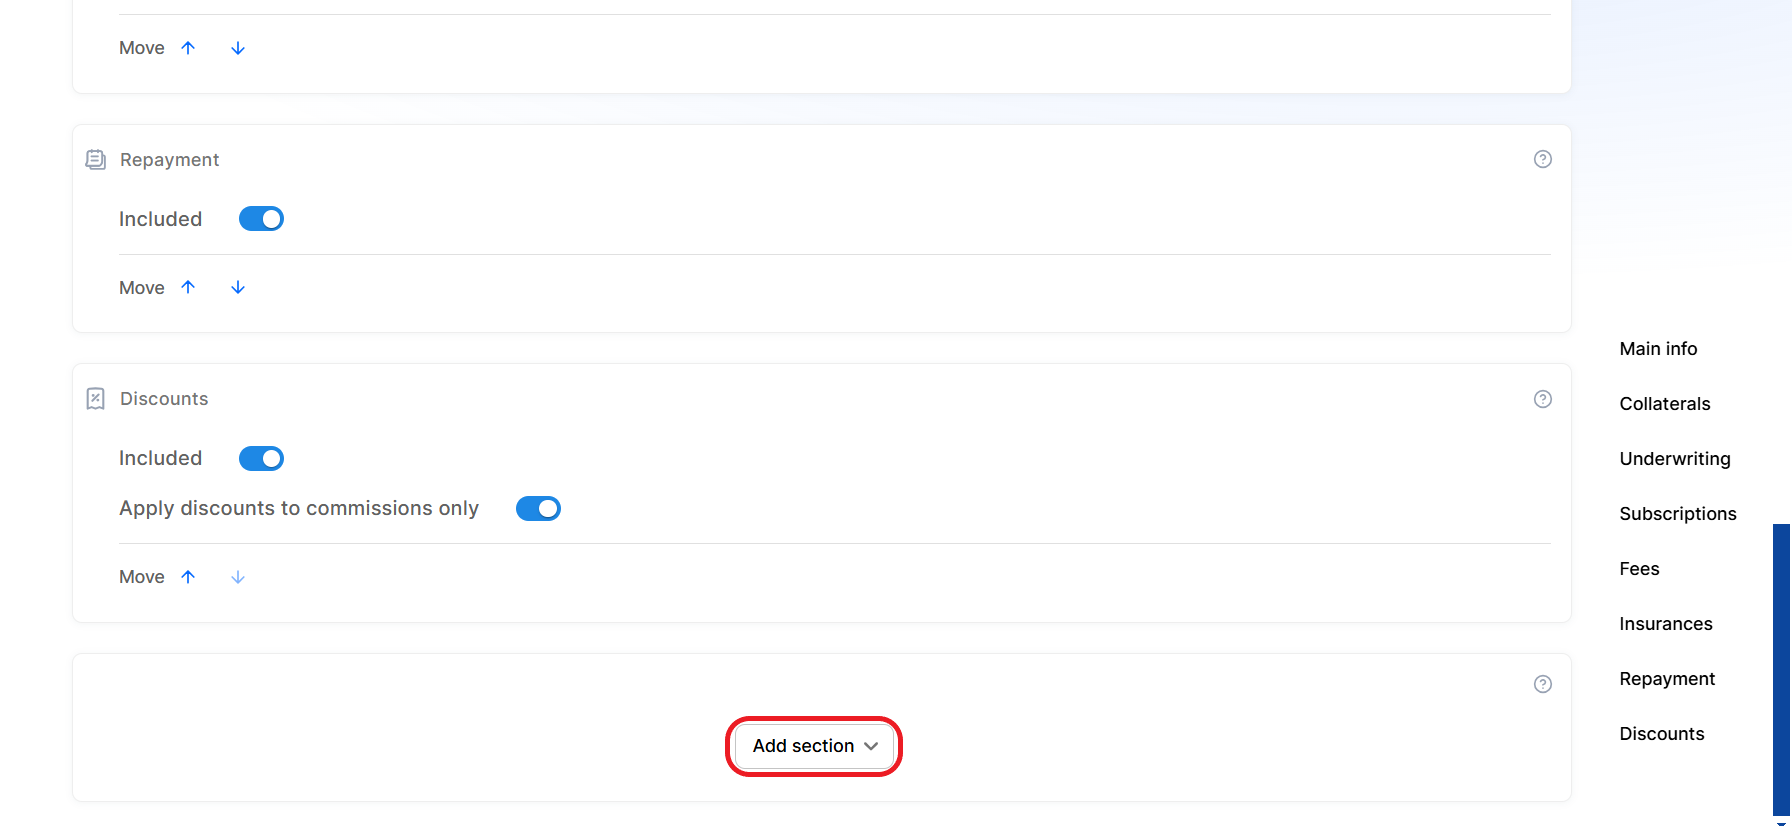
To reorder sections on the product type, use the move arrows on each section.

To delete sections from the product type, disable the Included toggle button. This removes the section from the product type editor and adds it to the Add section drop-down (from where you can enable it again).

You cannot remove Interest, Fees, and Underwriting sections from banking product types.
Product Type Life Cycle

Draft
When you create a new product type (by duplicating an existing product type), it begins in the Draft state. This is the only state where the product type can be edited and customized.
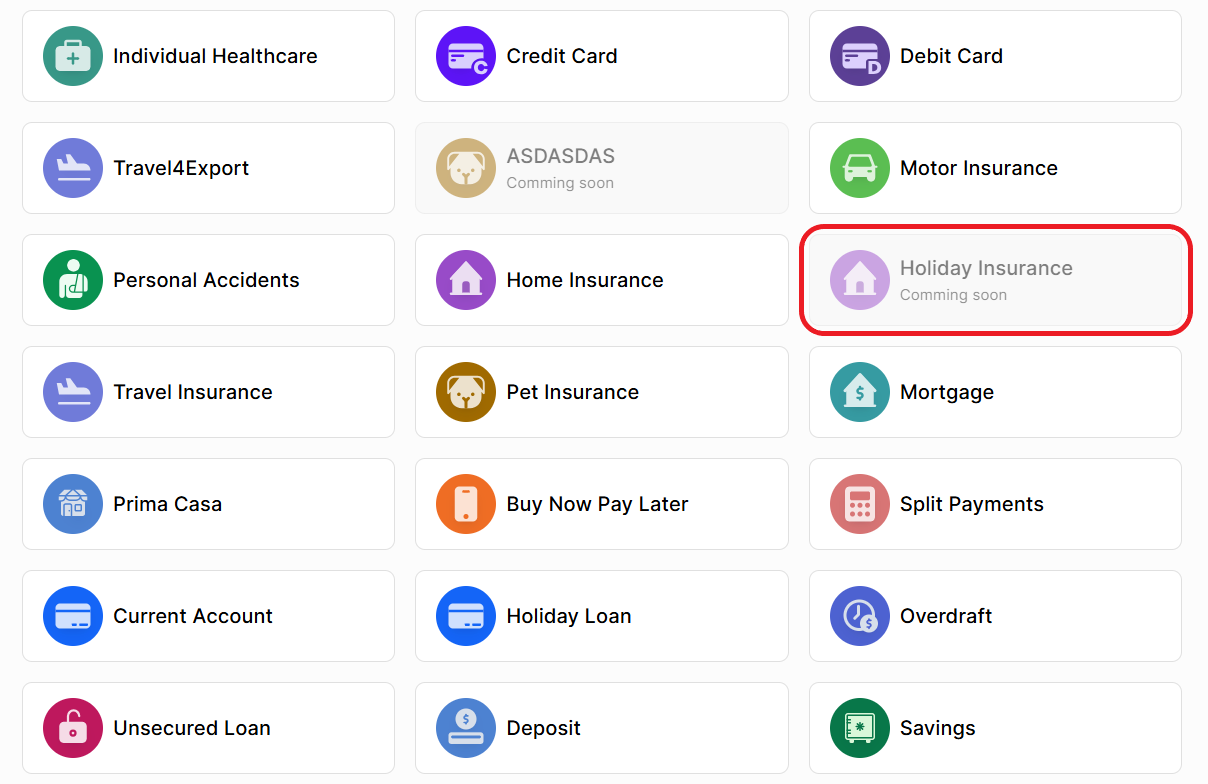
When selecting the product type for a new product, draft types are displayed in the selection window as grayed out, inactive buttons tagged as Coming soon.
Active
A product type in the Active state is available in the Product Designer, allowing the creation of products based on it. To activate a product type, click the ellipsis button (...) and select Active.
Once a product type is activated, it cannot revert to the Draft state. Ensure all edits are complete before activation. To make further changes after activation, you will need to create a duplicate and work on a new product type.
Inactive
If you want to disable a product type (prevent its use in the Product Designer to create new products), you can deactivate it by clicking the ellipsis button (...) and selecting Inactive. Product types in the Inactive state can be reactivated by selecting the Active option again from the ellipsis menu.