Journey Designer
If you chose to Create a Digital Journey using the Use Assistance or Design Journey option, you can use the Journey Designer to draft a high-level overview of the digital journey. This tool allows you to preview, test, and obtain stakeholder approval before development begins. Once you are happy with the design, you can publish the journey to automatically generate an associated mock-up flow, with the matching structure (sequence of steps, navigation rules, and actions), to kickstart the development process.
Some of the advantages of using the Journey Designer over manually building a mock-up form-driven flow include:
- Dex AI Assistance: An integrated chatbot can examine your requirements and help you select a relevant template for the initial draft of your journey.
- Intuitive Graphical Interface: Focused on a unified design experience, free from unnecessary distractions.
- Contextual Linking: Link products, actors, and channels to the journey to enhance context and receive relevant options during the design process.
- Simplified Design Components: Easily define all journey touchpoints, including user interface screens, navigation rules, integrations, back-office tasks, underwriting/eligibility checks, document generation, and omnichannel messaging.
- Journey Preview: Visualize the user experience and obtain stakeholder approval before development.
- Automatic Documentation: Annotate each design element with detailed specifications such as descriptions, validations, UX definitions, and error handling, then automatically generate a fully-formatted Functional Specifications Document (FSD) aligned with the "Product is the Spec" philosophy.
Journey Settings
To configure journey settings, click the ellipsis button (...) in the top right corner of the Journey Designer and select Edit Journey Settings.
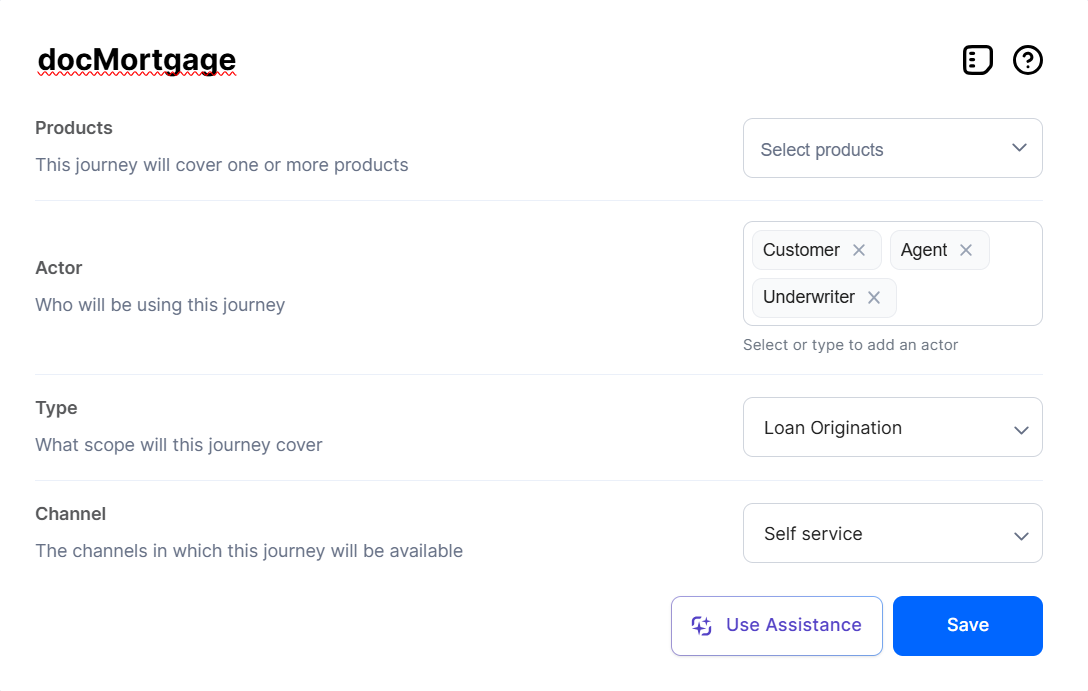
In the settings screen, select the associated products, actors, and channels to enhance the journey context and receive relevant options during the design process.
You must link the journey to at least one approved product.
Add Journey Elements
Click a + sign on the on the Journey Designer canvas at the desired insertion point to add a new journey element. This opens a pop-up window, allowing you to select the type of element you wish to add.

Screen
A screen represents the user interface displayed on screen at a specific step in the digital journey. The UI elements (headings, text, buttons/actions, tables, inputs/data attributes, widgets, etc.) serve as reference for designing the layout of the associated form driven flow step.

The available data attributes are based on product data configurations. Newly added data attributes are included in the journey’s data domain. Data attributes serve as reference for defining the data model of the associated form driven flow.
Decision
Decisions apply conditional logic to the journey’s data to select between alternative navigation paths. You can choose between two or more navigation paths depending on your navigation logic. For example, underwriting assessments often result in three possible navigation paths: "Approved," "Rejected", and "Manual Verification".
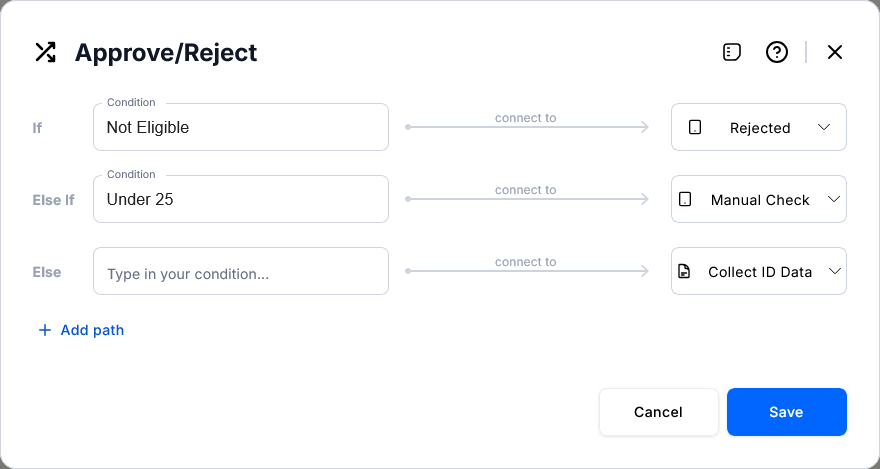
In its simplest form, a decision has an If navigation path at the top and an Else navigation path at the bottom. If the Else path is linked to another decision element, any additional paths are added as Else If paths. Otherwise, additional paths are added at the bottom. This makes them the new Else path, converting the previous Else path into an Else If path. You can reorder the navigation paths using the grab handles on the left of each path to drag it in the desired position (top for If, bottom for Else, or in-between for Else If).
Only Else paths may be linked to another decision element. This prevents them from being moved out of position in this situation.
Use the trash bin icon to the right side of a navigation path to delete it.
Only Else If navigation paths can be deleted.
Navigation paths can either connect to existing elements on the canvas (resulting in a new Connect To element downstream) or remain unlinked for later connection.
Navigation paths are used to define flow control rules in the associated form driven flow. Use meaningful titles and condition labels to enhance clarity when previewing the journey.
Condition Editor
You can use the point-and-click editor to define complex conditional logic for your If and Else If navigation paths without writing any code. To do so:
- Click the + Add Expression link under the desired If or Else If condition
- Use the point-and-click interface to define your expression.
In its simplest form, a condition is based on a single form field evaluation (e.g.: Name is not blank). The available operators depend on the data type of the form field: generic operators such as is blank or is not blank, text specific operators such as starts with or contains, date specific operators such as years since or days until anniversary, etc.
You can also create complex boolean logic by grouping conditions hierarchically with logical operators:
- AND - All conditions are true.
- OR - At least one condition is true.
- NOT AND (NAND) - Not all conditions are true (at least one is false).
- NOT OR (NOR) - All conditions are false.
Integration
Integrations are interactions with core systems or external service providers that perform specialized functions (e.g., fraud detection, identity verification, risk assessment, or credit scoring) at a specific point of the journey.
To select an existing integration, use the list on the left to enable or disable filters for the types of integrations you wish to browse or the search box to look for the desired integration by name.
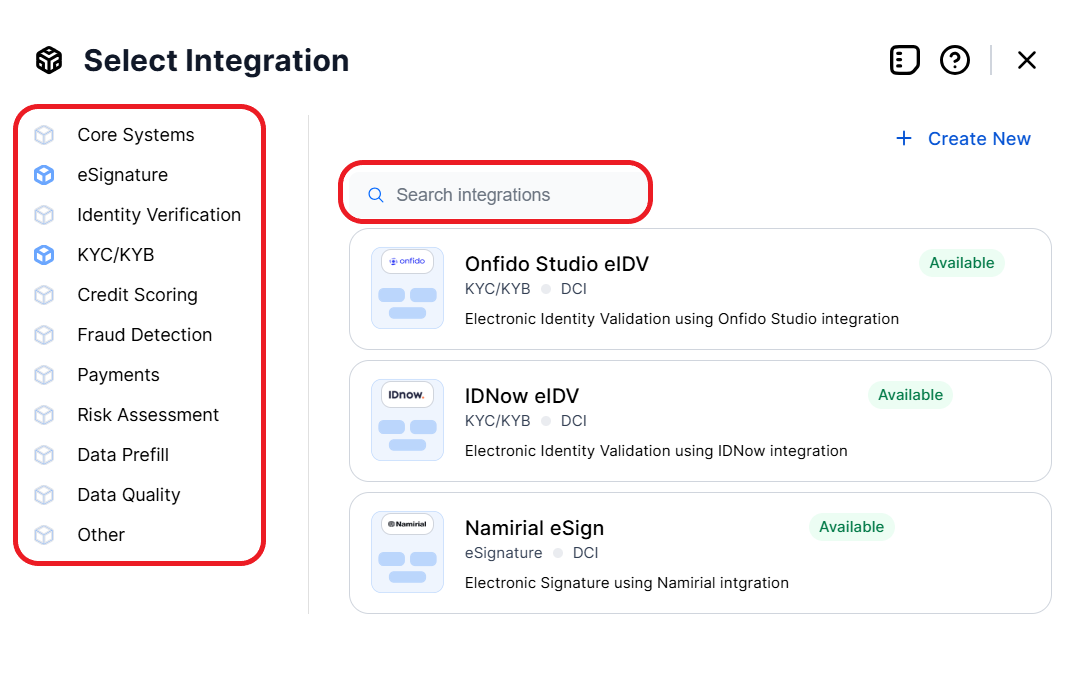
Click + Create New to open the integration editor and configure your own custom integration.
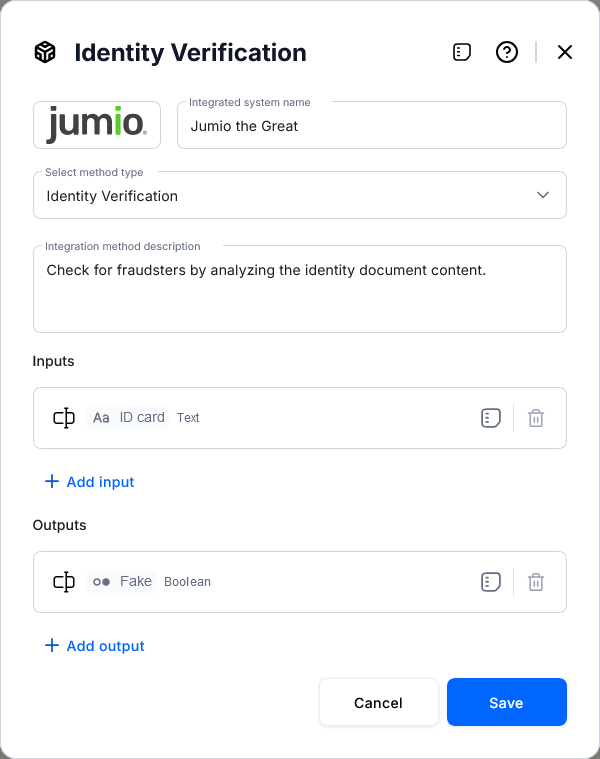
To ensure readability on the canvas, define a clear and relevant title for the integration action, such as "Check Account". Specify the inputs and outputs using data attributes to guide the implementation of the journey. For best effect, attach the logo of the integrated system.
Service
Services facilitate interactions with platform back-office systems (either pre-built or custom-designed) that implement business logic to retrieve data, execute specific calculations, update other systems, and others.
The FintechOS platform includes a variety of pre-packaged services for tasks such as claims management, billing and collection, or policy administration. Additionally, you can build your own custom services or even orchestrate multiple services together.
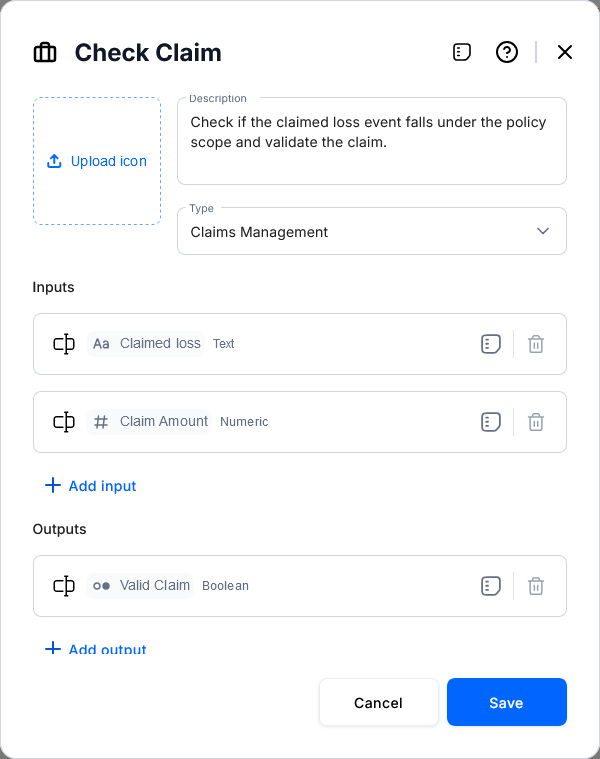
When specifying a service, define the input and output data attributes that the journey will send to or receive from the service.
Services Orchestration
In complex scenarios, where you need to coordinate and integrate multiple components (such as back-office services, core systems, external service providers, tasks, etc.) to deliver a specific business outcome, you can use the Services Orchestration service type.
These services include a Go To Service link, which opens a dedicated editor where you can design a sub-flow for your service orchestration.
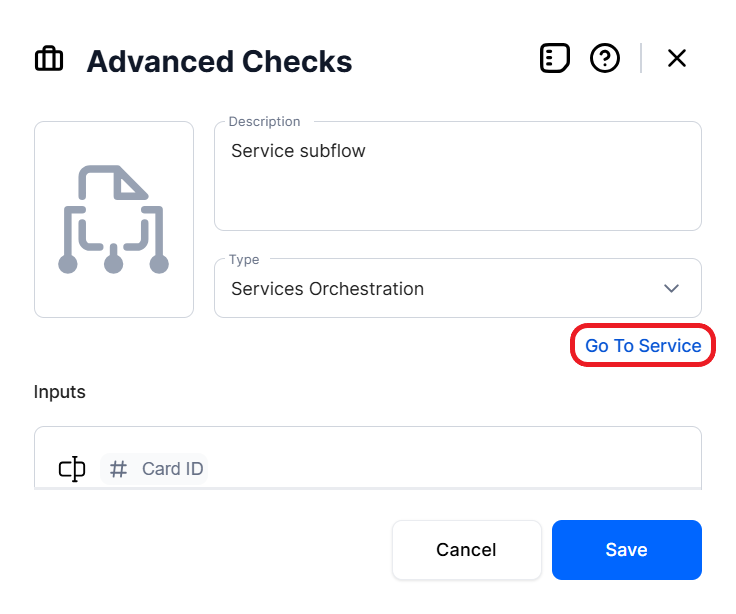
The sub-flow is encased in a single Stage, and only supports Decision, Integration, Service, Journey Designer, Journey Designer, Message, Document, Task, and Connect To elements.
Services orchestration flows are displayed on the Journey Designer canvas as a single element. To view or edit the underlying sub-flow, use the Go To Service link from the service's editor or access it via the Service Orchestration tab in the Journey Designer's Advanced mode.
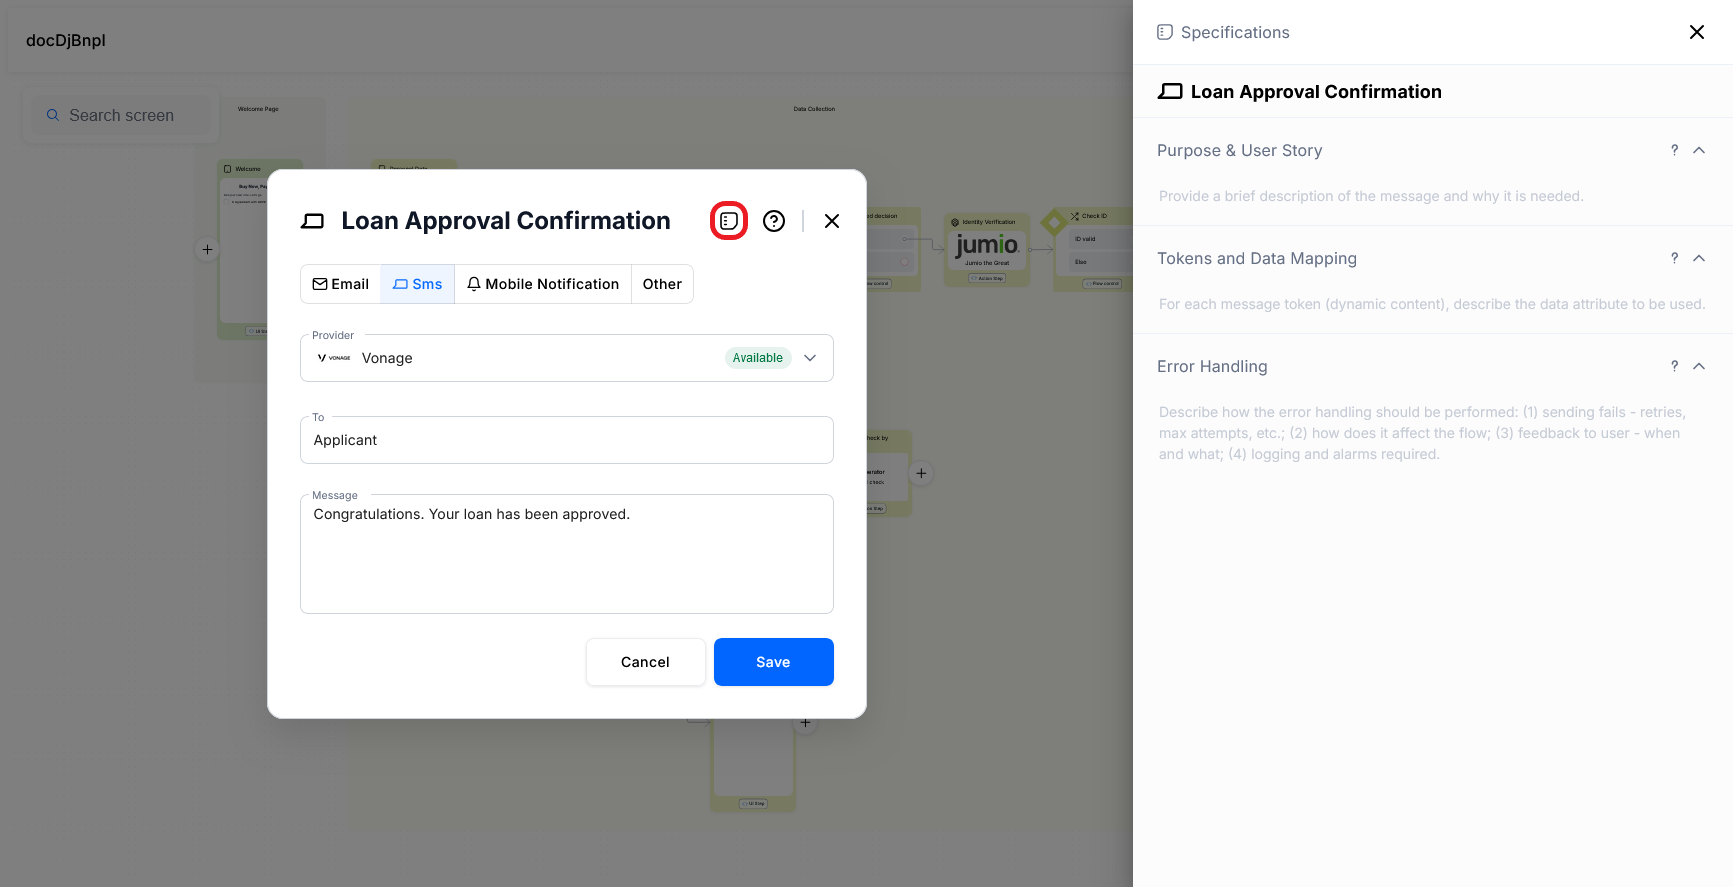
Message
Messages enable communication with users through alternative channels such as push notifications, SMS, and email. Examples include sending one-time passwords via SMS or emailing contract documents. A set of built-in providers for both email and SMS is available, with support for additional providers coming soon.
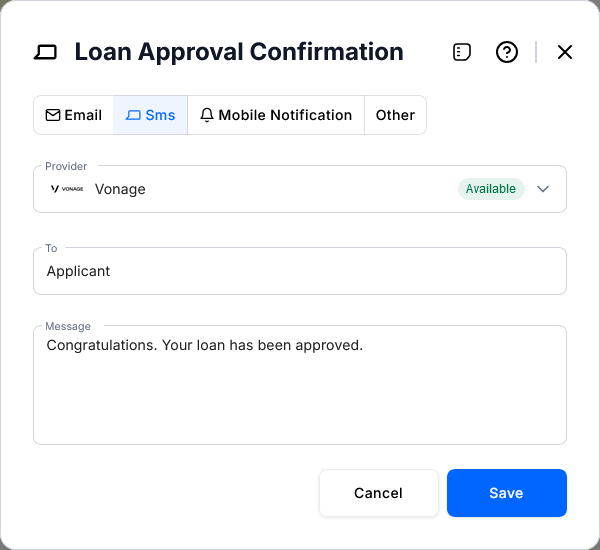
Define a relevant title and a meaningful sample text to ensure good clarity on the canvas.
Document
Documents are files that the user must either provide (e.g., proof of identity, income, or ownership) or receive (e.g., terms and conditions or GDPR agreements). You can also specify whether the document requires the user's agreement and/or signature.

Assign a clear title and an appropriate label to ensure good clarity on the canvas.
Task
Tasks are back-office operations that must be completed by a different user, typically a company employee, before the journey can proceed. This may involve manual underwriting of an application, initiating a follow-up action within the organization, or other similar activities.
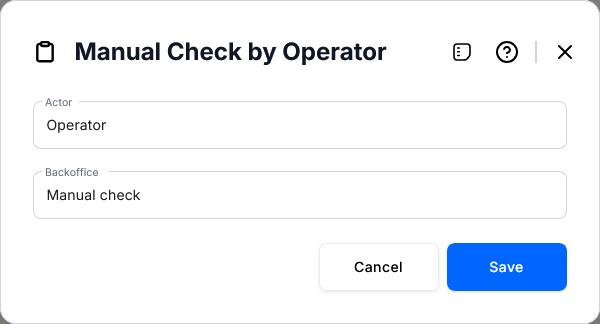
Specify the responsible actor for the back-office task and what the task entails.
You may need to follow this element with a Decision to direct the journey along alternate paths based on the task outcome.
Asynchronous Tasks
Select the When Completed checkbox to fork the execution flow into concurrent branches using asynchronous tasks. These tasks trigger a Service that runs in parallel with the main flow and rejoins at a defined synchronization point, where the main flow awaits its completion before continuing.
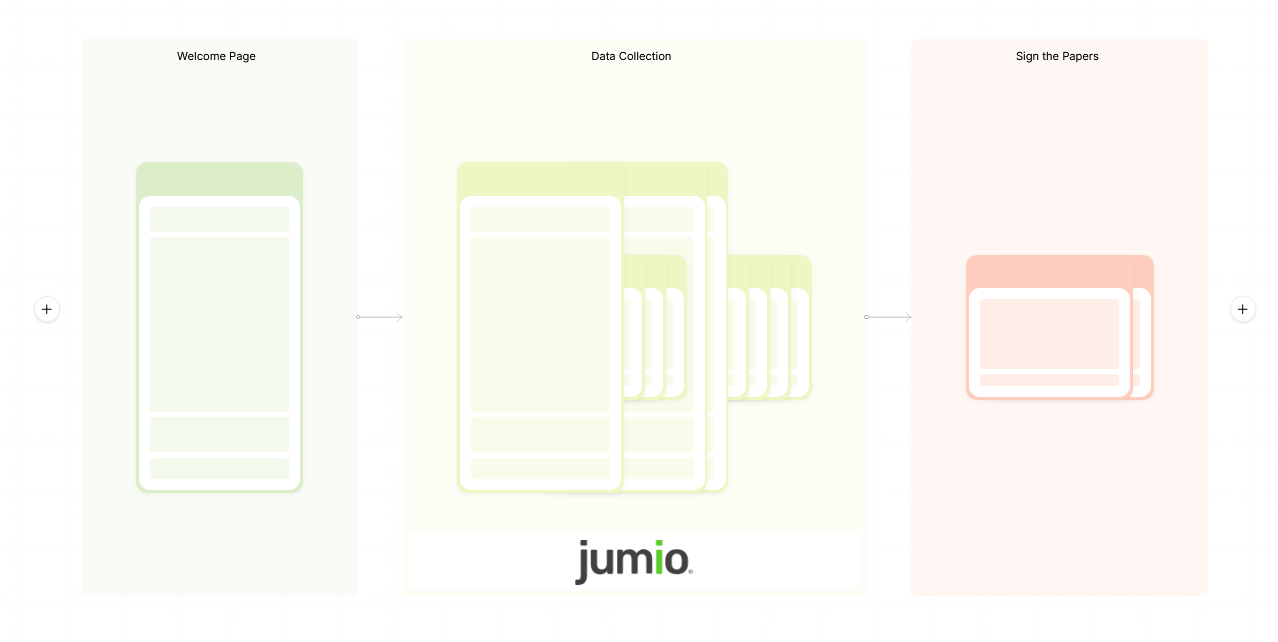
Stage
Stages enhance journey clarity by allowing you to group subsequent elements together and assign them a descriptive name. For example, you might group a sequence of screens, decisions, and integration elements used to collect and validate a user's personal data in a "Data Collection" stage.
When zooming out on the canvas, stages provide a simplified view of the journey by collapsing the enclosed elements, displaying only the stages and the outlines of their contents.
Connect To
Navigates to an existing element on the canvas.
Move Journey Elements
There are two grab handles above each element that allow you to drag the element to a different position along the journey path. The first grab handle moves the individual element. The second grab handle moves the entire sub-flow from that element to the end of the current Stage.
When moving Decision elements, the decision node is detached from its original location and reattached at the new position along the If navigation path. The Else and Else If branches remain connected to the decision node and are moved along with it.
Advanced Interface
Use the </> button at the top right corner of the journey designer to enable or disable the advanced interface. When enabled, this mode allows you to switch between the Data Domain and Service Orchestration views. These views let you model the client-side context data and manage service orchestration flows, respectively.
Data Domain
The data domain models the context data used by the Presenter Component to bind the data model and technical logic to the user interface via Technical Variables, Data Entities, and Dictionaries. Whenever you add a new data attribute, you must specify a Data Domain entity, dictionary, or technical variable it belongs to.
Technical Variables
Technical variables store the visibility states, validation statuses, and other behavioral aspects of the UI components (e.g., toggled sections based on user inputs). These variables control and influence UI behavior, rather than represent business data. Technical variables are scoped to the Presenter context and are not persisted to the backend.
- Click the Technical Variables node to open the editor, then select the Attributes tab. You can organize your attributes into categories. At least one category is required. A default category named General is provided, which you can either rename or delete once you create additional categories.
- To add an attribute:
-
From a Lexicon Term: Click + Add From Lexicon, then select the term from the list.
- From scratch: Click + Create New, then fill in the attribute details.
- To refine an attribute's definition, open its Properties slide-out panel from either the technical variables editor or the Data Domain canvas.
Data Entities
Data entities represent the structured business data the UI displays or modifies (e.g., customer information or application details). The mechanisms for defining attributes and grouping them into categories are identical to the ones used for Technical Variables. Unlike technical variables, however, you can create multiple data entities and define relationships between them with various cardinalities.
Dictionaries
Dictionaries represent structured business data displayed in the UI, similar to Data Entities, but differ in that they contain static, predefined values (e.g., a disclaimer text or a list of allowed currencies selectable by the user).. The mechanisms for defining attributes and grouping them into categories are identical to the ones used for Technical Variables.
You cannot define relationships between dictionary entities.
Service Orchestration
This is a repository for all the Services Orchestration elements defined within the journey, where you can expand and edit each service orchestration flow as needed.
Edit Specifications and Generate the FSD
Specifications fields for descriptions, validations, UX definitions, error handling, and more are available at the journey, stage, element, and item levels. To add specifications for a component, click the bullet points icon at its top right corner to slide out the specifications pane.
Once you have filled in the specifications for all the components, you can automatically generate a fully-formatted Functional Specifications Document (FSD) for your journey. To do so, click the ellipsis button (...) in the top right corner of the Journey Designer and select Export document.
The FSD also includes the specifications for the Data Domain technical variables and data entities.
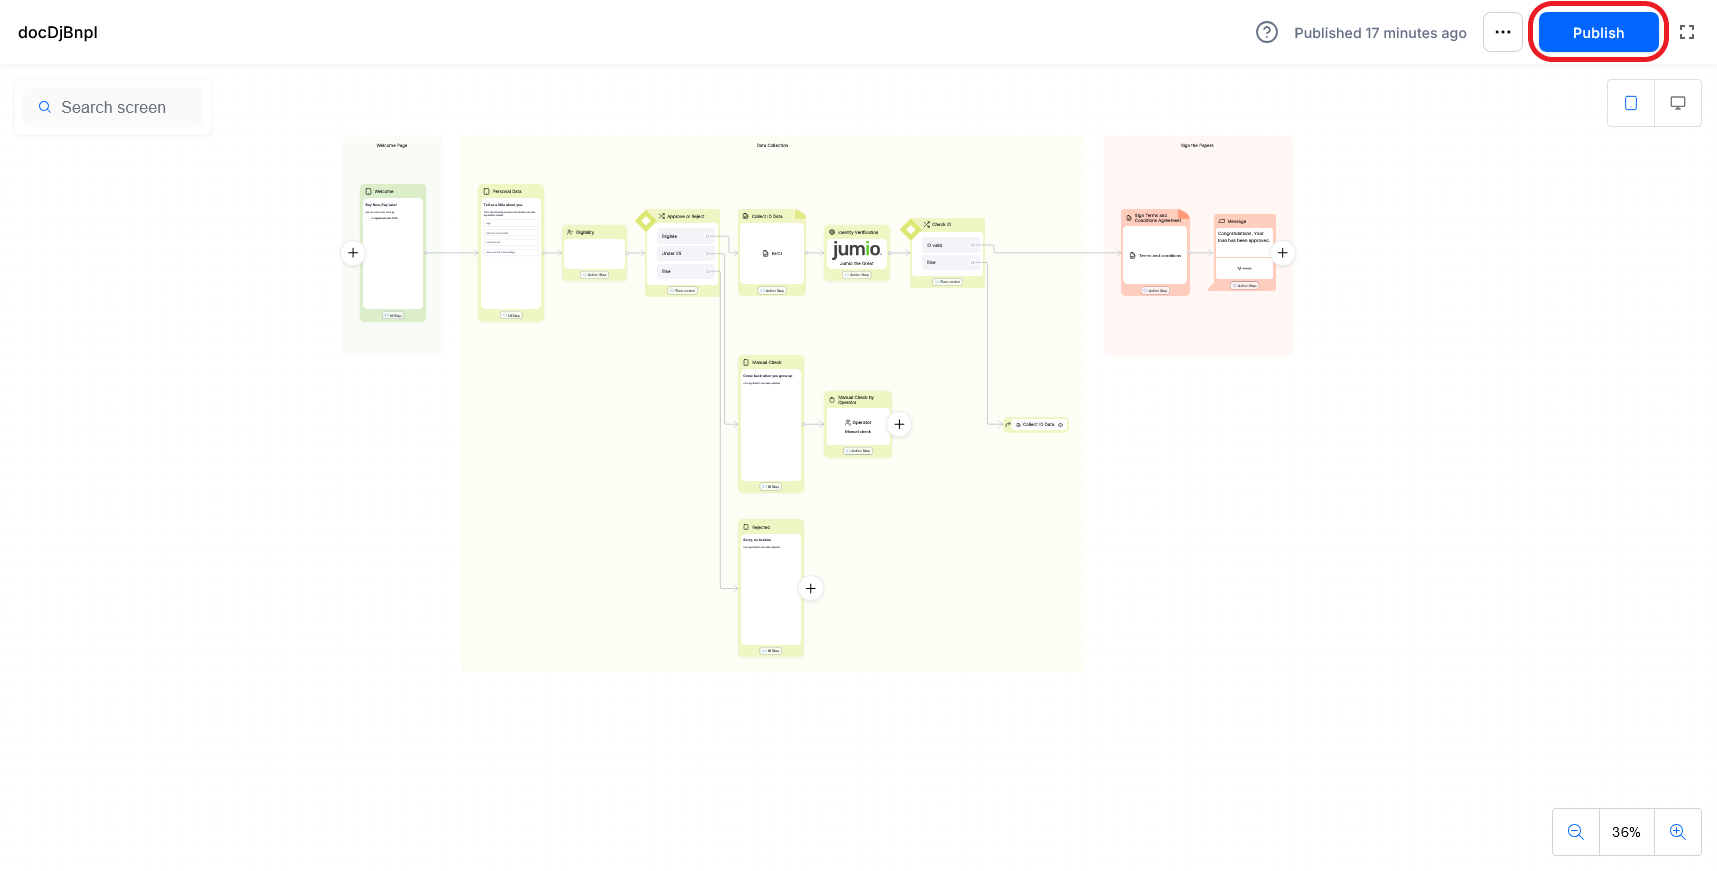
Publish the Journey
Use the Publish button at the top right corner of the screen to propagate the journey design to the platform, automatically generating a mock-up flow with a matching Flow Map.
 →
→ 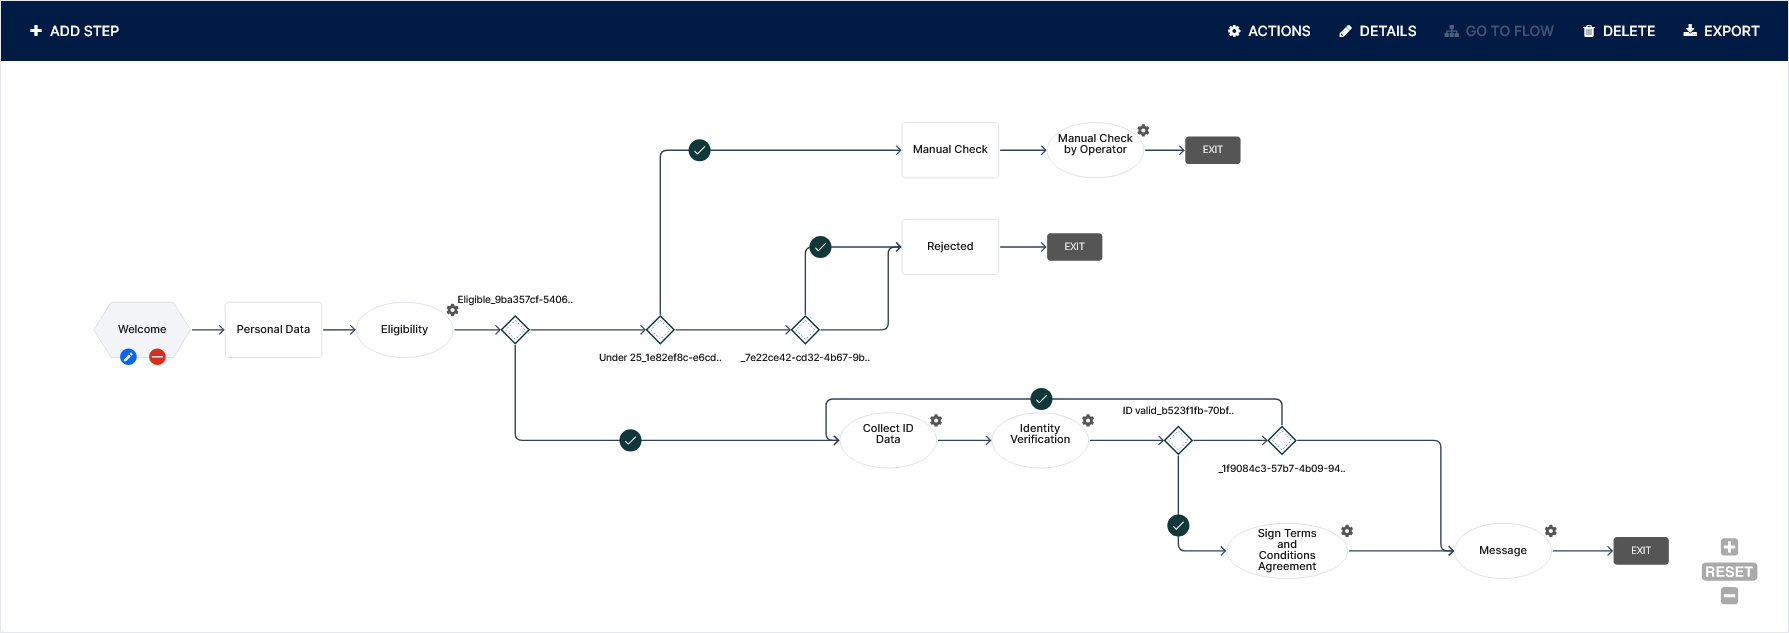
Journey elements are converted to flow elements as follows:
| Journey Element | Corresponding Flow Element |
|---|---|
| Screen | Default UI step. |
| Decision | Each exit path generates a flow navigation rule. |
| Integration | Action step. |
| Service | Action step. |
| Message | Action step. |
| Document | Action step. |
| Task | Action step. |
| Stage | N/A. |
| Connect To | Flow navigation rule. |
If you make additional changes to the digital journey, you can click the Publish button again to update the associated mock-up flow.
Once you convert the associated mock-up flow to a regular form drive flow (by attaching a data model), you can no longer publish the journey.
Preview the Journey
After you Publish the Journey, the Publish button is replaced with a Preview button, which allows you to visualize the journey and navigate its steps to assess the overall user experience.