Code Editor
The Code Editor is a modern code editor built using one of the most renowned IDEs in the industry: Visual Studio Code. This editor allows you to visualize digital solutions and edit code in isolation through a private workspace where you easily review and manage changes through remote code Github repositories.
Starting with v24.3.2, use the feature-external-editor-allow-form-html-template-editing key in Configuration Manager > studio > app-features, to restrict saving Entity forms, App data forms (tabs), or Form driven flows (wizard), in the Code Editor. Enable the key to allow editing with the Code Editor.
Configure the editor in the following way:
-
Go to Configuration Manager and in the
kv/<environment name>/<studio>/<app-features>path, set thefeature-use-external-dev-environmentkey value to:-
0 - edit in Studio/Monaco
-
1 - edit in FintechOS Editor in the browser
-
2 - edit in FintechOS Editor on desktop.
-
-
Create a ticket to Cloud Support to run the dedicated pipeline.
You can disable the code editor on one environment by logging into Studio with a user with Developer security role, navigating to the user profile and ticking the Disable External Editor box.
Check out the Code Editor Development Tutorial for steps on how to set up the editor for your environments, how to collaborate with your team, as well as guidelines for setting up your GitHub branches and way of working.
Open the Code Editor
The Code Editor is used for editing items that are part of a Digital Asset. Therefore, it is advised that you first organize all the items you need in Digital Assets, Digital Solutions, and Digital Solution Packages.
-
In the General tab of your digital asset, click the Open in Editor button.
-
Select the corresponding digital solution and the digital solution package. If the digital asset is not included in any digital solution, one is automatically created.
To open the editor successfully, enable pop-up windows in your browser.
Code Editor Layout
The edit function is available only for CSS, HTML and JavaScript files (not metadata).
Starting with v24.1.1, the Code Editor comes with SCSS support. Simply open your digital asset in the Code Editor and edit files with the .scss extension.
Explorer Structure
| Section | Description |
|---|---|
| Workspace | Section where the digital asset and digital solution files are centralized. There are two main folders:
|
| Outline | Allows easy navigation between file sections through a short overview of the file tree. |
| Timeline | Local version control system that lets you keep track of the changes you make to your files |
| SonarLint Issue Location | Shows issues in your code reported by SonarLint. |
In case the business solution you are shipping is split in more than one Digital Solution, use the FintechOS Explorer to bring additional sources.
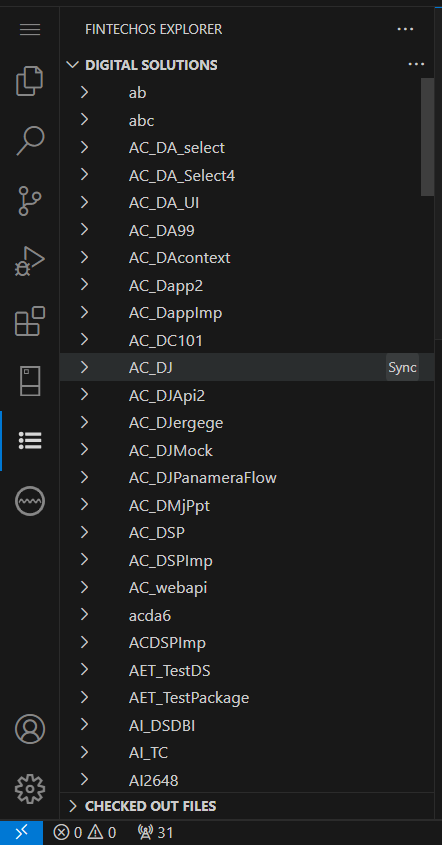
FintechOS Explorer
Use the FintechOS Explorer menu item to add new digital solution packages to your workspace or update existing ones. Click the Sync button next to the desired digital solution package to bring it up to the latest version or add other digital solution package from your environment to the Code Editor instance.
Manage and Edit Files
The editing mechanism of Code Editor allows you to edit all Javascript, HTML and CSS files while keeping the check-out and release features present in the FintechOS Platform embedded code editor.
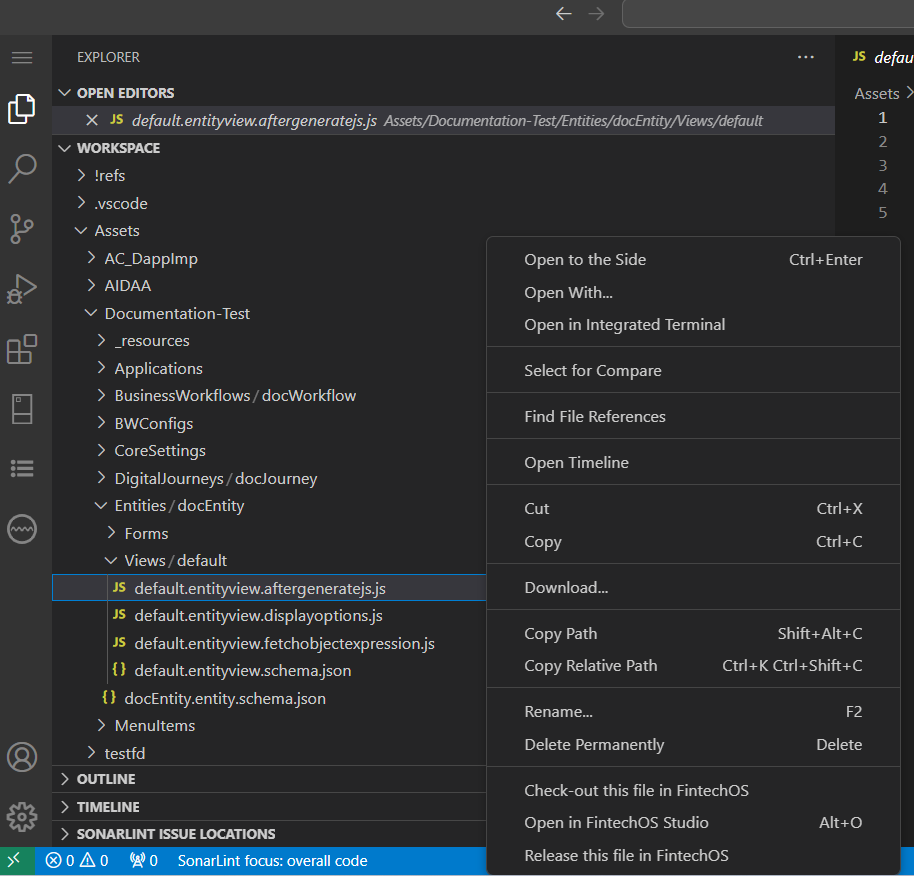
Right-click the item in the workspace to open the following controls:
| Control | Description |
|---|---|
| Check out this file in FintechOS | Use this option to lock the file and enable editing. |
| Release this file in FintechOS | Use this option to release the file. You cannot edit the file after release. |
| Open in FintechOS Studio | Use this option to open the element in FintechOS Studio. |
Source Control
Manage digital solution package versions and track changes to the digital asset components to ensure all users can easily work on simultaneously on items and trigger an easy code review process through branching and version control. The following steps describe creating a remote repo and committing your local digital package.
-
Create a remote code Github repository for your digital solution package.
-
Initialize a local repository by running the following Git commands in the terminal of Code Editor:
git initandgit remote add origin <remote repo URL>. -
Use
run git fetch originto fetch the remote repository and thenrun git pull origin main --allow-unrelated-historiesto keep the existing files in the local repository.
-
Fix merge issues, then use the
git addcommand,git commit -m "Merged local folder with GitHub repository", thengit push origin main. Alternatively, use the Commit button from the Source Control tab to perform an initial commit of the digital solution to the newly created repository.
git init
git remote add origin <repository_url>
git fetch origin
git pull origin main --allow-unrelated-histories
fix merge issues
git add
git commit -m "Merged local folder with GitHub repository"
git push origin main
For more in-depth details on how to set up a Git repository, branching, and source control, check the Visual Studio Code user guide.
Intellisense for SDK Methods
You can use intellisense in the Code Editor and get the definitions for your SDK methods.
To do so, add the ftos.data.query.getAlias('property') in your server automation script either in Studio or directly in the Code Editor. For example, you can add ftos.data.query.getAlias('entityName') and in Code Editor to see and use the properties of an entity.
Keep in mind to sync the script in the Code Editor to use the definitions.
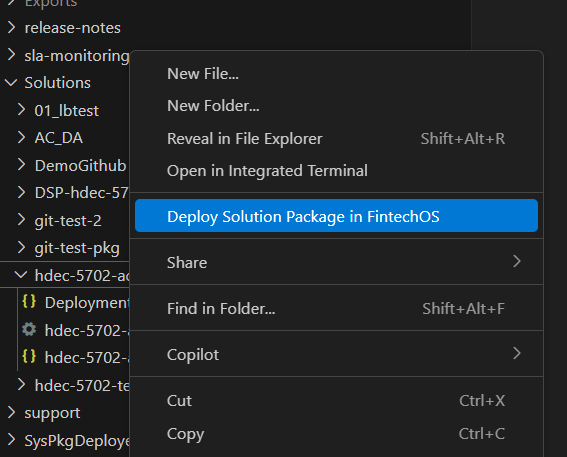
Code Editor in Sandbox
The Code Editor is also available with the local developer sandbox, a local instance of the FintechOS Platform (v24.4.0) for building, testing, and syncing your development work. After setting up your local sandbox, you may notice the option Deploy Solution Package in FintechOS. Use this option after you've made changes that you want to deploy to Studio. Right-click the file and click Deploy Solution Package in FintechOS to include it in a solution package and deploy to Studio.