Settings
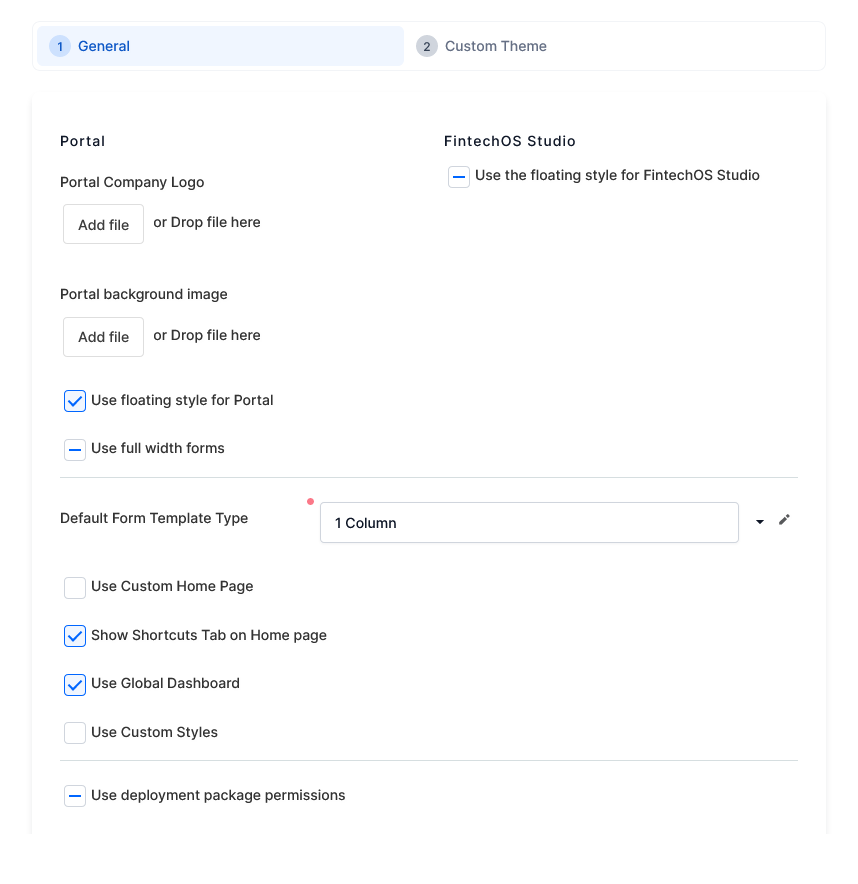
Settings allow you to customize the FintechOS Portal look and feel. From the menu, click Admin > Settings.
Upload your own company logo and background image to be shown in the Digital Experience Portal.
To show the Portal UI container in full screen width, tick the Use full width forms checkbox.
You can also add custom actions (custom flows) on the home page by ticking the Use Custom Home Page checkbox and selecting the desired custom flow. A new custom flow can be inserted directly in the Settings page, by clicking the arrow next to the Use Custom Home Page field. The list of available custom flows will be displayed. Click the Insert icon and provide the custom flow information. For more information on custom flows, see Creating Form Driven Journeys.
Choose if the shortcuts are displayed as the first tab on the homepage by selecting the checkbox next to the Show Shortcuts Tabs on Home page label. Unselect the checkbox to disable the user shortcuts and not have them displayed as the first tab on the home page, but available through a new icon on the top menu bar.
Multiple dashboards can be added to the Portal UI if the Show on Home page option is selected on the dashboards configuration page.
To force the default Dashboard, named Main Dashboard, to be displayed first on the user interface, tick the Use Global Dashboard checkbox.
By default, the color palette of the Digital Experience Portal UI is inherited from the FintechOS Platform brand. To apply your own brand, follow these steps:
- Select the Portal background image.
- Set the transparent top menu bar and a floating feeling for all elements by ticking the Use floating style for Portal checkbox.
Custom Themes
Custom themes allow you to adjust the default fonts and color palette of your FintechOS Portal user interface. For more info, see Custom Themes.
