Extend the Data Model
When a specific entity doesn't include all the attributes required by a form or form driven flow, you can extend that entity with the corresponding additional attributes. Thus, instead of creating a sophisticated entity from scratch, you can just use the Data Model Extension capability to include virtual attributes from multiple entities into the flow's data model.
Hence this is what Data Model Extension is all about: It allows you to bring in attributes from other entities or external sources in order to make them available in your current Form Driven Flows.
There are four types of extensions that you can use to extend the data model of an entity:
- Custom Data Extensions - Use them to create ad-hoc attributes that are not stored in the database or associated with any entity. They can, however, be populated based on the underlying entity attributes.
- Related Data Extensions - Use them to display attributes that are not native to the entity on which you are currently building the flow. The virtual attributes can only be fetched from entities that are related to the current entity (you will have to establish the Entity Relationships beforehand).
- One to One Data Extensions - Use them to simultaneously update all attributes referencing your underlying entity. For example, you network or link your entity with multiple other entities and create multiple digital journeys serving different purposes and need to make sure that the chosen attributes will be updated at once across the whole model.
- Transient Data Entity - Use them to expose attributes that temporarily store and display data that has been loaded from or is going to be saved to an external data source (e.g. a legacy system). The transient attributes values are preserved only while the flow is open. For more information, see Transient Data Entities.
If you need to extend your current entity with both Custom and Related attributes, you will have to add two distinct entity extensions, one of type Custom and the other one of type Related. Once added to the data model, the virtual attributes become available in the UI Designer - they will appear with a (VA) suffix added after their name.
Data extensions have specific particularities when they are related to real attributes of type Lookup and OptionSet:
-
Lookup attributes: If you render a data extension which is related to a Lookup attribute, the data extension will be a Lookup attribute as well. You will be able to choose from the same pool of records as the real attribute, or edit the selected record.
-
OptionSet attributes: If you render a data extension which is related to an OptionSet attribute, the data extension will be an OptionSet attribute as well. If the real attribute has a default selection, the related data extension will have it as well. If a new record is added to the option set, it becomes the default selection of the data extension. You can add option items to the data extension similar to the real attribute.
Custom Data Extensions
Custom Data Extensions give you full control over attributes’ values without altering the database. Use them to calculate and display aggregated attribute values in the user interface, without storing them in the database. You can render the following types of attributes: Bool, Date, Text, Lookup, Numeric, Text, Area, DateTime, OptionSet, and WholeNumber.
For example, Age could be a Custom Data Extension since, based on the data already stored in the database (e.g. a Birth Date attribute) and the current date, you just calculate and display the age of a customer, when needed, in a certain flow, instead of storing it in the database.
-
To add a Custom Entity Extension, from the main menu, go to Evolutive Data Core > Data Model Explorer.
-
In the Business Entities List, double click the entity you want to extend.
-
Scroll-down and expand the Extended Model section, then click Insert.
-
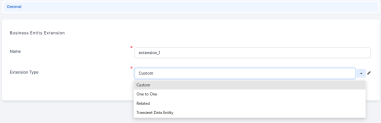
In the Business Entity Extension window, use the Name field to provide a unique name for the extension and select Custom from the Extension Type drop-down field.
-
Click Save and reloadto unlock the Virtual Attributes tab. You can now start creating your own custom virtual attributes, which will be related to your current entity, through that specific data extension.
-
In the Virtual Attributes tab, click Insert to open the Add Virtual Attribute window.
-
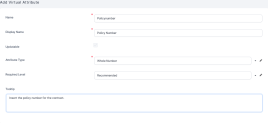
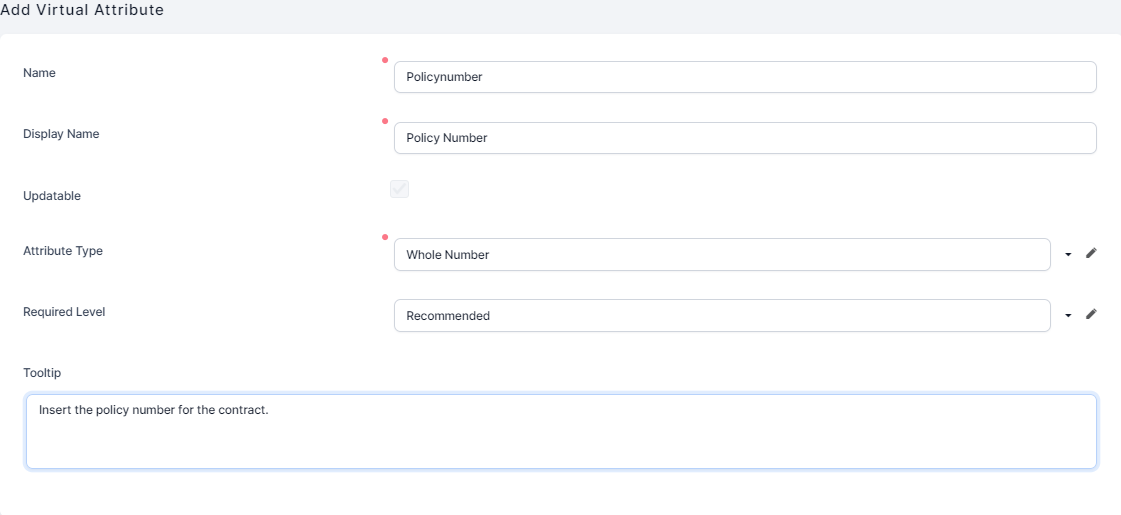
Provide the mandatory fields: Name, Display Name, and Attribute type. The remaining fields are optional:
-
Updatable - if checked, the data extension value updates automatically
-
Required Level - None, Recommended, or Required
-
Tooltip - text to be displayed when hovering the field in the UI
-
-
Click one of the Save options.

For details on how to render custom data extensions in the user interface, see Render Custom Data Extensions.
Related Data Extensions
Related Data Extensions will behave like native attributes. These extensions will allow you to edit the value of the data (a virtual attribute) similar to editing a native attribute (an attribute belonging to your current entity). To set up a Related Data Extension relationship between the current entity and another entity from the database, you will use a Lookup attribute (see below).
For example, on entity Contract, insert a Lookup attribute to the entity Client, in order to extend the data model of the Contract entity with attributes from the Client entity. The result is that, on the same digital journey, when updating a contract, you will also be able to edit or modify client data.
-
To add a Related Entity Extension, in FintechOS Studio main menu, go to Evolutive Data Core > Data Model Explorer.
-
In the Business Entities List, double click the entity you want to extend.
-
Scroll down and expand the Extended Model section, then click Insert.
-
In the Business Entity Extension window, use the Name field to provide a unique name for the extension and select Related from the Extension Type drop-down field.
-
After selection, the Related Attributes field becomes visible. Click it to open the drop-down list of the attribute types that you can use. From the list, select the Relation Attribute that will lookup to the entity from which you want to bring in data.
- Click Save and reload to unlock the Virtual Attributes tab. You can now start adding virtual attributes to your current entity.
- In the Virtual Attributes tab, click Insert to open the Add Virtual Attribute window.
- Select the desired Related Attribute. The system will automatically fill in some of the fields with information from the related attribute. Do not attempt to change it.
- Select the Updatable checkbox in order to update the related entity attribute value when the current entity virtual attribute field is updated. If not selected, the virtual attribute will be read-only. If tooltips are set to be shown on forms and digital journeys and you want to have a tooltip explaining this data extension in the user interface, provide the desired text in the Tooltip text area field.
- Optional: select the Is owner for relation checkbox so that when a data entry is added, an instance of it will be created to fulfill this logic on the entity connected through the Relation Attribute. If this is not checked, the virtual attributes will be read-only.
-
Click one of the Save options.
Virtual attributes can only be fetched from entities that are related to the current entity. If there is no attribute type in the drop-down list, you first need to establish a relationship between entities, in order to be able to display an attribute that you particularly need.

One to One Data Extensions
One to One Data Extensions enable modeling an underlying or base entity and all specialized entity extensions referencing it. You can extend an entity by creating a relationship between it and multiple other entities, while handling multiple digital journeys serving different purposes. The underlying entity will have multiple entries with different views based on the views used by the digital journeys defined on the entity.
For example, your base entity (e.g., Account) can be extended with virtual attributes from Client Info and Suppliers entities in order for the Account entity to support or provide for two digital journeys: one for creating clients and one for creating suppliers.
Another example is: You define an entity extension of the current base entity (e.g., Account) to another entity (e.g., Financial Info) which has a Lookup to the current entity (the two entities are in a 1:1 relationship). For an instance of entity Account there is one instance of entity Financial Info which refers to entity Account.
-
To add a One to One Data Extension, in FintechOS Studio main menu, go to Evolutive Data Core > Data Model Explorer.
-
In the Business Entities List, double click the entity you want to extend.
-
Scroll down and expand the Extended Model section, then click Insert.
-
Click Insert to open the Add Business Entity Extension window. Use the Name field to provide a unique name for the extension and select One to One from the Extension Type drop-down field.
-
After selection, the One to One Relationship field becomes visible. Click the field to open the drop-down list of the referenced entities that you can use. In that list, select the Referenced Entity from which you want to bring in data. For example, for the base Account entity, select the relationship between Account and Client Info.
-
At the top-right corner of the page, click the Save and reload button in order to unlock the Virtual Attributes menu. Click on Virtual Attributes in order to expand the menu. You can now start adding virtual attributes to your current entity.
-
Click the Insert button to open the Add Virtual Attribute window.
-
Select the desired Related Attribute. The system will automatically fill in some of the fields with information from the related attribute. Do not attempt to change it.
- Select the Updatable checkbox to update the related entity attribute value when the current entity virtual attribute field is updated. If not selected, the virtual attribute will be read-only. If tooltips are set to be shown on forms and digital journeys and you want to have a tooltip explaining this data extension in the user interface, provide the desired text in the Tooltip text area field.
- Optional: select the Is owner for relation checkbox so that when a data entry is added, an instance of it will be created to fulfill this logic on the entity connected through the Relation Attribute. If this is not checked, the virtual attributes will be read-only.
-
Click one of the Save options.
Virtual attributes can only be fetched from entities that are related to the current entity. If there is no attribute type in the drop-down list, you first need to establish a relationship between entities, in order to be able to display an attribute that you particularly need.
Transient Data Extensions
Transient Data Entity Extensions allow you to fetch data from an external source and display it in a form driven flow or to save data displayed in a form driven flow to an external destination. Transient data entities use automation scripts for load/save that are triggered when such a flow is displayed/saved to facilitate data transfers from/to external sources. The transient attributes values are preserved only while the flow is open. For more information, see Transient Data Entities.