Advanced Entity Find
Advanced Find is a powerful DB segmentation tool which allows you to filter and customize the entity grid displayed in the Data Model Explorer.
To access Advanced Find, in the Data Model Explorer, at the top-right corner of the page, click the Advanced find ( ) icon. The Advanced find page will be displayed similarly to the figure below. The page allows you to choose the criteria and conditions for displaying your entities.

1 Select the attributes you wish to display
Click the Attribute list button to open the Attributes List page. This page lists the attributes that all entities have in common.
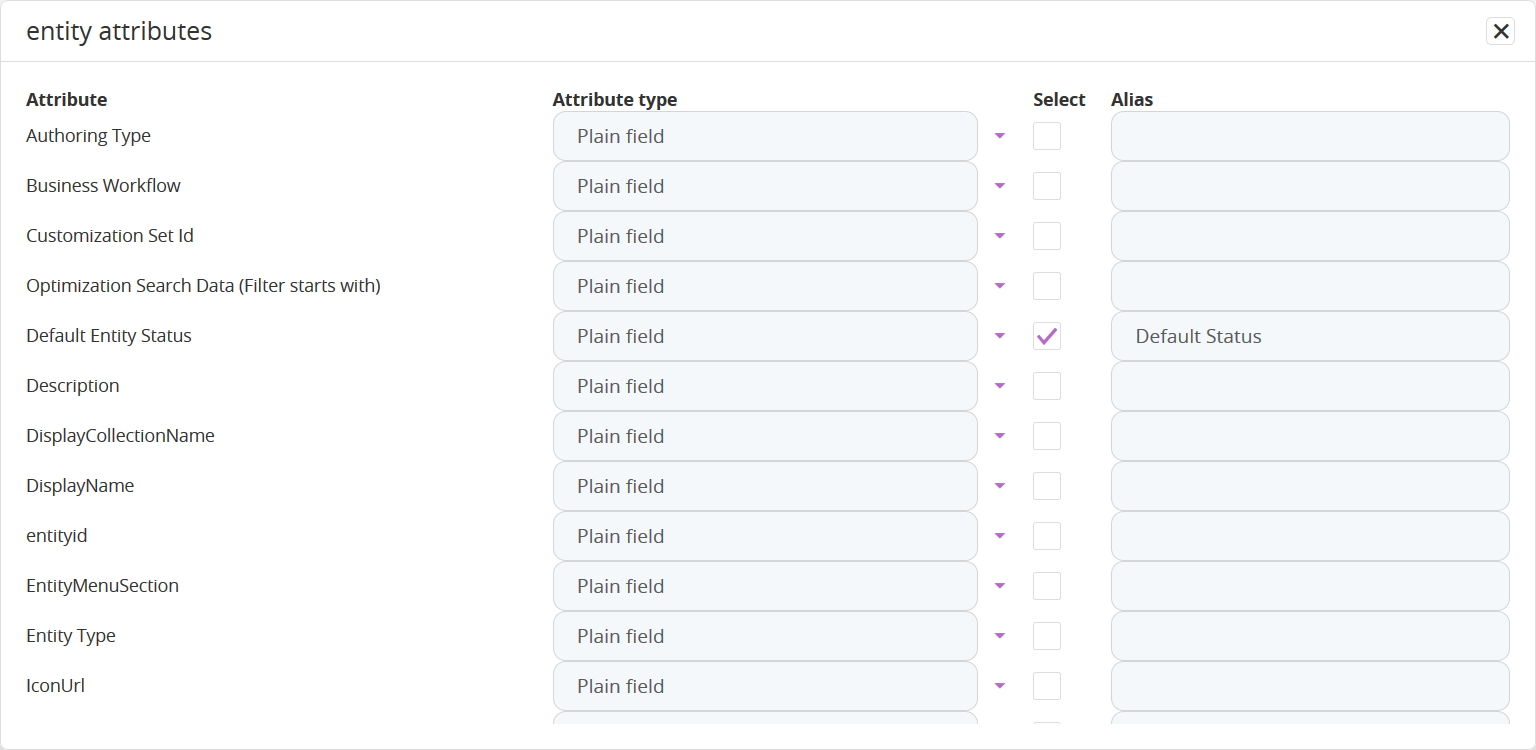
Select the attributes you want to include in the fetch by clicking the corresponding checkbox in the Select column.
For all selected attributes, in the Alias column, type a unique alias name.
The alias is used by the system to distinguish between various records; therefore, providing a unique alias for all selected attributes is mandatory. Do not use the same alias for two different attributes.
Scroll-down at the bottom of the attributes list and click OK. The page listing the entity’s attributes will be closed.
2 Apply filtering conditions
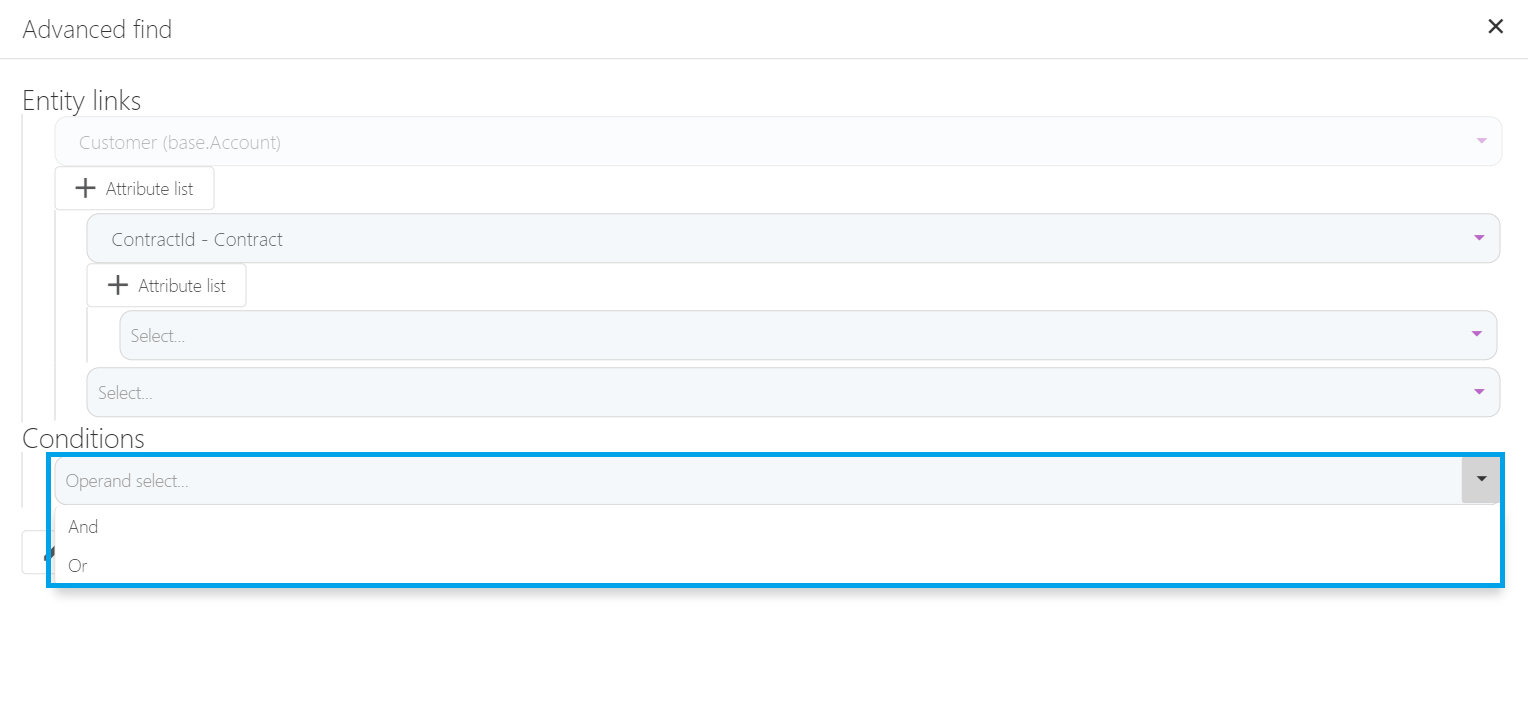
From the Conditions section you can select conditions which must be met in order to include a record into the data fetched from the database.
You can apply multiple conditions which need to be met separately or in combination by selecting either AND or OR as logical operator.
To set up the fetch entity data conditions, follow these steps:
- From the drop-down field displayed in the Conditions section, select the logical operator:
AND – to apply multiple conditions which all need to be met.
OR – to apply multiple conditions when at least one condition needs to be met.You can apply multiple conditions by using as many logical operators as you need. Once you select one, another logical operator field will be displayed beneath the first one, and so on. - Select the entity on which the condition is to be applied. NOTEAfter selecting an entity, the Attribute select field will be displayed below the selected entity.
In Advanced Find, you can only select the generic base entity. - Click the Attribute select field. A drop-down list will be displayed, listing only the attributes that all entities have in common.
- Select an attribute of the entity previously selected. Below the selected attribute, the Select operand field will be displayed. The table below describes the operands you can choose from.
Operand Description Contains Records will be included in the data fetched from the database if the value of the selected attribute contains the value given in the field displayed below the selected operand field. NotContains Records will be included in the data fetched from the database if the value of the selected attribute does not contain the value given in the field displayed below the selected operand field. Equals Records will be included in the data fetched from the database if the value of the selected attribute equals the value given in the field displayed below the selected operand field. NotEquals Records will be included in the data fetched from the database if the value of the selected attribute is different from the value given in the field displayed below the selected operand field. Greater Than Records will be included in the data fetched from the database if the value of the selected attribute is greater than the value given in the field displayed below the selected operand field. Greater Than or Equal Records will be included in the data fetched from the database if the value of the selected attribute is greater than or equal to the value given in the field displayed below the selected operand field. Lower Than
Records will be included in the data fetched from the database if the value of the selected attribute is lower than the value given in the field displayed below the selected operand field.
Lower Than Equal
Records will be included in the data fetched from the database if the value of the selected attribute is lower than or equal to the value given in the field displayed below the selected operand field.
IsNotNull
Records will be included in the data fetched from the database if the value of the selected attribute does not contain a null value.
IsNull
Records will be included in the data fetched from the database if the value of the selected attribute has a null value.
Last X Days
Records from the last 'x' days will be included in the data fetched from database. Where x is the number of days specified in the field displayed below the operand.
Last X Months
Records from the last 'x' months will be included in the data fetched from database. Where x is the number of months specified in the field displayed below the operand.
Last X Years
Records from the last 'x' years will be included in the data fetched from database. Where x is the number of years specified in the field displayed below the operand.
Last X Weeks
Records from the last 'x' weeks will be included in the data fetched from database. Where x is the number of weeks specified in the field displayed below the operand.
Next X Days
Records which have the creation date greater than today but less than x days from today. Where x is the number of days specified in the field displayed below the operand.
Next X Months
Records which have the creation date greater than today but less than x months from today. Where x is the number of months specified in the field displayed below the operand.
Next X Years
Records which have the creation date greater than today but less than x years from today. Where x is the number of years specified in the field displayed below the operand.
- Select an operand from the lists.
- If needed, in the text field below the operand field, enter the match value for the selected operand.
- Repeat for any additional filtering criteria.
For example, the criteria below will filter entities that have either the FTOM_MKT_Audience or the FTOS_MKT_Campaign business workflows attached.

Before saving the fetch, we recommend you to preview the fetch and validate the fetch results.
3 Order results
From the Order By section, the returned results can be arranged in an ascending or descending order.
To order the records:
- From the Order By section, click the +Attribute ordering list button. The Attribute ordering list page is shown.
- Click the Entity field and choose from available entities displayed in the drop-down list.
- Click the Attribute field and choose from the attributes displayed in the drop-down list.
- Click the Order type field. The following options are available: Asc – to order the results ascendingly
- Click the +Add ordering button to save the selection.
- Click the Ok button to return to the Advanced find page.
Desc – to order the results descendingly

The attribute types from the drop-down list are based on the entity attributes selected.
4 Validate the Fetch Results
To validate the fetch results, preview them by clicking the Preview button at the bottom of the Advanced find page. The Preview page will be displayed. The figure below is a preview example of data fetched from the Account, Contract and Product entities.
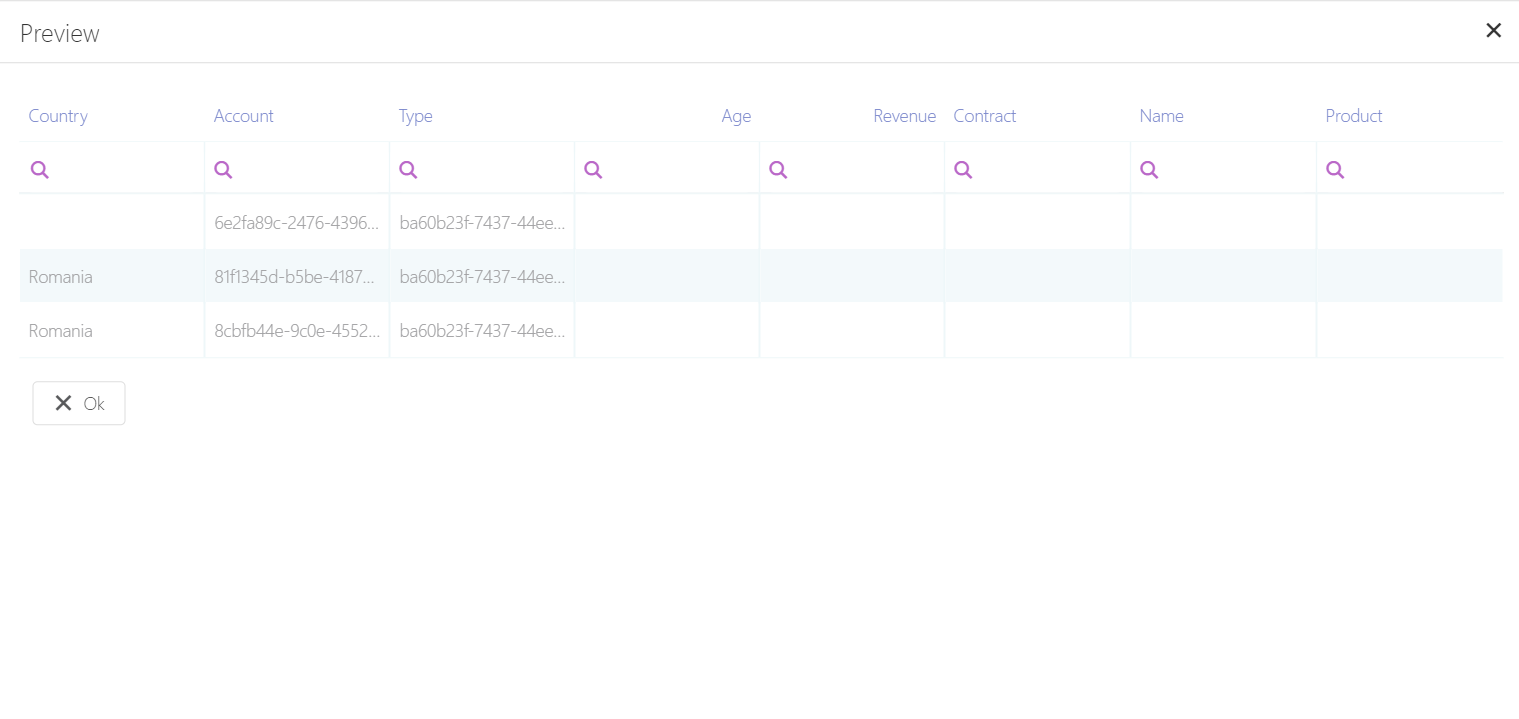
Validate the results, then click OK to close the page.
To filter the fetch, in the Advanced find page, click OK.