Creating Custom Flows
This section walks you through the steps that you need to follow to create a custom flow:
STEP 1. Provide custom flow general information
From the menu, click Digital Journeys > Custom Flows. The Custom Flows page appears.
At the top-left corner of the page, click the Create button. The custom flow configuration is displayed which consists of three sections (tabs). The configuration page is displayed by default on the General tab.

Fill-in the fields based on your needs:
| Field | Description |
|---|---|
| Name | The name of the custom flow to be used by the system. The field is mandatory. |
| Display Name | The name of the custom flow that will be displayed in the Digital Experience Portal. The field is mandatory. |
| External Url | If the custom flow redirects to an external Url, provide the URL here. |
| Description | Description of the custom flow. |
Click the ''Save and reload'' button and new tabs will be available.
STEP 2. Design the custom flow layout
Click the Code tab. The Code section is displayed on the Template tab. In the Template section, provide the HTML code which defines the layout of the custom flow.

You can also create the HTML template of a form driven flow by using the Advanced Code Editor or the UI Designer.
Using custom flows you can also create custom controls. For more information, see Creating Custom Controls.
STEP 3. Define the custom flow
In the Code section, click the After Generate Js tab and provide the JavaScript code which defines the digital journey (redirect users to a specific data form or view, generate custom filtered views, add buttons which trigger specific actions).
var params = sessionStorage.getItem("sessionParameters");
params = JSON.parse(params);
params.fileIsBase64 = false;
var signContract = function()
{

    if(params.existingFile){
        ebs.showLoadingPanel();
        if(params.externalURL == true){
                params.settings.maskNextStepURLSuccess = params.settings.maskNextStepURLSuccess;
        }     else {
            params.settings.maskNextStepURLSuccess = ebs.getBaseUrl() + "/" + params.settings.maskNextStepURLSuccess;
        }
    console.log("params.settings.maskNextStepURLSuccess " + params.settings.maskNextStepURLSuccess);
    ebs.callActionByName("FTOS_DFP_ESign_Endpoint", {params: params}, function(result) {

        ebs.hideLoadingPanel();
        params = result.UIResult.Data.params;

        //remember to delete
        //console.log(JSON.stringify(params));

        sessionStorage.setItem("sessionParameters", JSON.stringify(params));
        if(params.settings.redirecttoNamirialLink == true){

                window.location.href = params.site;
                } else {
                window.history.back();
                }
        });
    } else ebs.showMessage("There is no file to sign!", "error");
}
signContract();
// Upload document button
$('#btnUpload').click(function() {
        if(!params.existingFile){
                $('#fileInput').trigger('click');
                $('#fileInput').on('change', function(event) {
                var fileNotBase64 = event.target.files[0];
                params.existingFile = true;
                $('#fileInput').removeAttr('style');

                var reader = new FileReader();
                reader.onload = function(fileLoadedEvent) {
                var fileBase64 = fileLoadedEvent.target.result;
                fileBase64 = fileBase64.substring(fileBase64.indexOf(",")+1);
                params.file = fileBase64;
                params.fileIsBase64 = true;
                };
                reader.readAsDataURL(fileNotBase64);
                });
        } else ebs.showMessage("A file was already uploaded!", "error");
});

// Sign document button
$("#btnSign").click(function(e) {
                signContract();
}); <div> </div>.STEP 4. Define who has access to the journey
If your business case requires that the custom flow is available to designated roles within your organization, click the Security Roles tab and add the security roles who should have access to them. If no security roles are added here, all users will be able to view the journey. For more information, see Creating Security Roles.
STEP 5. Save the journey
If you want to save and close the journey, at the top-right corner of the page click the Save and close icon.
If you want to save the journey and continue working on it, click the Save and reload icon.
STEP 6. Display the Custom Flow on the Portal
To add the flow to the dashboard, complete the following steps:
- Navigate to the main menu, open the Digital Frontends, select the Digital Experience Portals.
- Click on the Dashboards and from the list choose the dashboard name where you wish to place the flow.
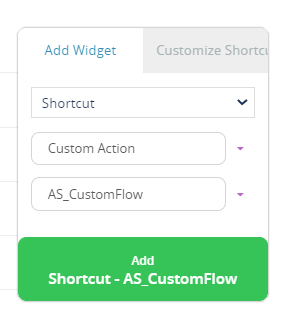
- The layout of the dashboard will open. Navigate to the right panel where there is a control table which adds the widgets.HINT
If the dashboard does not have the checkbox ''Show on homepage'' equal true, then the dashboard will not be shown in the FintechOS Portal. Thus, any widget added to that dashboard will not be displayed. - Select the type ''Shortcut'', followed by the ''Custom Action'', and lastly the entity.
- Click on the button which says ''Add Shortcut-EntityName''.
To add the flow as a menu item, complete the following steps:
- Navigate to the main menu, open the Digital Frontends, select the Digital Experience Portals.
- Click on the Menu Items. Click on ''Insert''.
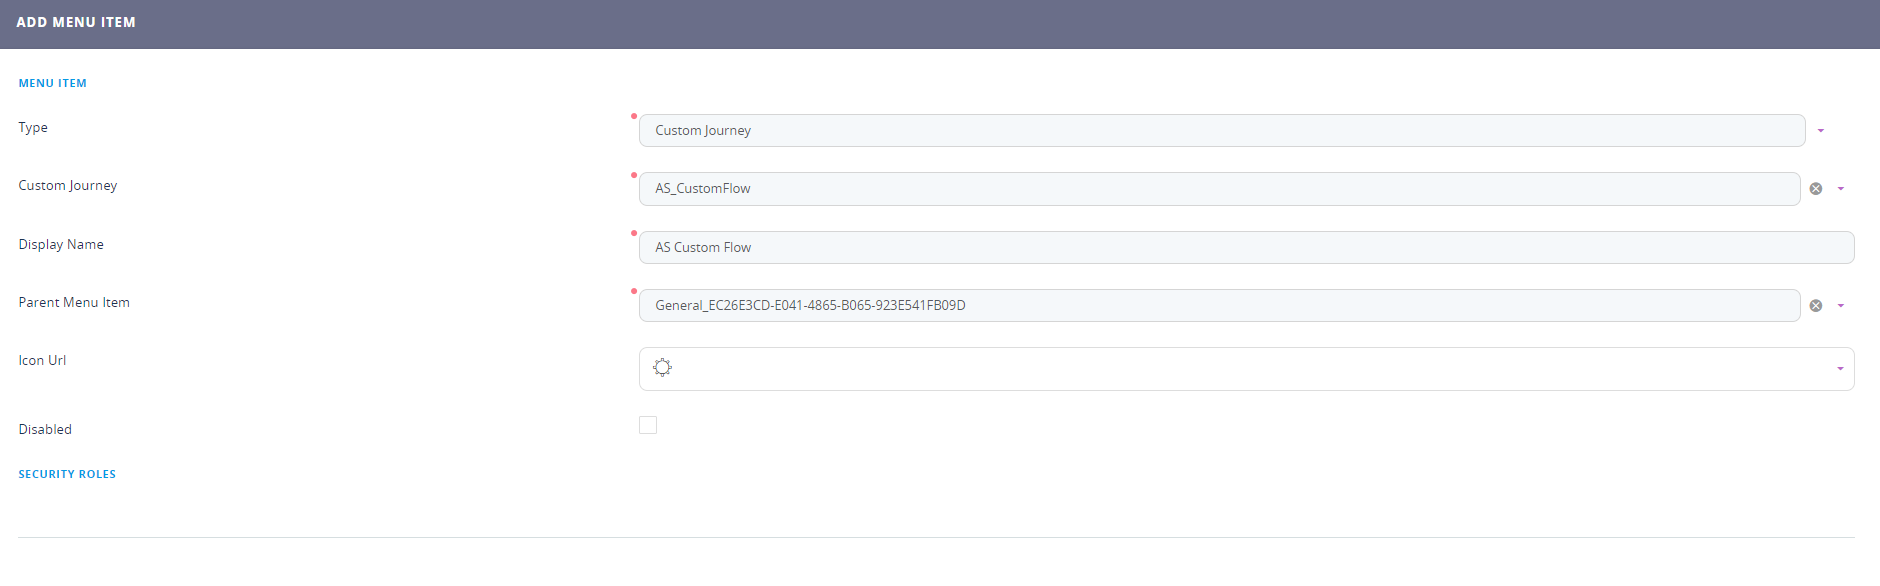
- The ''Add menu item'' page will open. Fill in the following:
Field Description Type Select from the list:
- Entity
- Custom journey
- Report
- Menu section.
Custom Journey This field will open once you have chosen the type. Select the flow you wish to add. Display Name Insert the name of the flow. Parent menu item This field is optional, only if you are adding the flow inside another menu item. It shows the name of the menu item inside where the flow will appear.
Icon URL Select the desired icon. Disabled
Tick this checkbox if you wish to disable it.
- Click the ''Save and reload''. The Edit menu item page will appear.
- Add security roles by clicking the ''Insert existing.''