Header Items
When creating user journeys, the Header Items tab allows you to provide users visibility to the most relevant information (attributes). It also allows you to make the form driven flow's header sticky on scroll, which is useful when a data form has many attributes and users have to scroll-down to complete it.
To add a new header item:
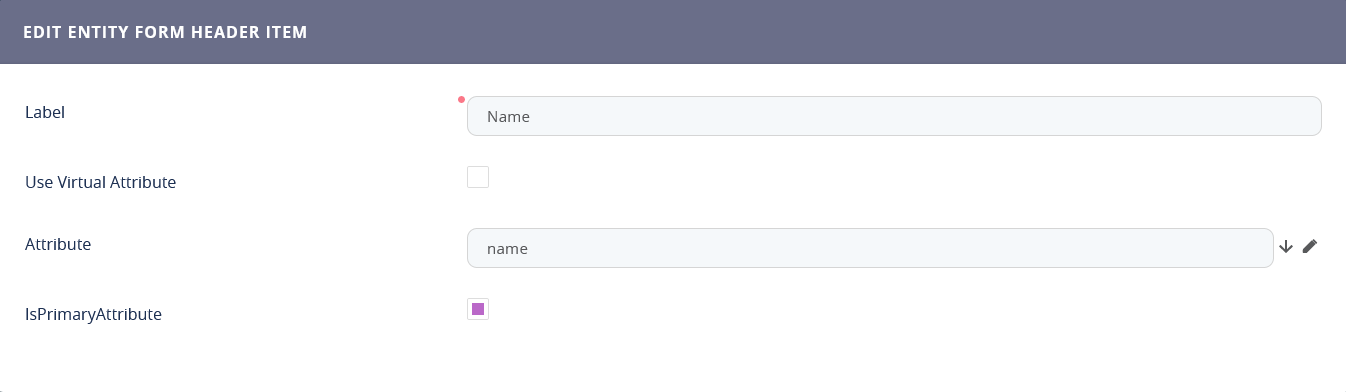
- Click the Insert button. The Add New Header Item page will be displayed.
- Fill-in the following fields:
Field Description Label The name of the header item which will be displayed on the form driven flow. Use Virtual Attribute Select if you wish to display a virtual attribute from the entity's extended data model, instead of a regular attribute. This will replace the Attribute field with a drop-down called Virtual Attribute which will allow you to select virtual attributes instead of regular attributes. Attribute/Virtual Attribute The value of the entity attribute which will be displayed on the journey header item. If you selected the Use Virtual Attribute checkbox, you will be able to choose virtual attributes from the entity's extended data model. Is Primary Attribute Tick only if the attribute to be displayed in the digital journey header is also the entity's primary attribute. 
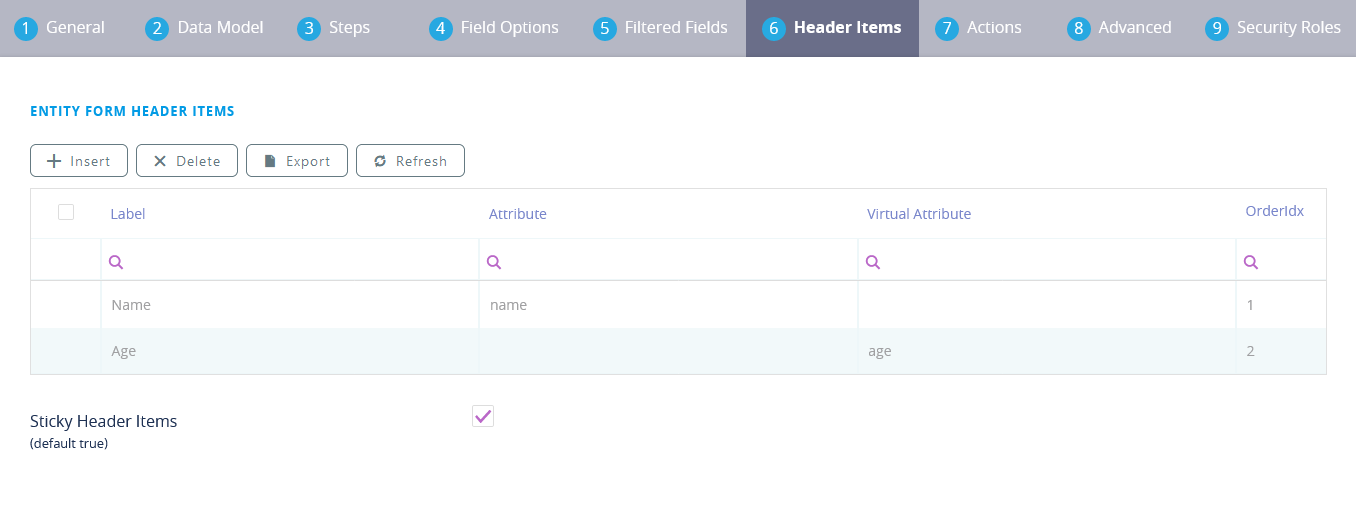
- In the upper-right corner of the page, click the Save and close icon. The page refreshes and the header item will be displayed in the Entity Form Header Items list.
By default, the header item has the order index set to 1. Add as many header items as you need, then from the Entity Form Header Items list set their display order on the data form, by drag and dropping rows. The header items order is ascendant, whereas the first row (header item) has the order index set to 1.
The data form header is by default sticky on scroll. If you do not want to have a sticky data form header, tick clear the Sticky Header Items checkbox.