Using Custom Theme
This section walks you through the steps that you need to follow to use a custom theme for the Digital Experience Portal:
STEP 1. Create custom theme
To create a custom theme, from the menu, click Admin > Settings . The Portal UI configuration page is displayed on the General tab.

Click the Custom Theme tab. The list of custom themes you defined will be displayed. If you haven't created any custom themes, the list will be empty. Click the Insert button. The custom theme configuration page will be displayed on the General tab.
Provide a name for the custom theme and select the base theme.
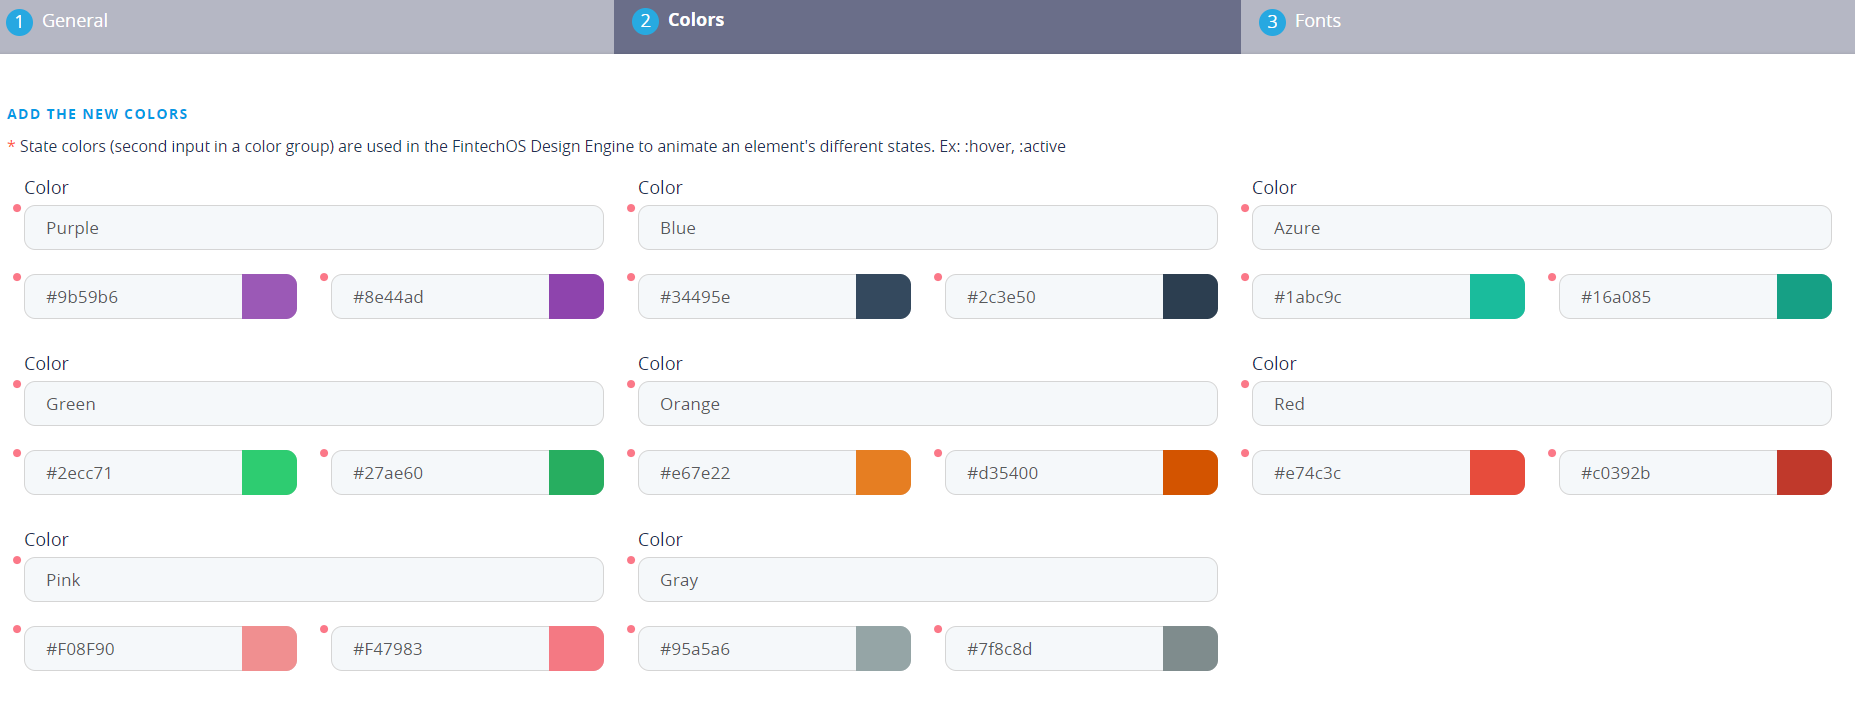
Click the Colors tab to access extensive settings for your custom theme.
In the Add the new colors section, you can customize 16 colors from the base theme previously selected by providing the desired color hexa values.
In the Match the new state colors section, set the matching colors for different system notification messages. Read the on screen information on the recommended colors.

Once you select the matching colors for the different system notifications, a new section is displayed at the bottom of the configuration page and lists the new css color classes.

In the Generate the new palette colors section, select three colors of the 16 colors customized in the Add new colors section. Based on these colors, a palette will be generated to the new custom theme.

You can also overwrite system fonts with your preferred font styles. To do so, click the Fonts tab. Click the drop-down arrow next to the Custom Font field. A pop-up will be displayed listing all custom fonts you have created. Double-click the desired custom font to be used. If no custom fonts have been defined, click the Insert button. The Add Custom Font page will be displayed.
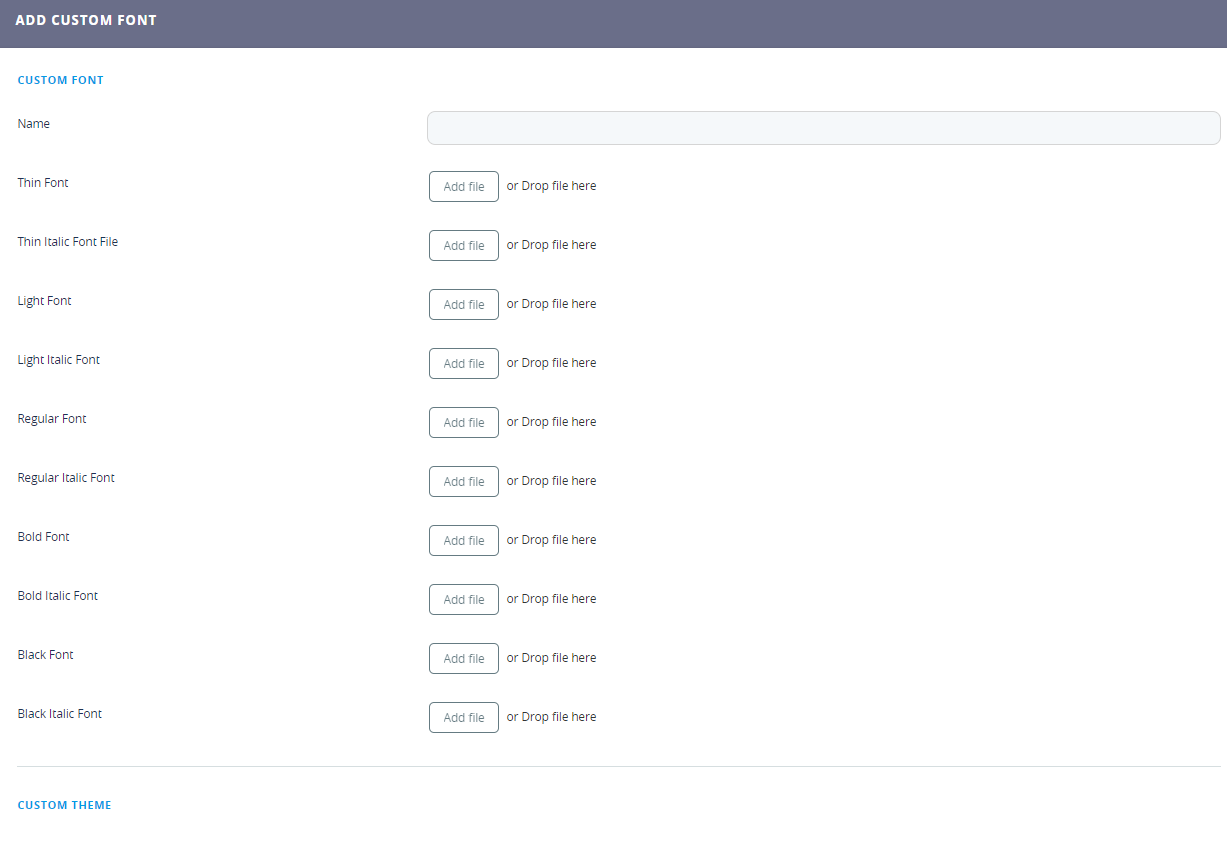
In the Name field, provide a unique name for your custom font and based on the system fonts that you want to customize, drag and drop the new fonts as needed.
Save the new custom font and double-click it. Save the new custom theme by clicking one of the save icons at the top-right corner of the page. To use the new custom theme, make it default.
STEP 2. Set default custom theme
If you want to apply a custom theme to the Portal UI, on the server where you have installed FintechOS, open the web.config file and add the following setting:
<appSettings>
        <add key="feature.customTheme" value="CustomTheme" />
        ...
</appSettings>
STEP 3. Apply custom theme to the Portal UI
- From the menu, click Admin > Settings . The Portal UI configuration page will be displayed on the General tab.
- Select the Use Custom Styles checkbox and type the name of the folder.

If you're using a custom theme for the Portal UI, in the top-right Settings menu, the options to choose theme and palette will no longer be available.