Manage Quotes
The Quote Admin solution enables you to manage quotes and offers. In FintechOS Portal, you can view the list of all quotes, together with details like coverages, insured amounts, etc.
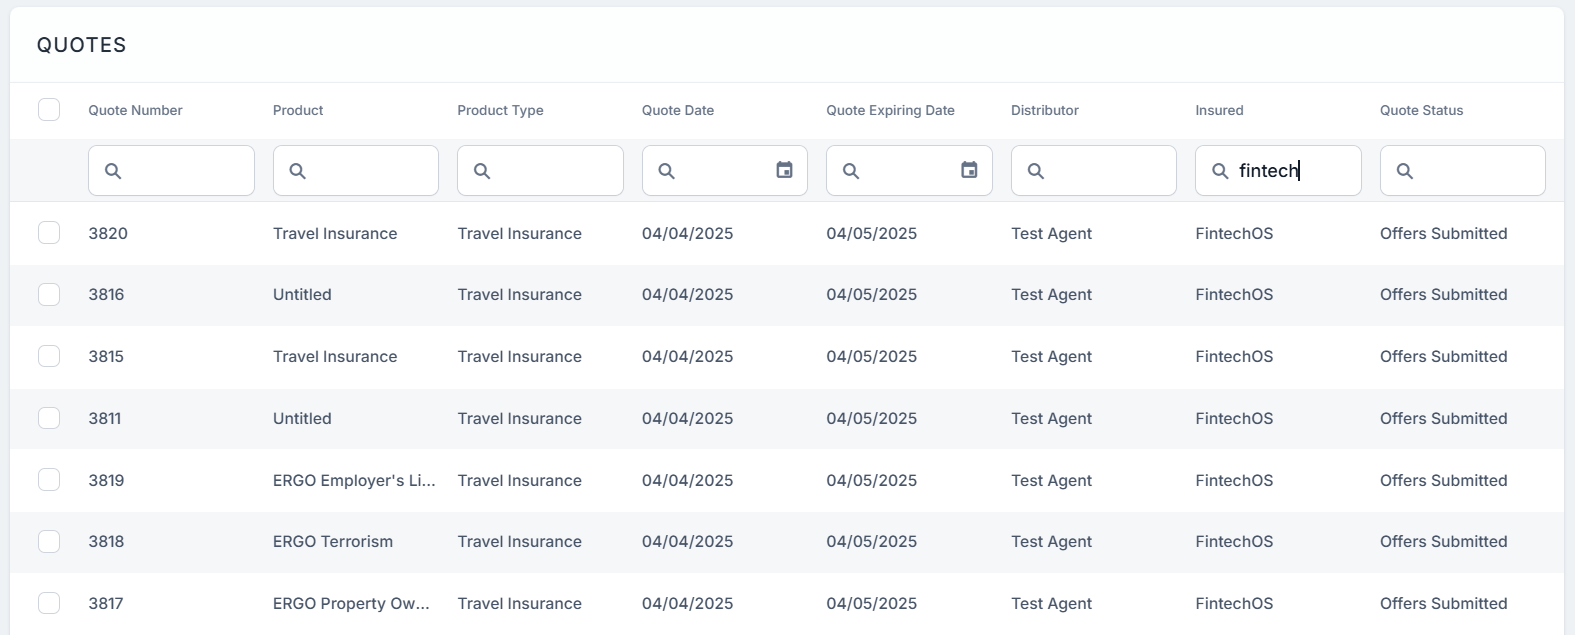
View Generated Quotes
There are two ways you can access the list of existing quotes in FintechOS Portal:
-
Go to Main Menu > Quote Admin > Quotes.
-
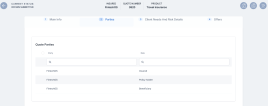
Double-click any quote record to view its components. The quote form opens, displaying the first tab, Main Info, with the following sections:
-
The Quote Details section. The details in this grid are read-only.
-
Quote Number: The unique identifier of the quote record;
-
External Number: The external reference of the quote;
-
Quote Date: The date when the quote takes effect;
-
Quote Expiring Date: The expiration date of the quote. When the current date is greater than the expiring date, the quote transitions to the Expired status;
-
Product Type: The insured product type;
-
Product: The insured product;
-
Policy Validity: The numeric value of the policy validity;
-
Policy Validity Type: The policy validity type: months, days etc;
-
Policy Start Date: The date when the policy takes effect;
-
Policy End Date: The date when the policy effect ends;
-
Renewal: The renewal type for the contract;
-
Mentions: Mentions regarding the quote;
-
Quote Type: The type of the quote.
-
-
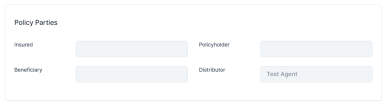
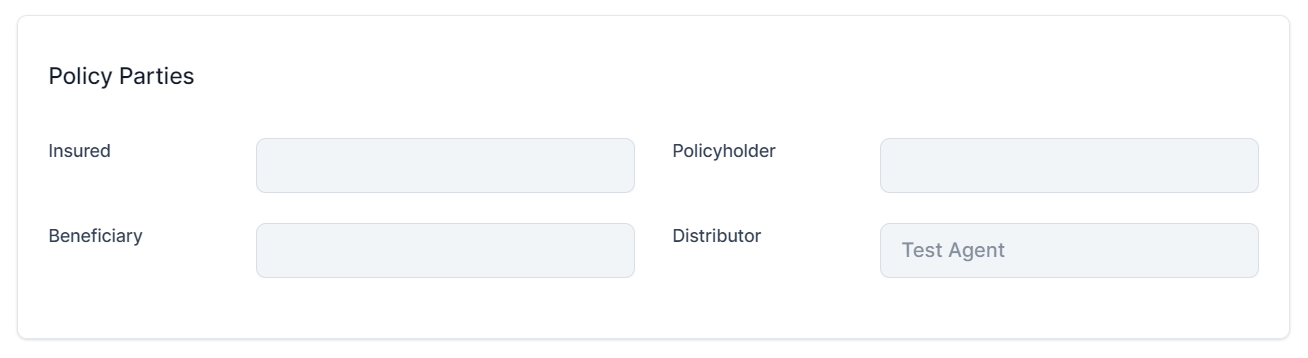
The Policy Parties section. The details in this grid are read-only, provided in the registerQuote API.
-
Insured: The insured party of the quote;
-
Policyholder: The policyholder;
-
Beneficiary: The beneficiary of the insurance;
-
Distributor: The quote distributor.
-
-
-
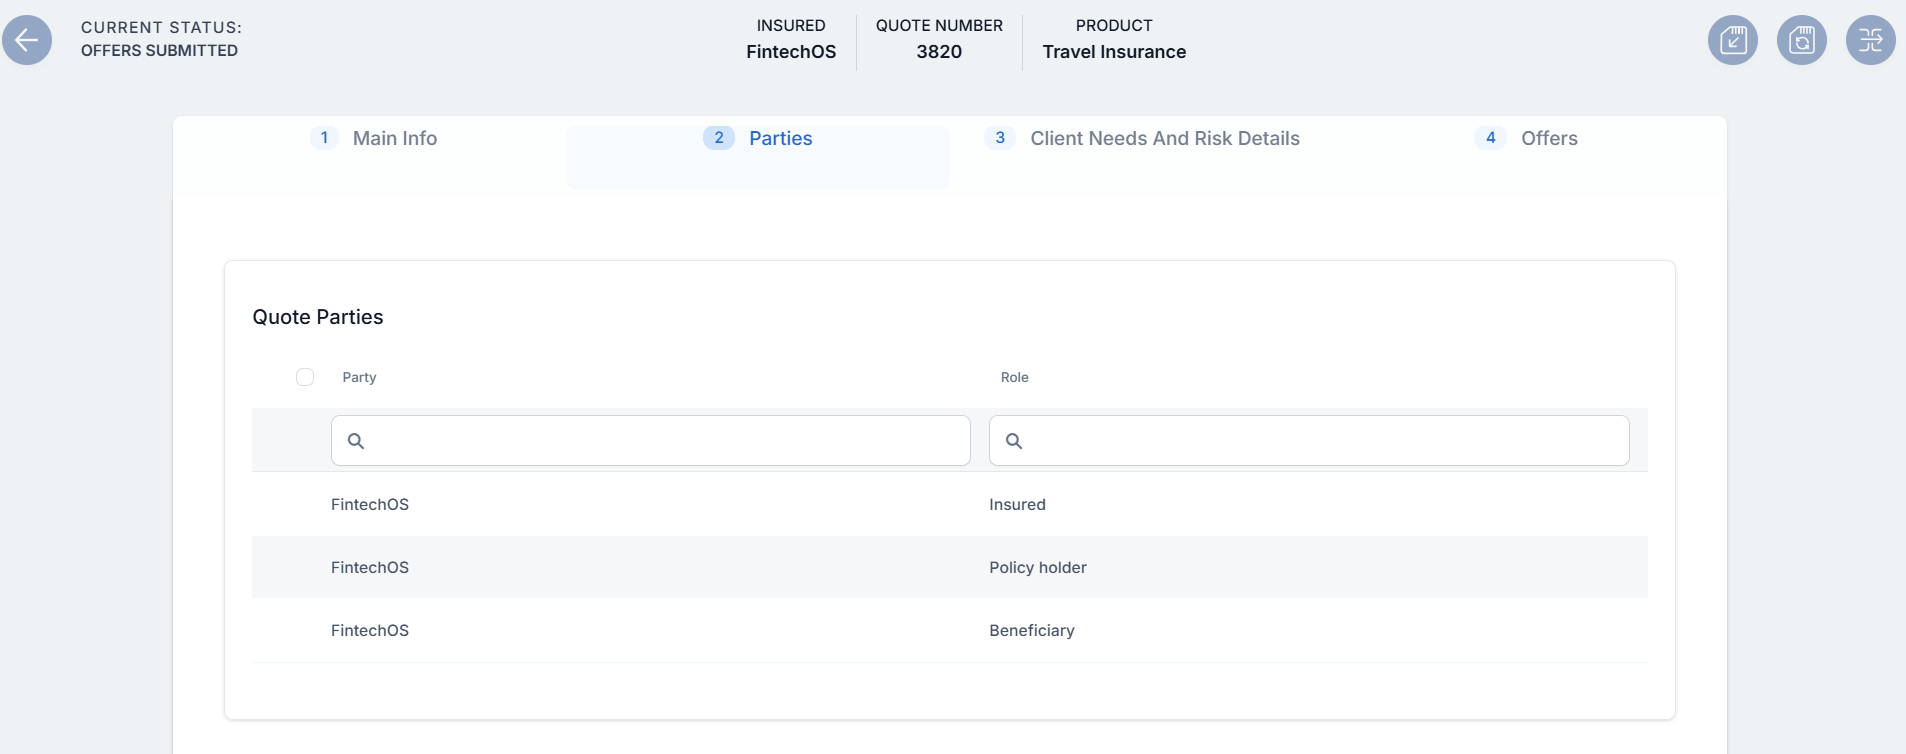
Click the second tab, Parties to display the list of all parties involved in the quoted policy.
-
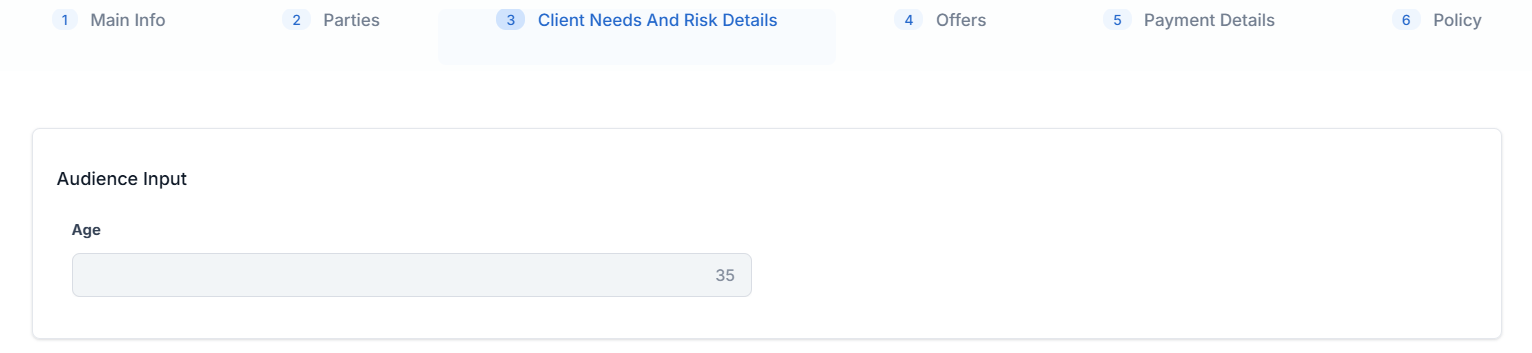
Click the third tab, Client Needs and Risk Details. The following sections are displayed:
-
If the quote was created in versions prior to v24, then the Client Needs (DNT) section contains the DNT questions and the answers provided by the customer.
-
If the quote was created in v24, thus with the new Product Factory, then the section displays the Audience Input:

-
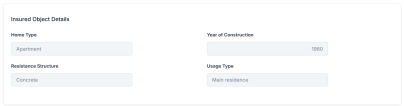
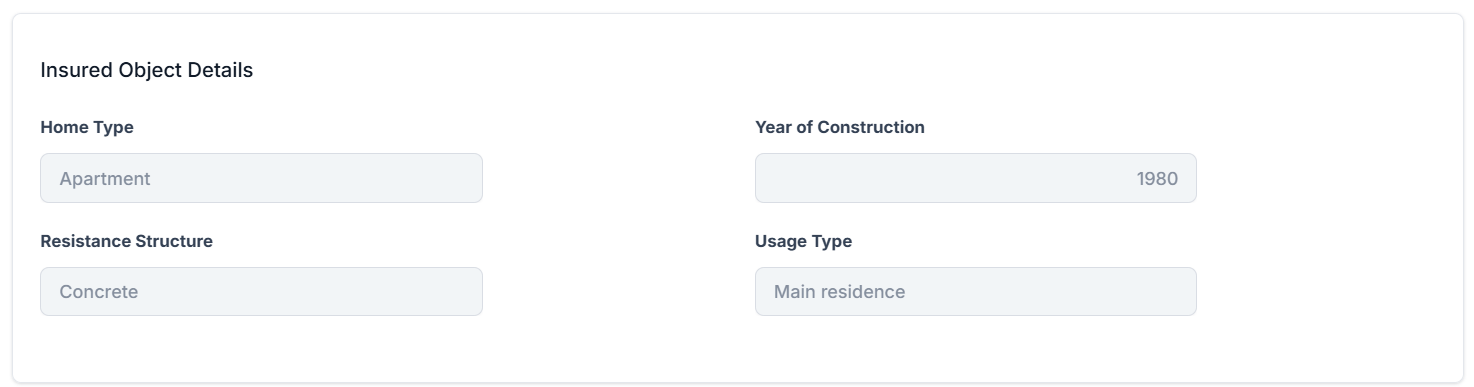
The Insured Object Details section lists data about the object that is insured.
-
-
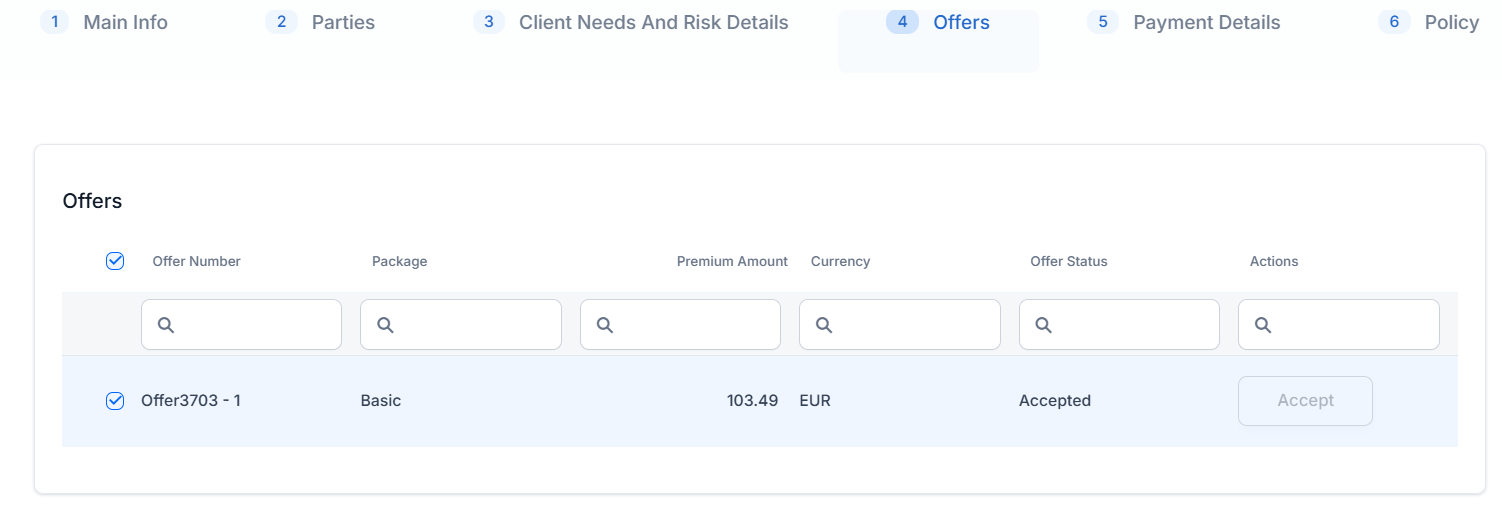
Click the Offers tab. This section contains the records of all the quote offers made for the beneficiary, and they can choose to either Accept or Decline them.
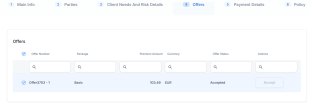
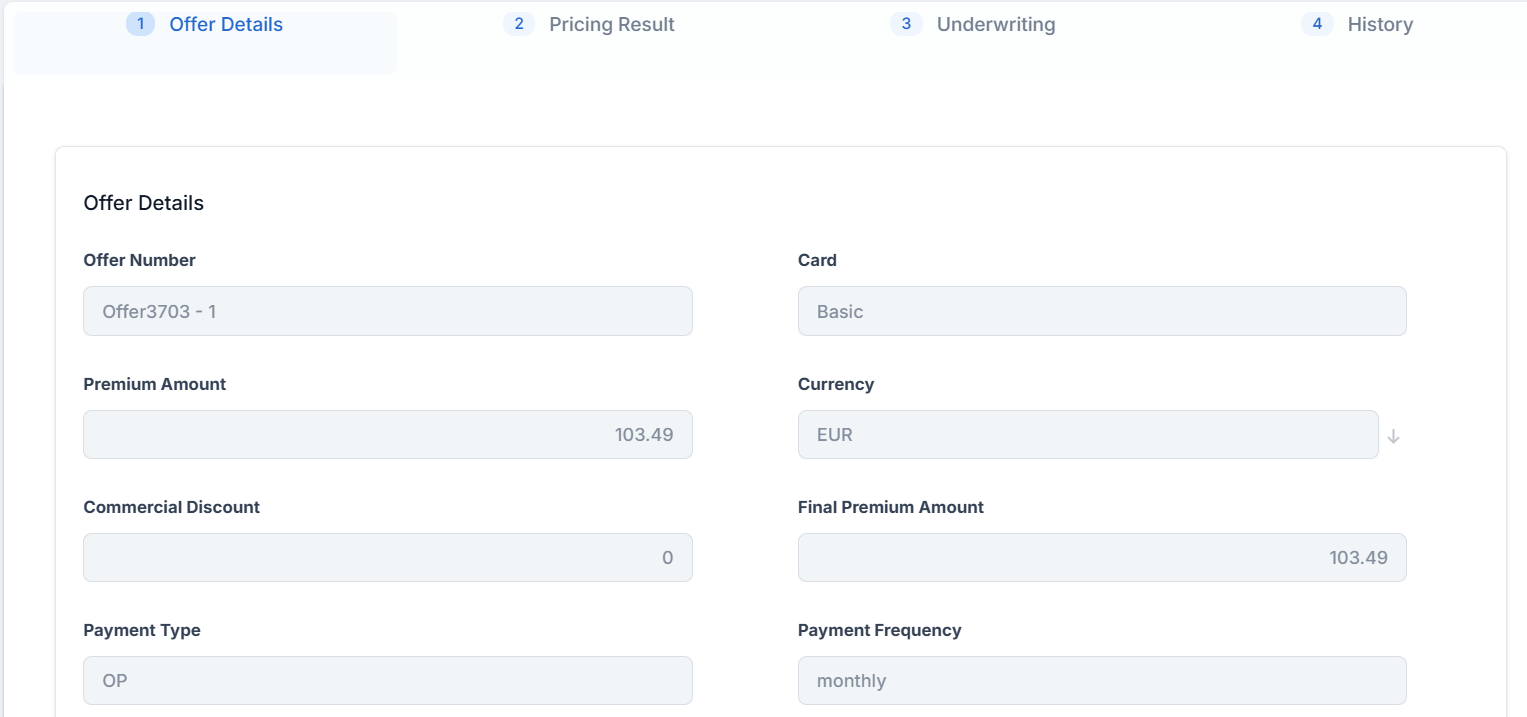
Double-click an offer to open:
-
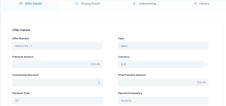
Offer Details: displays the premium amount, currency, payment frequency, payment type.
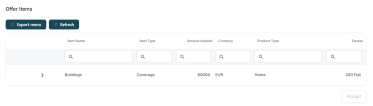
Offer Items: shows the insured amount, currency, excess for each coverage. Expand a coverage such as Medical expenses or Luggage and Cancellation to open its sub-coverages:
-
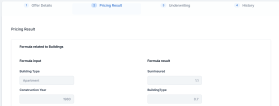
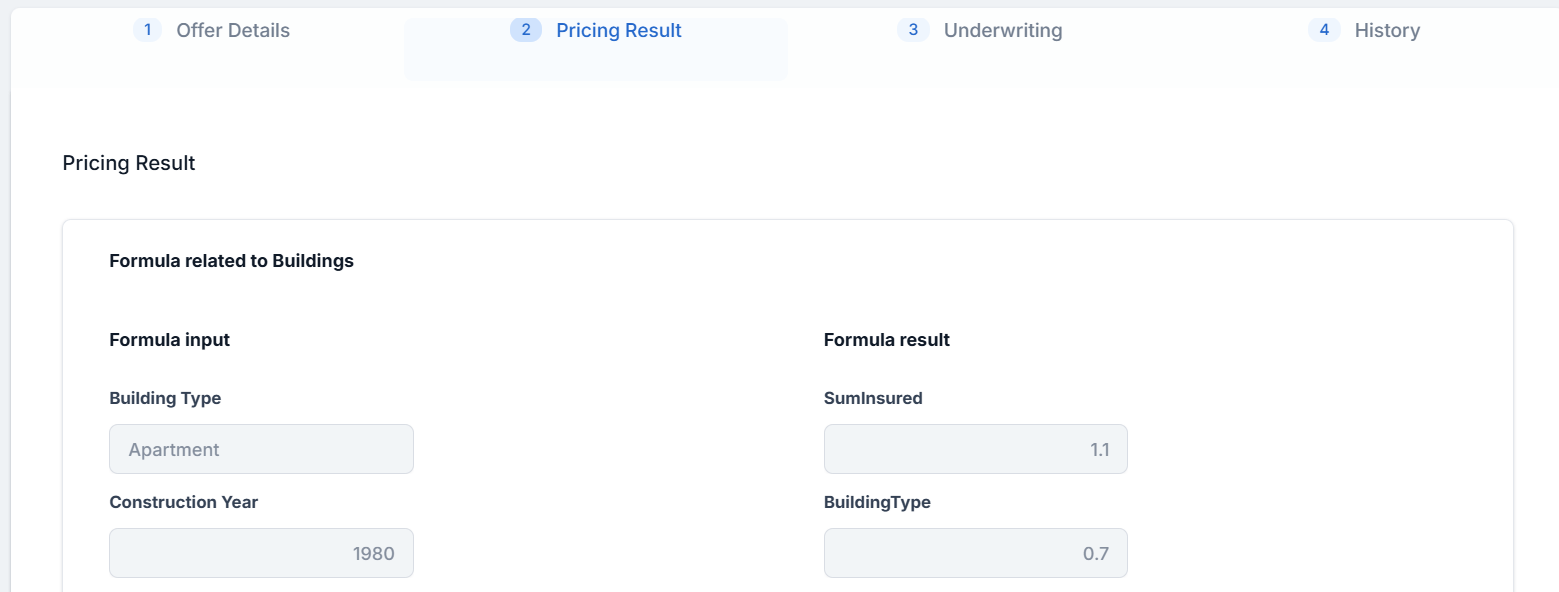
Pricing Result: for each coverage, it displays the values of inputs for the formula, and formula results for parameters.
-
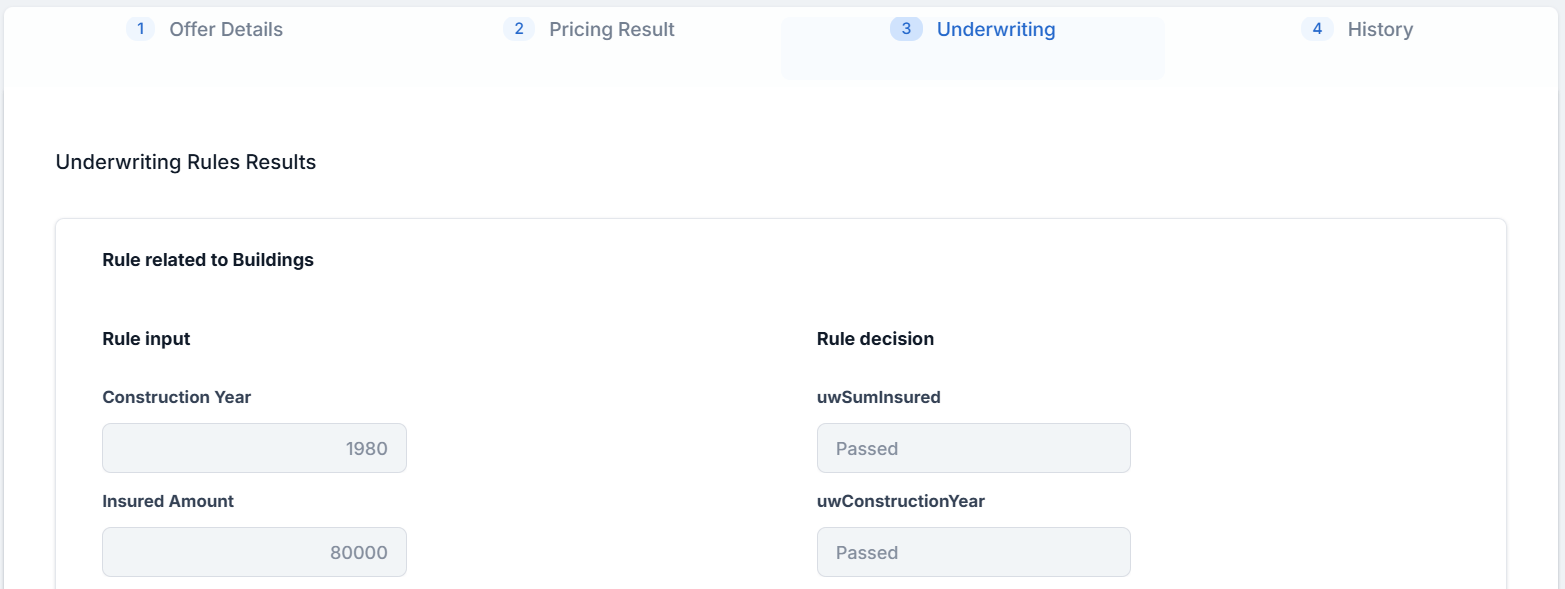
Underwriting: the underwriting rules results for each chosen coverage, based on their formulas.

-
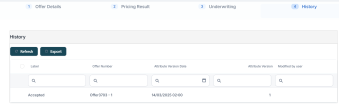
History: shows modifications to offers, together with the timestamp and the user name.
-


Accept a Quote Offer and Issue the Policy
-
Go to the Offers tab of a quote in Offer Submitted status, and click Accept on the quote offer button. The status of the quote transitions to Accepted.
-
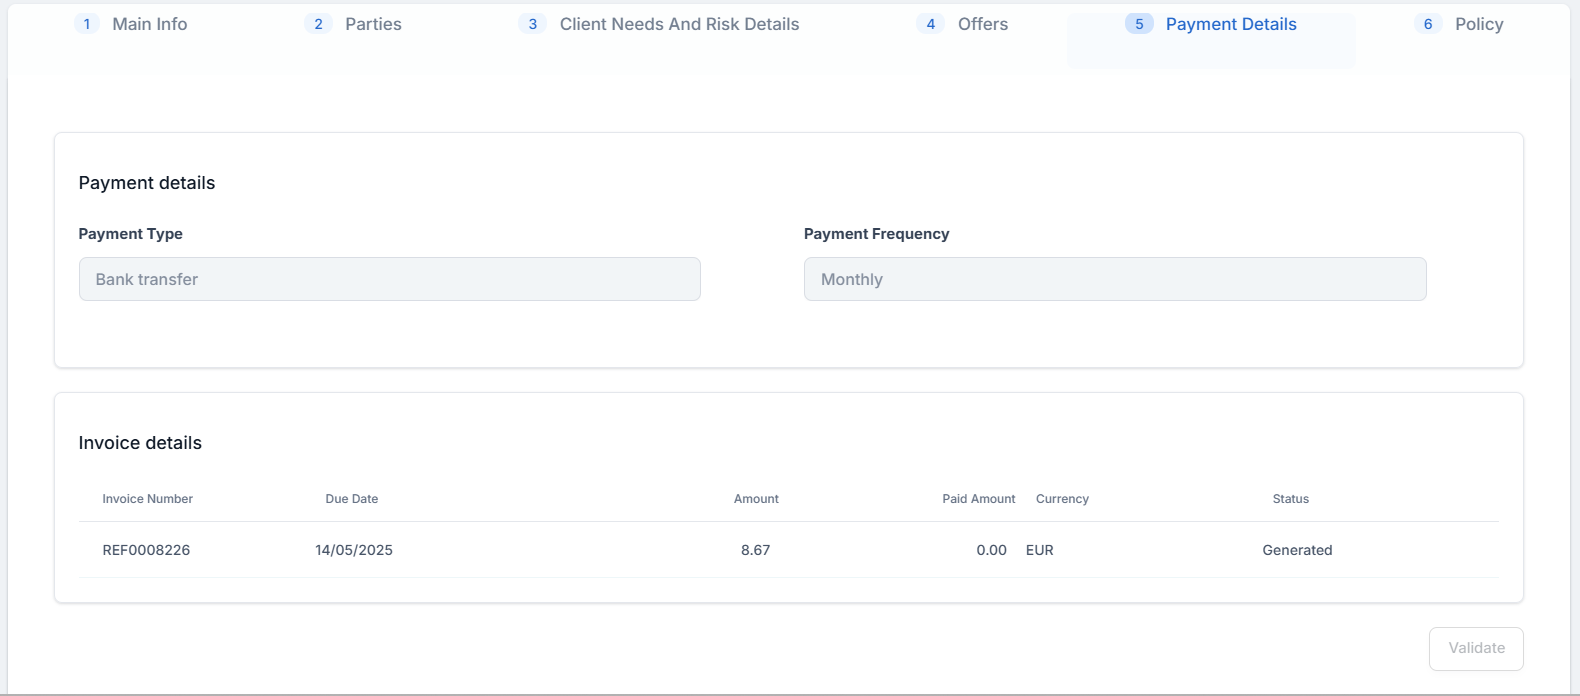
Go to the new tab, Payment Details. Choose the Payment Type and enter the necessary details.
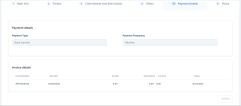
-
Click Validate. The invoice and the mandate details are generated, and displayed in the newly unfolded Invoice details and Mandate details sections of the tab.
-
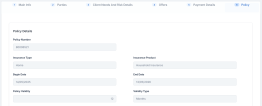
Go to the Policy tab, inspect the basic details of the policy to be generated, choose a Begin Date, and click Issue Policy. The quote transitions to the Policy Issued status.
-
Click Save and close.
-
Go to Main Menu > Policy Admin > Policies, and open the newly issued policy.