Configure Policy Parties
You can define and configure the roles involved in a policy in FintechOS Portal. You can create a role, name it, and match it against a matrix that reflects the standard, most encountered roles (Insured, Policy Holder, Beneficiary, or define Other parties).
Once you have made your configurations, the system identifies the parties that are to be received through quote and policy generation APIs (including those for master quotes and master policies) and displays the parties in the quote, master quote, policy and master policy forms.
When it comes to the policy roles, the following rules are applied when generating the polcies, masterpolicies, quotes and master quotes APIs:
-
There can be only one Insured or for one Policy;
-
There can be only one Policy holder for one Policy;
-
There can be one Policy holder for a master policy and policy;
-
Policies and master policies can have multiple beneficiaries;
-
Policies and master policies multiple Other Parties.
Follow the steps below to configure policy parties:
-
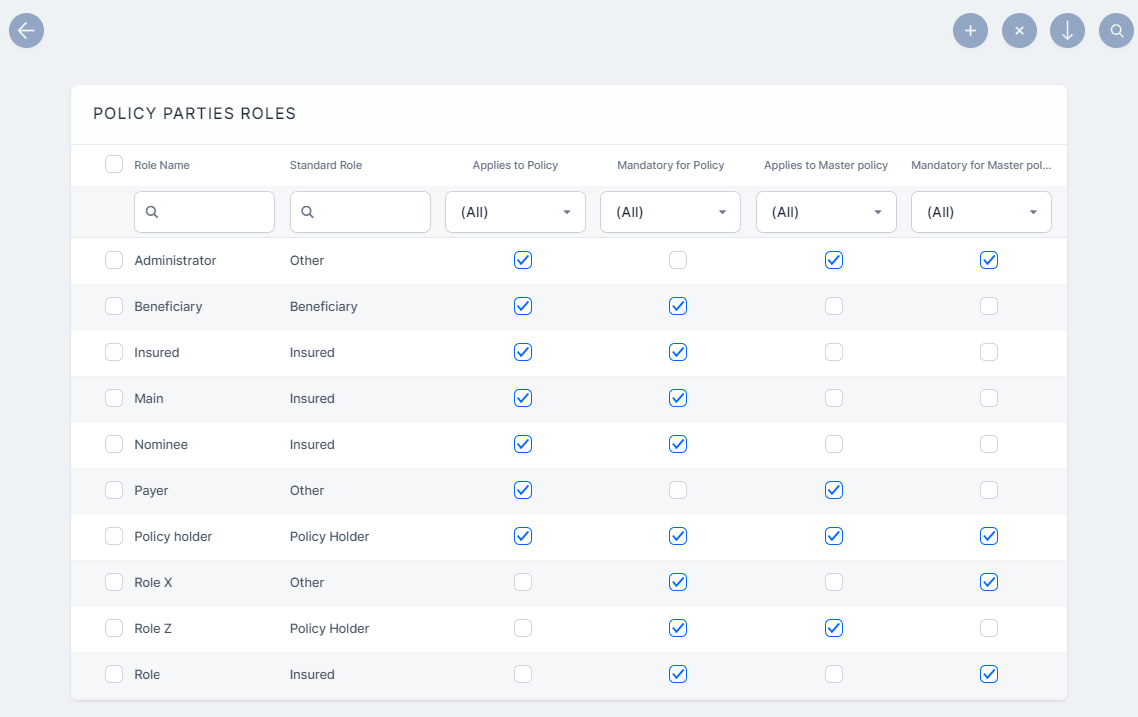
In FintechOS Portal, go to Main Menu > Settings > Policy Parties Roles. The list of all defined policy parties is displayed.

-
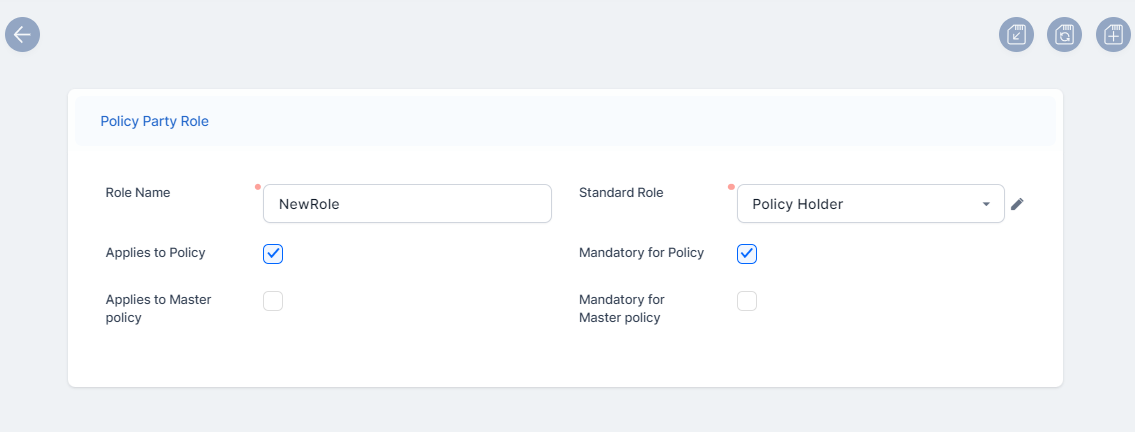
Click Insert to add a new role.
-
Fill in the Policy Party Role form, with the following information:
-
Role Name: A unique name for the policy party role;
-
Standard Role: From the drop-down, choose one of the following values: Insured, Policy Holder, Beneficiary, or Other;
-
Select the type of contract the role applies to (policy or masterpolicy);
-
Mark if the role is mandatory to be received for a policy or a master policy, and their quote or master quote.

-
-
Click Save and Close. The role is now registered in the system, in the Policy Parties Roles list.