Authentication with Active Directory Federation Services
This service provided by Microsoft manages the user sign-in information for members of a platform. If your organization is using ADFS for identity and access management of your users, it is possible to map the users already existing in ADFS to FintechOS Security Roles. When a user is authorized with ADFS, a corresponding system user is created in FintechOS. Through ADFS OpenId, users to log in to FintechOS using their existing ADFS credentials.
Add keys to Vault secrets
| Key Path | Key Name | Key Value |
|---|---|---|
| kv/<environment>/<application>/app-settings | EBSDefaultAuthentication | ADFS |
ADFS configuration:
| Key Path | Key Name | Key Value |
|---|---|---|
| kv/<environment>/<application>/app-settings | openid-client-id | Client identifier configured in ADFS |
| kv/<environment>/<application>/app-settings | openid-application-id | this value is not used |
| kv/<environment>/<application>/app-settings | openid-client-secret | ADFS Web API shared secret |
| kv/<environment>/<application>/app-settings | openid-callback-url | http://{portalRoot}/Account/LogonCallback |
| kv/<environment>/<application>/app-settings | openid-discovery-endpoint | {adfs server uri}/adfs/.well-known/openid-configuration |
User mapping settings:
| Key Path | Key Name | Key Value |
|---|---|---|
| kv/<environment>/<application>/app-settings | openid-auto-user-roles | Registered User,My default role |
| kv/<environment>/<application>/app-settings | openid-auto-user-organization | ebs |
| kv/<environment>/<application>/app-settings | openid-auto-user- businessunit | root |
| kv/<environment>/<application>/app-settings | openid-auto-user-type | Back Office |
| kv/<environment>/<application>/app-settings | openid-auto-user-remote-roles-add | 0|1 |
| kv/<environment>/<application>/app-settings | openid-auto-user-remote-roles-sync | 0|1 |
Configuration Keys:
| Key | Value |
|---|---|
| openid-auto-user-roles | Platform role names, separated by colon. These roles will be added automatically when the AD user is mapped to a platfrom user |
| openid-auto-user-organization | Platform organization name. The mapped user will be added in this organization |
| openid-auto-user-businessunit | Platform business unit name. The mapped user will be added in this business unit |
| openid-auto-user-remote-roles-add | when value is 1 the roles from AD will be added to the mapped user on user creation. See below how to expose the AD roles in custom claims consumable by FintechOS |
| openid-auto-user-remote-roles-sync | when value is 1 the roles from AD and the default roles are always synchronized at login. Any roles manually added to a AD user are lost |
Parameters:
| Parameter | Value |
|---|---|
| {portalRoot} | root url for FintechOS portal |
|
{adfs server url} |
ADFS server url |
<add key="EBSDefaultAuthentication" value="ADFS" />

    <!-- BEGIN ADFS OPENID CONFIGURATION -->

    <add key="openid-client-id" value="Client identifier configured in ADFS" />

    <add key="openid-application-id" value=" this value is not used "/>
    <add key="openid-client-secret" value="ADFS Web API shared secret"/>

    <add key="openid-callback-url" value="http://{portalRoot}/Account/LogonCallback" />

    <add key="openid-discovery-endpoint" value="{adfs server uri}/adfs/.well-known/openid-configuration" />

    <!-- USER MAPPING SETTINGS -->

    <add key="openid-auto-user-roles" value="Registered User,My default role" />
    <add key="openid-auto-user-organization" value="ebs" />
    <add key="openid-auto-user-businessunit" value="root" />
    <add key="openid-auto-user-type" value="Back Office" />

    <add key="openid-auto-user-remote-roles-add" value="0|1"/>
    <add key="openid-auto-user-remote-roles-sync" value="0|1"/>

    <!-- END ADFS OPENID CONFIGURATION -->
ADFS configuration
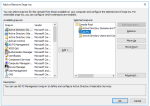
- On a Windows Server 2016+, on the ADFS server open the Microsoft Management Console (mmc).
- Add the ADFS snap in if not already added.
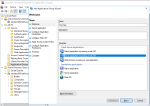
- Open the ADFS MMC plugin and select the node Application Groups.
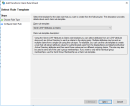
- Right click and select Add application group. In the template list select Server application accessing a web API.
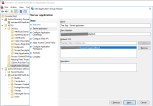
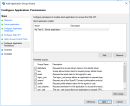
- Configure the client identifier and the redirect (callback) Url.
- Client identifier should be an global unique identifier. This value must be set in the openid-client-id configuration item in FintechOS.
- Redirect (callback) Url must be also be set in the openid-callback-url configuration item in FintechOS.
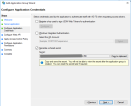
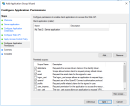
- Configure the shared secret. The shared secret must be set also in the openid-client-secret configuration item in FintechOS.
- Configure the Web API identifierIMPORTANT!
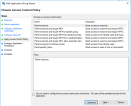
The Web API identifier must be THE SAME identifier as the one used for the CLIENT IDENTIFIER in the first step. - Configure Access Control Policy.
- Configure claims to be sent with the openid token.
- Following claims must be included: allatclaims, email, openid, profile.
- Review the configuration in the Summary step and go to Complete step.IMPORTANT!
In the following steps we need to expose the GROUP INFORMATION, EMAIL, GIVEN NAME and SURNAME information from AD directory to be included in the claims. This will permit the correct mapping of the users to FintechOS. - Double click the newly created Application Group.
- Select the Web API element and click the Edit... button.
- Go to tab Issuance Transform Rules and add a new rule of type Send LDAP Attribues in Claims
- Map the AD attributes as in the image below:

Group mapping in FintechOS
Once the system user has been created in the FintechOS Studio, it is possible to have default roles for this user, organization, business unit and user type configured in web.config.
To configure the mappings, an XML file named OpenIdUserConfiguration.xml must be placed in the root of the web application. When the ADFS configuration was performed as in the section above, the ADFS token for an user authentication will include a group claim with the names of the Groups where the user is member from AD.

