Using Okta as External Identity Provider
If your organization is using Okta for identity and access management, you can configure the FintechOS Identity Provider to act as an identity broker, allowing users to log in to FintechOS applications and services using their existing Okta credentials.
1 Create an Okta App Integration for the FintechOS Identity Provider
Sign in to your Okta admin console with your administrator account and create an app integration for the FintechOS Identity Provider. The Sign-in redirect URI must match the identity provider alias you will set up for Okta in the FintechOS Identity Provider and has the following structure:
https://{HPFI base URL}/auth/realms/{realm name}/broker/{alias}/endpoint
E.g.: https://myHpfi.myDomain/auth/realms/FintechOSRealm/broker/Okta/endpoint
Make a note of the following Okta settings which you will have to provide in the FintechOS Identity Provider for integration:
- Okta client ID (from the Okta app, General tab)
- Okta client secret (from the Okta app, General tab)
- Well-known configuration - This is an endpoint that returns the OpenID Connect metadata related to the Okta authorization server and has the following URL template:
https://{oktaDomain}.okta.com/oauth2/{oktaServer}/.well-known/openid-configuration
2 Set up the Okta server as Identity Provider in the FintechOS Identity Provider
- Log in to the FintechOS Identity Provider admin console and select your FintechOS realm.
- Open the Identity Providers section.
- From the Add provider... drop down, select OpenID Connect v1.0.
- Fill in the following configuration settings for the Okta server.
Setting Value Alias Identity provider alias you set for the Okta server (see 1 Create an Okta App Integration for the FintechOS Identity Provider). Display Name User friendly name for the Okta server. Enabled ON First Login Flow first broker login Sync Mode force Authorization URL https://{oktaDomain}.okta.com/oauth2/{oktaServer}/authorizeToken URL https://{oktaDomain}.okta.com/oauth2/{oktaServer}/tokenLogout URL https://{oktaDomain}.okta.com/oauth2/{oktaServer}/logoutUser Info URL https://{oktaDomain}.okta.com/oauth2/{oktaServer}/userinfoClient Authentication Client secret sent as post. Client ID Use your Okta client ID (from the Okta app, General tab). Client Secret Use your Okta client secret (from the Okta app, General tab). Issuer https://{oktaDomain}.okta.com/oauth2/{oktaServer}Default Scopes Scopes to be sent when asking for authorization. Default: openid email. Prompt unspecified Validate Signatures ON Use JWKS URL ON JWKS URL https://{oktaDomain}.okta.com/oauth2/{oktaServer}/keys - Click Save.
3 Map Okta User Groups to FintechOS Security Roles
When users log in, information about their security roles must be retrieved from the Okta server. For this purpose, you must set up an automatic mapping between Okta user groups and FintechOS Identity Provider security roles.
Set Up the ID Tokens Sent by Okta to Include Security Groups Information
You can include user groups information in the ID tokens sent by Okta as an optional claim. To do so, in the in the Okta portal:
- Hover over the API menu item and select Authorization Servers.
- Select your Okta authorization server.
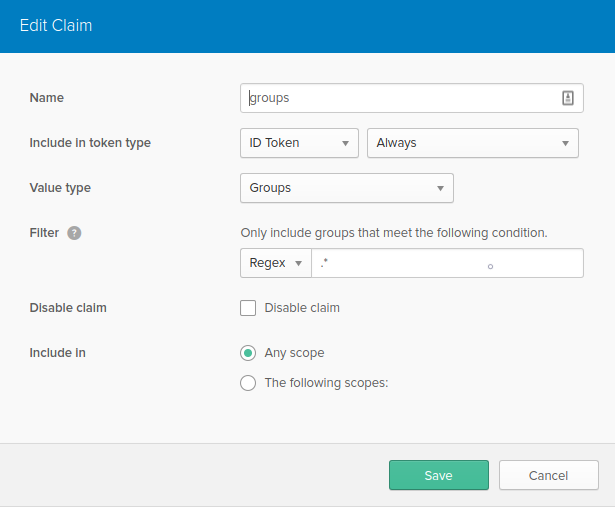
- Open the Claims tab and click Add Claim. Fill in the following fields:
Field Value Name groups Include In token type ID Token | Always Value Type Groups Filter Regex | .* Disable claim Uncheck Include In Any scope 
- Click Save.
Define Mappings between Okta Groups and FintechOS Security Roles
- Log in to the FintechOS Identity Provider admin console and select your FintechOS realm.
- Open the Identity Providers section.
- Select the Okta server you added earlier (see 2 Set up the Okta server as Identity Provider in the FintechOS Identity Provider).
- Open the Mappers tab.
- For each security role, do the following:
- Click Create.
- In the Add Identity Provider Mapper window, fill in the following fields:
Setting Value Name Enter a descriptive name for the mapper. Sync Mode Override legacy Mapper Type Claim to Role Claim groups Claim Value Name of the Okta group set up on the Okta server. Role Select the corresponding FintechOS security role. - Click Save.
4 Disable User Account Editing in Innovation Studio
Users who authenticate in FintechOS Platform via an external identity provider cannot have their user account information edited in Innovation Studio as modifications cannot be propagated back to the external identity provider.
In order to protect the user name, first name, last name, display name, email, and phone number fields, as well as the password reset button in the Innovation Studio interface, a hardcoded ftos-third-party-brokered-auth-provider attribute mapping must be provided by the FintechOS Identity Provider for such user accounts:
- Log in to the FintechOS Identity Provider admin console and select your FintechOS realm.
- Open the Identity Providers section.
- Open your external identity provider and select the Mappers tab.
- Click Create to create a new mapper.
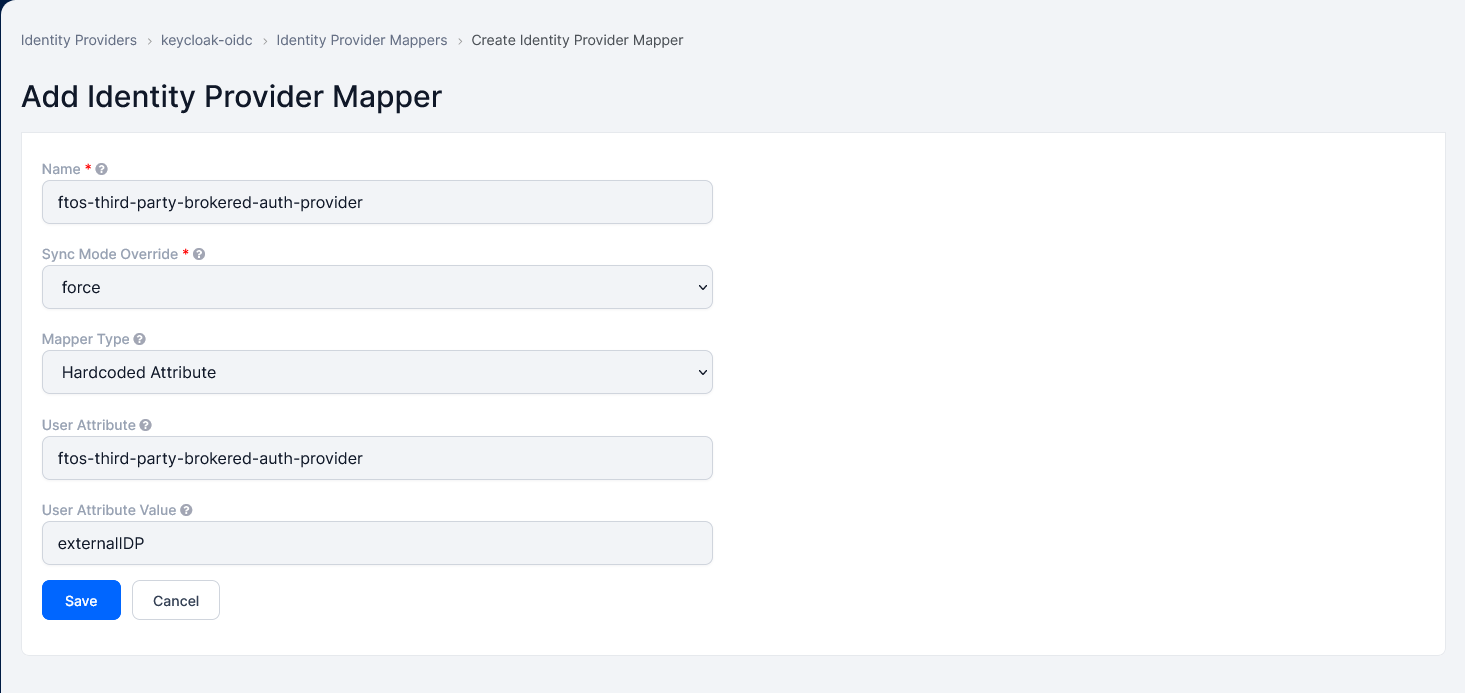
- Fill in the following fields:
- Name - Provide a name for your mapper
- Sync Mode Override - force
- Mapper Type - Hardcoded attribute
- User attribute - ftos-third-party-brokered-auth-provider
- User attribute value - Any non-null value will work, but it is recommended to use a value that is meaningful for your external identity provider, such as AzureAD or Okta.

- Click Save.