Using Google as External Identity Provider
If your organization is using Google for identity and access management, you can configure the FintechOS Identity Provider to act as an identity broker, allowing users to log in to FintechOS applications and services using their existing Google credentials.
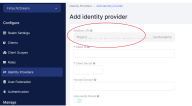
1 Identify the Redirect URI in FintechOS
-
Login to FintechOS Identity Provider.
-
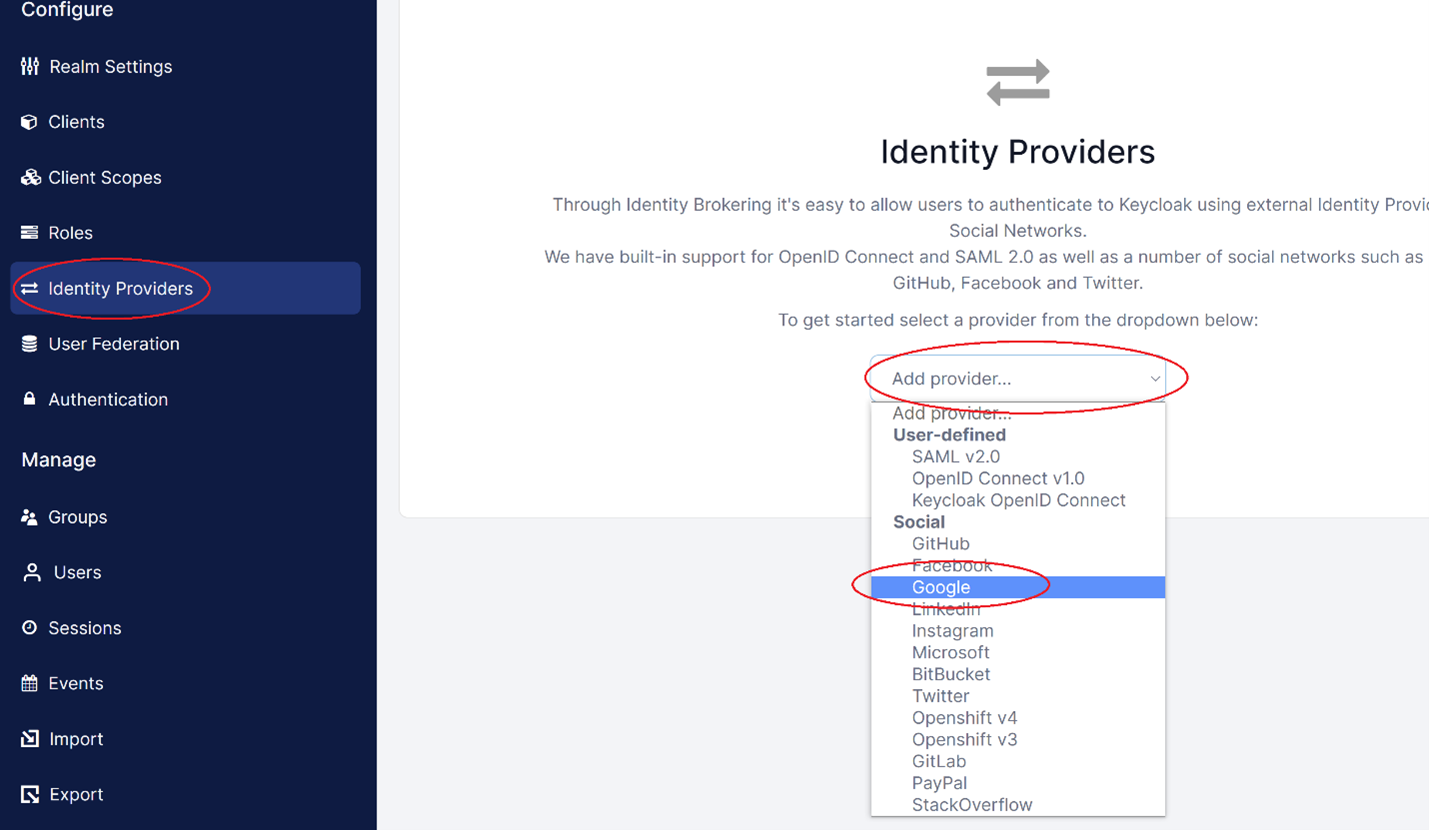
Go to Identity Providers > Add provider > select Google from the drop-down.

-
Identify the Redirect URI value and make a note of it. You will need it later.
2 Create a Google App for the FintechOS Identity Provider
-
Go to this page and sign in with your Google account to get to the Google Developers Console.
-
Select CREATE PROJECT and provide a Project Name, then select CREATE.
-
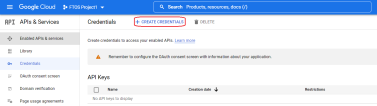
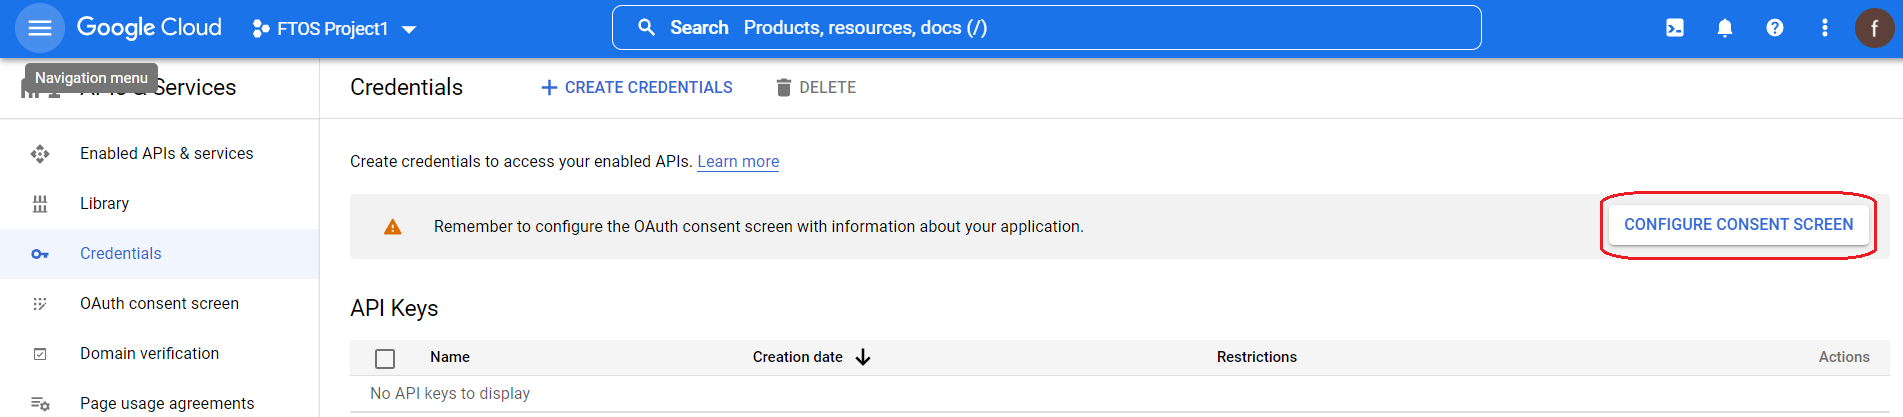
Go to the Credentials tab and select CONFIGURE SELECT SCREEN. This step is mandatory for the integration and it configures what the users see when they are redirected to Google for signing in.

-
In the OAuth consent screen page, check External, then select CREATE.
-
Next, in the Edit app registration page, fill-in the mandatory fields (App name, User support email, and Developer contact information). Then, select SAVE AND CONTINUE.
-
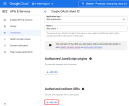
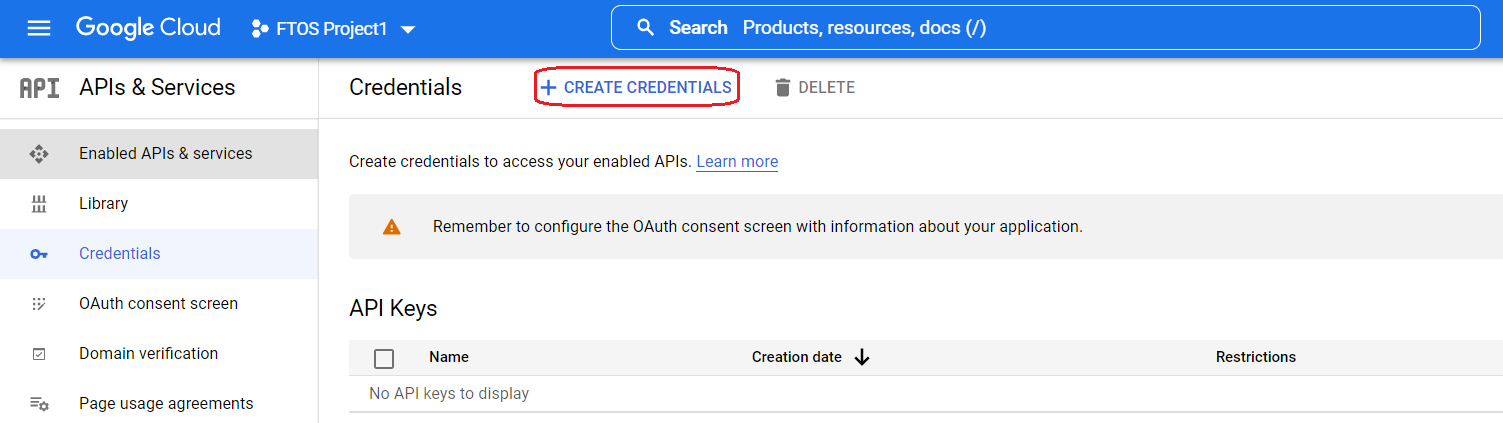
Go to the Credentials tab again and select +CREATE CREDENTIALS > OAuth client ID.
-
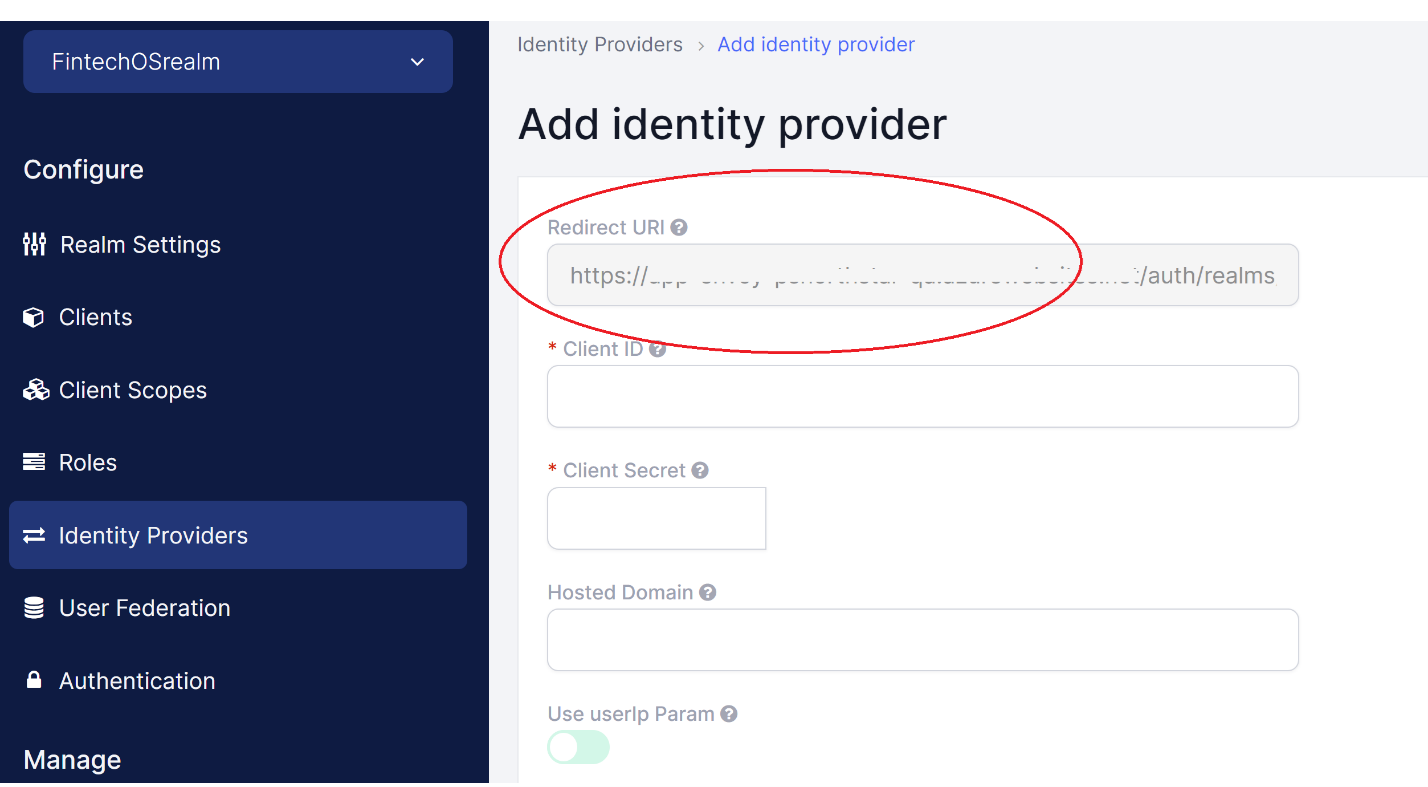
In the Create OAuth client ID page, select Web application from the drop-down, and select +ADD URI in the Authorized redirect URIs section. This is the value found in the FintechOS Identity Provider admin console, section Identity Providers (Redirect URI field), and it has the following structure:
https://{HPFI base URL}/auth/realms/{realm name}/broker/{alias}/endpoint.IMPORTANT! The Redirect URI value should match the FintechOS platform IDP. If this field is not correctly configured, the authentication process will return an error.
Multiple Redirect URIs can be configured during this step in order to integrate the same external provider with multiple applications, platforms, or portals.

-
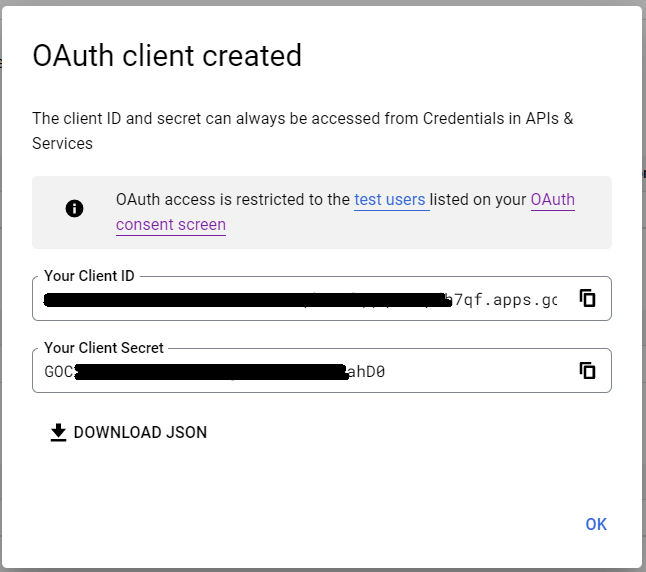
Select Create and make a note of the Client ID and Client Secret, you will need them while setting up the FintechOS Identity Provider.


3 Set up Google as Identity Provider in the FintechOS Identity Provider
- Log in to the FintechOS Identity Provider admin console and select your FintechOS realm.
- Open the Identity Providers section.
- From the Add provider... drop down, select Google.
-
Fill in the following configuration settings for the Google server.
Setting Value Client ID Use your Google client ID (from the Google console, Credentials tab). Client Secret Use your Google client secret (from the Google console, Credentials tab). Enabled ON First Login Flow first broker login Sync Mode import Hosted Domain
(*) When * is entered, any hosted account can be used
-
Click Save.
4 Configure the Attribute Mapper
Users who authenticate in FintechOS Platform via an external identity provider cannot have their user account information edited in Innovation Studio, as modifications cannot be propagated back to the external identity provider.
In order to identify external users in Innovation Studio, hardcoded ftos-third-party-brokered-auth-provider attribute mapping must be provided by the FintechOS Identity Provider for such user accounts:
-
Log in to the FintechOS Identity Provider admin console and select your FintechOS realm.
-
Open the Identity Providers section.
-
Open your external identity provider and select the Mappers tab.
-
Click Create to create a new mapper and fill in the following fields:
-
Name - Provide a name for your mapper
- Sync Mode Override - force
- Mapper Type - Hardcoded attribute
- User attribute - ftos-third-party-brokered-auth-provider
- User attribute value - Any non-null value will work, but it is recommended to use a value that is meaningful for your external identity provider, such as AzureAD or Okta.
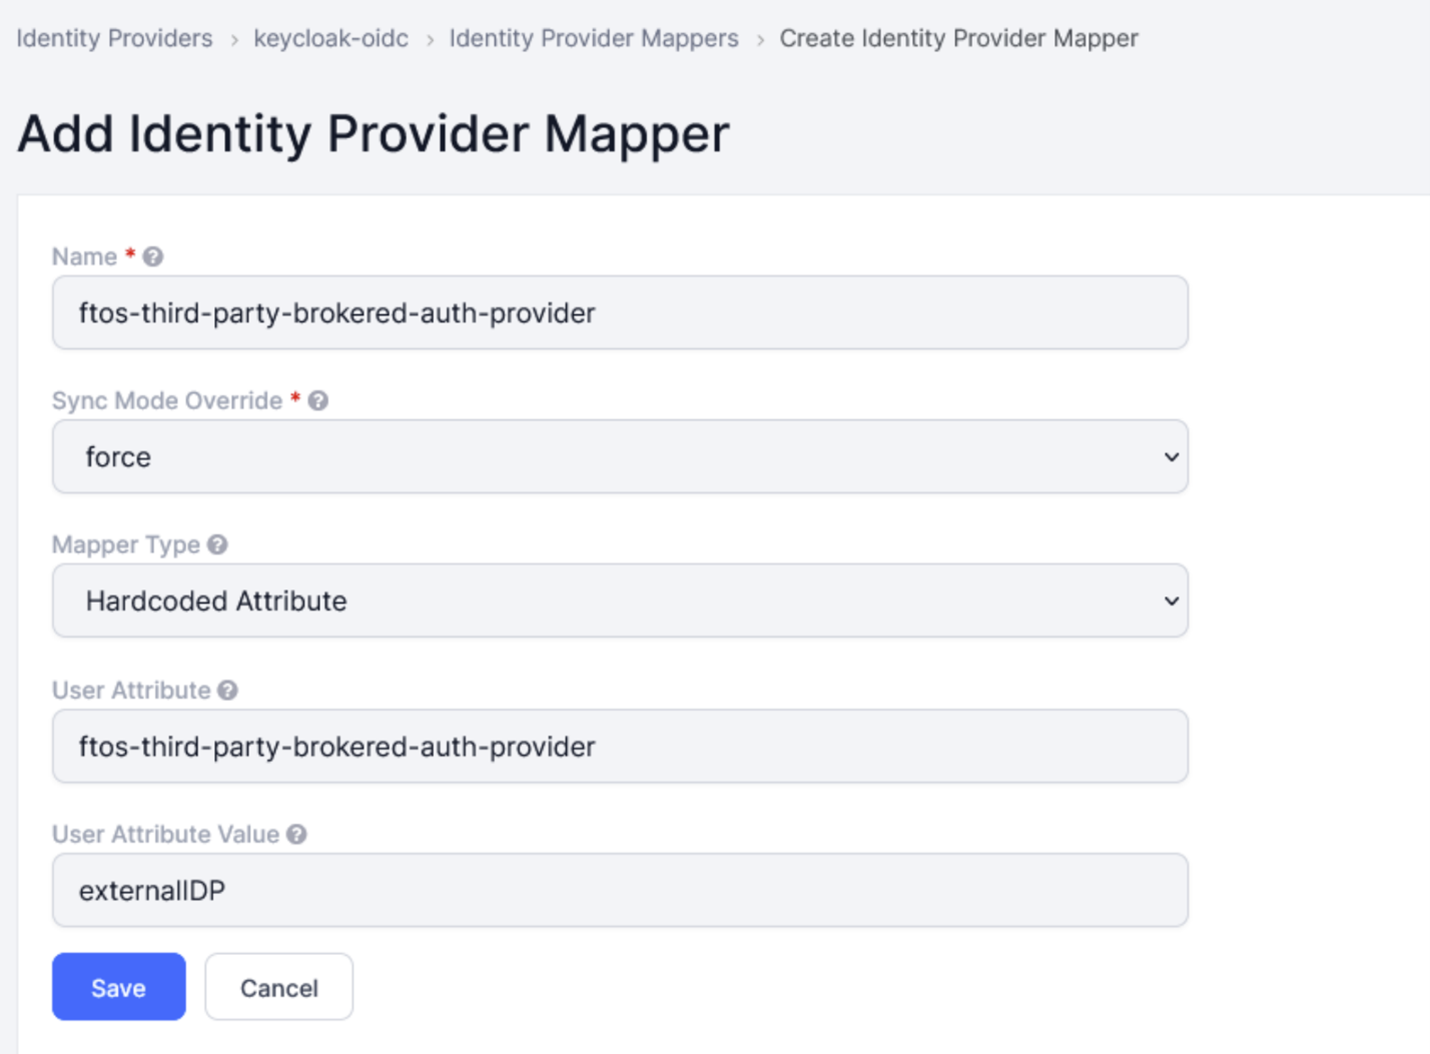
5. Click Save.