Email/SMS/IVR Multi-Factor Authentication
Email/SMS/IVR Multi-Factor Authentication (MFA) adds an extra layer of security on top of the basic authentication methods. When users access the FintechOS Portal or Innovation Studio, they will be prompted to provide the login credentials associated with their FintechOS Platform account. To make sure account access is protected, after the login credentials are provided, users are redirected to a secondary login page where they have to enter a one-time security pass code received via email, SMS or IVR (the phone number set in the user account profile). Once a user enters the code received via the Email/SMS/IVR option, access to the system is granted.
Follow the instructions below to set up Email/SMS/IVR(Call Me) multi-factor authentication.
1 Set Up Your Email/SMS/IVR Service Providers
In the Configuration Manager, create a custom secret that holds settings for the Email/SMS/Call Me service providers available to deliver the one-time passwords, e.g.: myEnvironment/service-pipes/myProviders.
The secret's value must have the following structure:
{
    "provider-configurations": [
        {
            "url": "https://api.emailprovider.com",
            "payload-template": {"sender":{"name":"","email":"SENDER_PLACEHOLDER"},"to":[ { "email":"RECEIVER_PLACEHOLDER","name":""}],"subject":"SUBJECT_PLACEHOLDER","body":"MESSAGE_PLACEHOLDER"},
            "default-sender": "pwdGenie@myCompany.com",
            "communication-channel": "email",
            "headers": {
                "Accept": "application/json",
                "Api-Key": "abcdef",
                "Content-Type": "application/json"
            },
            "placeholder-mappers": {
                "sender": "SENDER_PLACEHOLDER",
                "receiver": "RECEIVER_PLACEHOLDER",
                "subject": "SUBJECT_PLACEHOLDER",
                "message": "MESSAGE_PLACEHOLDER"
            },
            "phone-number-prefix-to-add": "",
            "phone-number-prefix-to-remove": ""
        },
        {
            "url": "https://api.smsprovider.com",
            "payload-template": {"text":"MESSAGE_PLACEHOLDER","to":"RECEIVER_PLACEHOLDER","from":"SENDER_PLACEHOLDER"},
            "default-sender": "anotherPwdGenie",
            "communication-channel": "sms",
            "headers": {
                "Content-Type": "application/json"
            },
            "placeholder-mappers": {
                "sender": "SENDER_PLACEHOLDER",
                "receiver": "RECEIVER_PLACEHOLDER",
                "message": "MESSAGE_PLACEHOLDER"
            },
            "phone-number-prefix-to-add": "",
            "phone-number-prefix-to-remove": ""
        },
        {
            "url": "https://api.callme.com",
            "payload-template": {"code":"CODE_PLACEHOLDER","to":"RECEIVER_PLACEHOLDER"},
            "default-sender": "",
            "communication-channel": "call-me",
            "headers": {
                "Content-Type": "application/json",
                "Key": "123456"
            },
            "placeholder-mappers": {
                "receiver": "RECEIVER_PLACEHOLDER",
                "code": "CODE_PLACEHOLDER"
            },
            "phone-number-prefix-to-add": "",
            "phone-number-prefix-to-remove": ""
        }
    ]
}| Property | Description |
|---|---|
| url | The service provider's URL that will receive the service request. |
| payload-template | The template for the request body. It can contain placeholders that will be later replaced with predefined information. |
| default-sender | If the sender is not provided as an input parameter, this field will be used as the sender of the message. Use only if the service provider supports specifying a sender. |
| communication-channel | Specifies the communication channel as either Email, SMS, or Call Me. |
| headers | List of key-value pairs representing headers that will be added to the request. The headers' keys and values can contain placeholders. |
| placeholder-mappers | List of key-value pairs specifying what information should fill the placeholders. All the keys should belong to the following list: sender, receiver, subject, message, code. E.g.: If the payload-template is the following string: "address: PLACEHOLDER_RECEIVER" and the intent is to replace the PLACEHOLDER-RECEIVER string with the email address of the client, then the value of the placeholder-mappers configuration property should be: {"receiver":"PLACEHOLDER_RECEIVER"}. |
| phoneNumberPrefixToAdd | A string to be prepended to the client phone number before sending the request to the service provider. E.g.: In the FintechOS Identity Provider, the user’s phone number is stored in the following format: 40XXXXXXXXX, but the SMS service provider needs the phone number in the following format: +40XXXXXXXXX. To fix this, set the phoneNumberPrefixToAdd to +. |
| phoneNumberPrefixToRemove | A string to be removed from the beginning of the phone number before sending the request to the service provider. E.g.: In the FintechOS Identity Provider, the user’s phone number is stored in the following format: +40XXXXXXXXX, but the SMS service provider needs the phone number in the following format: 40XXXXXXXXX. To fix this, set the phoneNumberPrefixToAdd to +. |
2 Configure the Service Pipes to Use the Defined Service Providers
In your Azure admin console, open the Service Pipes web app and set the app.vault.custom.secrets.path property to the Configuration Manager secret path you created earlier, e.g.: myEnvironment/service-pipes/myProviders.
3 Create an Authentication Flow
Make sure that the FintechOS Identity Provider has the MFA plugin installed and uses a theme that includes the MFA login screen.
- Log in to the FintechOS Identity Provider admin console.
- Select your FintechOS Platform realm.
- Select the Authentication blade.
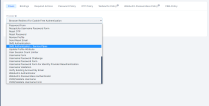
- In the Flows tab, create a new authentication flow based on your preferences.
- In the Forms authentication type, set the flow's last execution step to use the SMS Authentication - Service Pipes provider.


4 Configure the Flow's MFA Execution Step
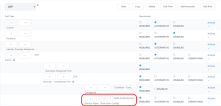
- Open your authentication flow and navigate to the SMS Authentication - Service Pipes execution step.
- Click the Actions drop-down and select Config.
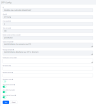
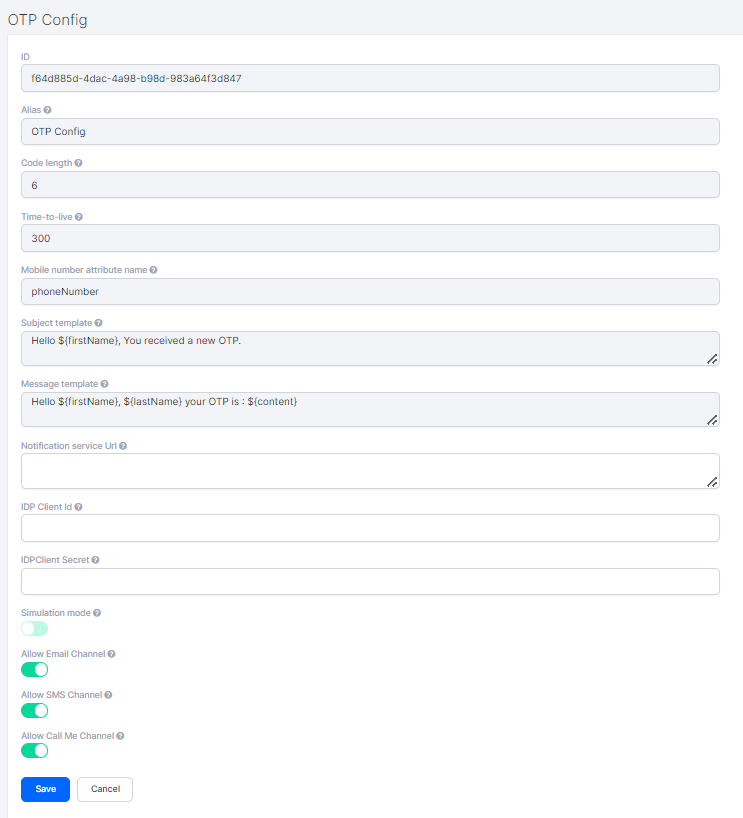
- Set up the following parameters:
- Code length: The length of the one-time password that is going to be sent to the user.
- Time-to-live: The duration in seconds the one-time password is valid.
- Mobile number attribute name: The attribute name that is going to be used to retrieve the user’s phone number.
- Subject template: The message subject template that is going to be sent to the user when using the email communication channel. You can use the following placeholders: ${firstName}, ${lastName}, ${content}.
- Message template: The message content template that is going to be sent to the user via SMS or email. You can use the following placeholders: ${firstName}, ${lastName}, ${content}.
- Notification Service Url: URL to the service pipes web app which receives the request and forwards it to the chosen service provider.
- Client Id: The client ID used to authenticate the request to the service pipes web app.IMPORTANT!
This client must have the service-pipes-user service account role assigned in the FintechOS Identity Provider. - Client Secret: The client secret used to authenticate the request to the service pipes web app.
- Simulation mode: When set to True, the actual one-time password will not be sent to the user. Instead, the one-time password will be logged on the FintechOS Identity Provider server.
Allow Email channel: If set to true, the user will be able to select Email as communication channel for receiving the OTP.
- Allow SMS channel: If set to true, the user will be able to select SMS as communication channel for receiving the OTP.
- Allow Call Me channel: If set to true, the user will be able to select Call Me as communication channel for receiving the OTP.
- Click Save.
5 Activate the Authentication Flow
Once the authentication flow is configured, in the FintechOS Identity Provider, navigate to Authentication > Bindings and replace the Browser flow with the newly created flow. This will the set authentication flow globally. However, if you want to enable the flow only for one client, you can navigate to the client page, go to Settings > Authetication Flow Overrides, and change the Browser Flow there.
A user who logs in to FintechOS Portal or Innovation Studio, will be directed to the one-time password form and will receive the required password via Email, SMS or IVR (Call Me).