Master Policy Cancellation
The Masterpolicy cancellation will work in a similar way as the masterpolicy’s MTA. This means that cancelling a Masterpolicy will inherently cancel also all the policies with status In Force MTA that are linked to it.
In order to open a cancellation on a Masterpolicy, you must first search for a specific one. After finding the right masterpolicy, you can request a cancellation.
-
Click the Insert button.
-
The Masterpolicy Search form is displayed. Select the Masterpolicy option from the drop down.
-
You can further refine the search by filling at least one of the following fields:
-
Masterpolicy No;
-
Policy No;
-
Insurance Type;
-
First Name;
-
Last Name;
-
Phone No;
-
Email;
-
PIN.
-
-
Click the Search button.
-
A grid is displayed, showing the Masterpolicies with the matching details inserted in the previous form. The grid contains the following columns:
-
Masterpolicy No;
-
Contractor Name;
-
Masterpolicy Start Date;
-
Masterpolicy End Date;
-
Options.
In this grid, only Masterpolicies having the specific statuses configured in the correlated processor appear. The statuses available for the Masterpolicy cancellation are either in the Inforce or Issued status.
-
-
When you've found the right policy, click the Choose Option button.
-
The main Cancellation form is displayed in order to register a request.
If you choose a policy which already has a Cancellation request in the InProgress status, the process is not available, and the following warning message is displayed: ”This Masterpolicy already has a Cancellation request opened on it!”.
-
When starting the registration, two tabs are displayed in the interface: Change Request and Masterpolicy Details.
-
The Change Request tab presents the following 3 sections:
-
The Change Request Summary section, with the following fields to be filled in:
Field
Description
Cancellation Notification Date Manually filled in by the user.
Masterpolicy Begin Date <= Cancellation Notification Date <= Current Date.
Reason Type The list composed by the existing cancellation reason types in the system and their configuration .
This list is calculated as the intersection of all the cancellation reason types configured in the system having the Masterpolicy attribute checked.
Requested End Date If manually filled:
Masterpolicy Start Date <= Requested End Date <= Masterpolicy End Date
This field can also be automatically filled for some specific reason types.
Final End Date If manually filled:
Masterpolicy Start Date <= Final End Date <= Masterpolicy End Date
This field can also be automatically filled for some specific reason types
The algorithm for the Final End Date and Requested End Date fields according to the selected Reason Type is the following, taking into consideration the validations stated above:
Reason Type
Requested End Date
Final End Date
Withdrawal
Automatically completed with the Masterpolicy Start Date.
Automatically completed with the Masterpolicy Start Date.
Property sold
The Requested End Date can be set to any day before or including the day of the request for cancellation.
The Final End Date is filled with the value from the Requested End Date but with the possibility to edit.
Cancelled by Client
It can be manually filled with any date.
If the Notification Date - Policy (Issued) Date <= X days (free withdrawal limit date), then this field is automatically completed with the Policy Begin Date with the possibility to be adjusted.
Otherwise, this is automatically completed with the Notification Date + 21days to go.
NOTEIf the Final End Date is in the X days (from the free qithdrawal limit date), then the policy is transitioned to Withdrawal on client request, and if it is after those X days, then the policy is transitioned to the Cancelled status.
Decline by screening
It can be manually filled with any date.
It can be filled with the value from the Requested End Date, but with the possibility to edit.
Cancelled
It can be manually filed with any date.
It is automatically completed with the Notification Date + 21 days to go.
Closed by Claim
It is pre-filled with the Notification Date + 21 days from the present on.
It is filled with the value from the Requested End Date, but with the possibility to edit.
Insured Death
It can be manually completed with any date.
It is filled with the value from the Requested End Date, but with the possibility to edit.
-
The Masterpolicy section, with the following read-only fields.
-
Masterpolicy No;
-
Masterpolicy Start Date;
-
Masterpolicy End Date;
-
Contractor Name;
-
Premium Amount;
-
Premium Currency;
-
Paid Amount;
-
Paid Currency;
-
Earned Premium;
-
Earned Premium Currency;
-
Canceled Premium;
-
Canceled Premium Currency;
-
Uninsured Period Type;
-
Uninsured Period;
-
Claims.
A specific grid with all the policies included in that Masterpolicy is displayed below the mentioned fields. Double click a record to be redirected to that policy form.
-
-
The Payment Beneficiary section, with the following fields to be filled in:
-
Payment Beneficiary;
-
Payment Beneficiary First Name;
-
Payment Beneficiary Last Name;
-
Payment Beneficiary PIN;
-
Bank;
-
IBAN Account.
-
-
-
The Masterpolicy Details tab displays a grid with all the Masterpolicy Installments and a grid with all the Masterpolicy Claims. The records cannot be adjusted.
The following are the columns of the Installmens grid:
-
Installment No;
-
Due Date;
-
Installment Amount;
-
Currency;
-
Status.
-
-
-
After completing all the information, click the Register request button, to transition the status for the request to the In Progress status.
-
The Premium Returned tab is displayed, containing more information about the reimbursement.
-
Alternatively, click the Cancel button to close the current request. You have to complete the Resolution Reason attribute in order to explain the reason of cancelling the current request.
-
The request status is transitioned to the Cancelled status.
Core Policy Admin offers you the ability to configure if a specific cancellation reason type should be included as a reason type for a Masterpolicy beside the policy.
-
In FintechOS Portal, navigate to Settings > Cancellation Reason Types.
-
The Cancellation Reason Types grid is displayed. Insert a new reason type by clicking the Insert button.
-
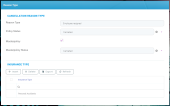
Fill in the Reason Type and Policy Status fields.
-
Check the Masterpolicy option and choose the Masterpolicy Status from the drop down field.
The Masterpolicy boolean check is present on this form in order to be checked or not:
-
If it is checked, then the current cancellation reason type also appears for a Masterpolicy cancellation;
-
If it is not checked, the current cancellation reason type is not displayed as a reason type for a Masterpolicy cancellation.
-
-
Click Save and Reload.
-
The Insurance Type grid is unfolded, where you can configure the insurance type for which the reason type applies.
-
Click Save and Close.

You are also able to configure a business status mapping between the Cancellation reason type and the policy and Masterpolicy statuses. For example, the Decline by Screening reason type triggers the transition of a policy and a Masterpolicy in the Decline by Screening business status after reaching the Cancellation Final End Date.
Presented below are the Reason Types for the cancellation, and the business statuses for the Policies and Masterpolicies.
|
Reason Type |
Policy Status |
Masterpolicy Status |
|---|---|---|
|
Decline by Screening |
Decline by Screening |
Cancelled |
|
Property Sold |
Cancelled or Surrender |
Cancelled |
|
Insured Death |
Cancelled or Surrender |
Cancelled |
|
Withdrawal |
Withdraw on Client’s Request |
Withdraw on Client’s Request |
|
Cancelled by Client |
Cancelled or Surrender |
Cancelled |
|
Closed by Claim |
Closed by Claim |
Cancelled |
|
Cancelled |
Cancelled or Surrender |
Cancelled |
If in the Masterpolicy searching grid you choose a policy which already has a Cancellation request in InApproval status, the process is not available and the following warning message is displayed: ”This Masterpolicy already has a Cancellation request opened on it!”.
After registering a Masterpolicy cancellation,the Premium Returned tab is displayed and you either have the possibility to Propose the request further to be approved, or to Cancel it.
The Premium Returned tab contains some static information regarding the premium to be returned. The Returned Premium Amount section contains the premium returning details for the Masterpolicy and a specific policy grid with all these details but for each policy.
The following fields are displayed in read-only mode for this section:
|
Field |
Description |
|---|---|
|
Masterpolicy Start Date |
The start date of the Masterpolicy. |
|
Masterpolicy End Date |
The end date of the Masterpolicy. |
|
Premium Amount |
The sum of premium amounts for of all the included policies. |
|
Premium Currency |
The currency of the premium. |
|
Paid Amount |
The sum of premium amounts for of all the included policies. |
|
Paid Currency |
The currency of the paid amount. |
|
Returned Premium Amount |
The sum of premium amounts for of all the included policies. |
|
Returned Premium Currency |
The currency of the returned premium. |
The policies grid includes the following columns:
-
Policy No.;
-
Policy Begin Date;
-
Policy End Date;
-
Contractor;
-
Premium Amount;
-
Premium Currency;
-
Paid Amount;
-
Returned Premium Amount.
After checking the information, you are able to perform the following actions:
-
Further propose the request by clicking the Propose Change Request button which changes the status to InApproval and triggers the displaying of the Request Approval tab.
-
Cancel the request, and you have to fill the Resolution Reason attribute in order to explain the reason of cancelling the current request. Also, the request status is transitioned to Cancelled.
By clicking one of the existing buttons, the first tab becomes read-only with no other possibilities for adjustments. The buttons disappear after clicking them.