Managing Personalized Content
Communicating with customers on a personal level is critical, but getting too personal can be very intrusive. Marketers need to be able to keenly interpret available customer data to extract the right insights.
Governance around the frequency of marketing messages and degree of personalization is also essential. In order to support such requirements, and help businesses overcome the challenges of the digital age, FintechOS provides a powerful tool to create and manage customer engagement campaigns, giving you the means to interact with customers in a meaningful manner.
Personalized content templates are essential to the content creation process. They allow you to remain on track by guiding you with useful fields, and minimizing the chance of mistakes by omission, and can also help the content team think strategically and holistically about the content they’re creating for each page.
View Personalized Content Templates
To view the list of personalized contents, follow these steps:
- Click the main menu icon at the top left corner.
- In the main menu, click Hyper-Personalization > Personalized Content.
The Content Template List opens. If personalized content has already been created, this page displays relevant information: the ID and name of the template to quickly identify and distinguish between campaigns. The template type is also displayed along with the user who created it, the date, and the content template status.
This page provides you with the means to add, edit, or delete personalized contents.
Add Personalized Content Templates
In order to create a personalized content template, you should first create content types. For information on how to do this, see Creating Personalized Content Types.
To add personalized content, in the Content Template List page, click the Insert icon in the top right corner of the page. The Add Content Template page opens.
Adding a personalized content template is a two-step process.
1 Define content template
By default, the Add Content Template page opens on the Define step.
Fill in the fields:
| Field | Description |
|---|---|
| Name | The name of the content template. This field is mandatory. |
| Reference Id | The number associated with the content template. |
| Template Type | Select between existing content types in order to categorize. |
| Attachment | Add an attachment to the content template. |

Click the Save and reload button at the top right corner of the page to save the record. The page reloads and the Add Content Template page opens.
Continue with the next step.
2 Manage content template items
Click Manage Template Items and follow these steps:
- Select the Communication Start Hour, the hour when the communication can start.
- Select the Communication End Hour, that is the hour when the communication ends.
- Add content template items to differentiate between different user types and cultures in order to deliver personalized content.
Content templates contain multiple content template items. Each content template item represents the structure of the message to be sent, it contains fields like name and subject. These items also help determine the most important thing about communication campaigns, namely customer personalization done via the culture and channel fields, and can determine the specificity and period of messages.
Another important field is the body, where the template is rendered and can be modified. A very useful tool to have are the tokens, these are used to personalize the message with name, address, etc. The last checkboxes provide support for textual or HTML type of messages or enable analytics via tracking. Content templates are used to provide audiences with personalized content in a quick and efficient manner.
To add a content template item, follow these steps:
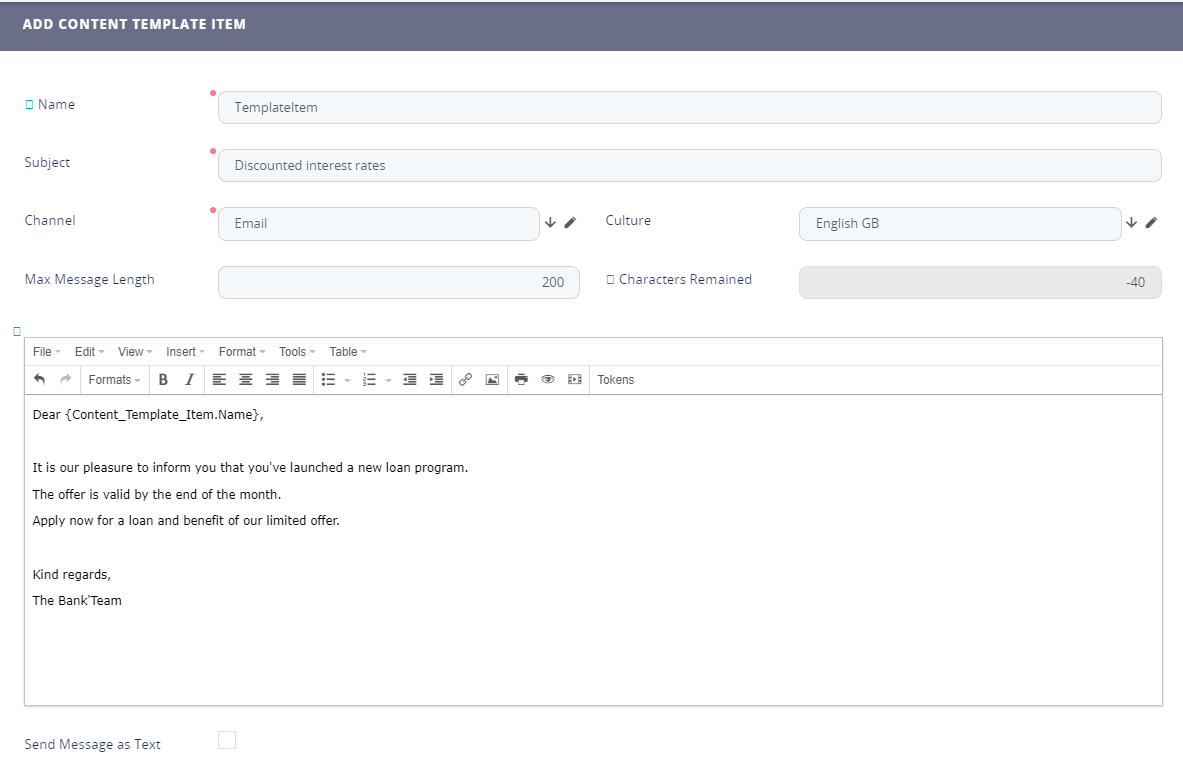
- Click the Insert button. The Add Content Template Item page appears.
- Fill-in the fields:
- Click the Save and close button at the top right corner to save the content template item.
- Continue adding as many content template items as you need, then click the Save and close button at the top right corner to save the content template.
| Setting | Description |
|---|---|
| Name | The name of the content template item. This field is mandatory. |
| Subject | The main content of the message. This field is mandatory. |
| Channel | Select a communication channel (e.g., mail, SMS, etc.). This field is mandatory. NOTE You need to add channels (main menu > ADMIN > Omnichannel Communication Automation > Communication Channels) in order to be able to select one in this field. |
| Culture | Select the nationality of the user. |
| Max Message Length | The maximum length of the message to be sent. It is important for channel SMS. |
| Characters Remained | The number of remaining characters. |
| Body | The main body that displays the message that will be sent. This field is of type HTML. Use the HTML Editor toolbar to format text as per your preference and insert tokens within the body by clicking Tokens from the editor's toolbar and selecting the desired token . |
| Send Message as Text | Switches between HTML and text. |