Install SysPacks
The steps below describe how to perform both an automatic installation and a manual import of a FintechOS SysPack.
Depending on the FintechOS platform version that you want to install, make sure the correct SysPack type is applied:
- For standard FintechOS infrastructure installation use Standard SysPacks.
- For professional/ enterprise FintechOS infrastructure installation use the following SysPacks:
- Banking environments: Professional Banking SysPacks
- Insurance environments: Professional Insurance SysPacks
SysPacks are mutually exclusive. The platform installation requires only one SysPack type.
Starting with V20.2.9, SysPacks can be imported asynchronous. Make sure you use async syntax when importing the packages in an Azure environment.
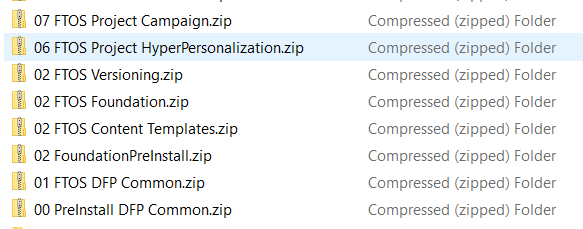
Below are the components for each FintechOS SysPack. Details about each component are in their .zip packages.
| Package | Description |
|---|---|
| 00 PreInstall DFP Common | PreInstall DFP Common |
| 01 FTOS DFP Common | N/A |
| 02 FoundationPreInstall | FoundationPreInstall |
| 02 FTOS Content Templates | FTOS Content Templates |
| 02 FTOS Foundation | FTOS Foundation |
| 02 FTOS Versioning | FTOS Versioning PreReq |
| 06 FTOS Project HyperPersonalization | FTOS Hyperpersonalization Processor Data Model |
| 07 FTOS Project Campaign | FTOS Campaign Management Data Model |
| FTOS AriadNext Processor | N/A |
| FTOS OCR Processor | FTOS OCR Processor Scripts |
| FTOS Onfido Processor | FTOS Onfido Processor Scripts |
| FTOS Project Cognitive Processor Client | N/A |
| FTOS Project Cognitive Processor Operator | N/A |
| FTOS Project Data Governance Consent Management | N/A |
| FTOS Project Data Governance Sensitive Data | FTOS Data Governance Sensitive Data Data Model |
| FTOS Project Esign Processor | FTOS Esign Processor Scripts |
| FTOS Project Integration | FTOS Integration Scripts |
For an automatic installation, follow the steps described in the SysPacks Automatic Installation section.
The HyperPersonalization and Campaign packages must be installed together as they have dependencies.
Prerequisites
In order to install the SysPacks, you need the latest FintechOS platform version installed, with the database configured. For specific steps, see the Installation page.
When using FtosSysPackageDeployer with SQL Server Integrated Authentication make sure:
1. The Windows user running the above command has read/ write rights access to the FTOS database.
2. You run the command without the SQL username/ password parameters.
When using FtosSysPackageDeployer with SQL Server Build In Authentication make sure:
1. The login used has read/ write access to the FTOS database.
2. You run the above command with the SQL username/ parameters.
Pre-Installation Checklist
The SysPack has unique constraints on some of the standard entities like: FTOS_DFP_FlowSettings, FTOS_DFP_ProcessorSettings, FTOS_VersionSettings, FTOS_VersionSettingsItem, FTOS_EntityStatusSettings, FTOS_MKT_AudienceSegments, FTOS_MKT_Audience.
If you have already moved data using the Configuration Data Deployment Package menu, then you probably have already configured some unique constraints.
Before running the script, make sure you:
- Disable the constraints that you have created on your environment, allowing the system to create the new ones after the SysPacks are imported.
- Use the new Configuration Data Definitions imported with the SysPacks when you export the data.
Automatic Installation Steps
- Download the desired SySDigitalSolutionPackages compatible with you platform version from the Release Hub.
- Unzip the installation kits.
- Use FtosSysPackageDeployer to install the Syspack as follows:
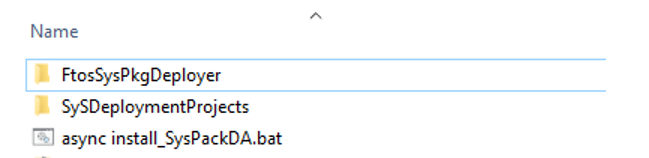
- Locate the FtosSysPackageDeployer in the unzipped FintechOS installation kit at the following location: <unzipped_install_archive>\Tools\FtosSysPkgDeployer.

- Navigate to the location where you have unzipped the SysPack and copy the FtosSysPackageDeployer here. Let's call this location <pckg_deployer_dir>.
- Open
async install_SysPackDA.batto edit and replace the parameters described in theinstall_SysPack.batParameters Explanation section, with your own values. - Right-click
async install_SysPackDA.bat» Run as administrator.
- Locate the FtosSysPackageDeployer in the unzipped FintechOS installation kit at the following location: <unzipped_install_archive>\Tools\FtosSysPkgDeployer.
install_SysPackDA.bat Parameters ExplanationFor asynchronous import run the following command: FtosSysPkgDeployer.exe-i –a -s <studio_url> -u <studio_user_name> -p <studio_user_password> -z <db_Server> -v <db_server_login_username> -k <db_server_login_password> -d <db_name> -r <syspack_file_path>
| Field | Description |
| <studio_url> | The web URL of the Innovation Studio installation, for example http://localhost/ftos_studio. |
| <studio_user_name> | The username of the Innovation Studio user under which this import is executed. The user has to exist in Innovation Studio prior to this operation |
| <studio_user_password> | The password for the Innovation Studio user. |
| <db_server> | The name of the database server where the FintechOS installation database was created. |
| <DB_user> | The username of the SQL Server user with administration rights on the FintechOS installation database. |
| <db_server_login_username> | The login username of the SQL Server user with administration rights on the FintechOS installation database. |
| <db_server_login_password> | The password for the above mentioned SQL user. |
| <db_name> | The name of the database where the package is deployed. |
| <syspack_file_path> | The physical path to the unzipped SysPack previously downloaded. |
For more information about the deployment tool, please run FtosSysPackageDeployer.exe without any arguments to see the built-in help
Post-Installation Setup
After installing the .zip packages, access the 100_AfterImportManualCopy folder and follow the below steps:
- Add the following images to the Upload EBS folder
<portal_EBS_folder>(the Portal with operator flow):- <syspack_file_path>\100_AfterImportManualCopy \CopyToUploadEBS\emptyOCR.jpg
- <syspack_file_path>\100_AfterImportManualCopy\CopyToUploadEBS\emptyPhoto.png
- Copy the following folders over the FintechOS Portal installation directory for every Portal with back-office or B2C installed.
- <syspack_file_path>\ 100_AfterImportManualCopy \FTOS Project Cognitive Processor Files\dcs-sdk-version\custom
- <syspack_file_path>\ 100_AfterImportManualCopy \FTOS Project Cognitive Processor Files\dcs-sdk-version\custom-on-demand
- Copy any other needed js files in the corresponding js folder.
- For Onfido, follow the Instructions from the InstallGuideOCRWithOnfido v1.1 file.
| Folder | Description |
| custom | Contains the video custom components:
|
| custom-on-demand | Contains the liveness component resources. |
For any other information about the steps performed and their result, check <pckg_deployer_dir>\Logs.
Manual Import Installation Steps
Follow the below steps if you choose to import the SysPack’s individual deployment packages by hand.
- Import the projects in SySDogitalSolutionPackages.Log into FintechOS Studio and navigate to Configuration Management > Deployment> Digital Solution Packages,
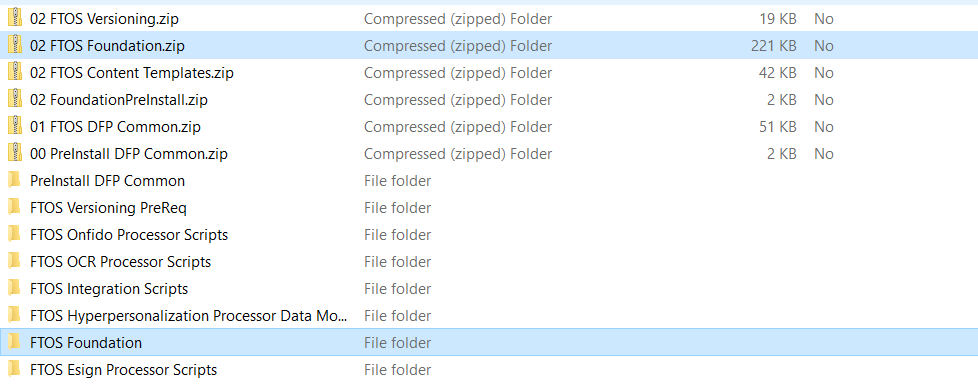
- Click Import Digital Solution Package and select the zip packages in the order set by their names and import them one by one.
- Run the SQL scripts found in the folders that have a part of the name of the packages. For example 02 FTOS Foundation. zip and FTOS Foundation.
If you need to update certain packages from the SysPacks, import the .zip files for those packages and run the sql scripts from the folder.