Creating Digital Documents
In FintechOS Studio, you can create three types of digital documents based on the data source used upon document generation, as follows:
- Stored SQL procedures - gathers data from a stored SQL procedure.
- Entities - gathers data from the entity on which the digital document is generated.
- Fetch collections - gathers data as per defined fetch collection.
For information on how to add and configure digital documents, see below the section corresponding to the data source that you want to use:
During this configurations, the document is created based on the template attached while gathering the source data for a SQL procedure, batch of statements grouped as a logical unit and stored in the database with parameters or one at all.
Prerequisites
- You should have created the SQL procedure that you want to use when creating the report document.
- The SQL procedure should control the Date and Numeric formatting (culture specific).
Add a digital document using SQL Procedure
-
Open FintechOS Studio in developer mode.
- Click the Main Menu icon at the top left corner.
- Click Fintech Automation > Digital Documents. The Digital Documents List page appears.
- At the top-right corner of the page, click the Insert icon (
 ). The Add Digital Document page appears.
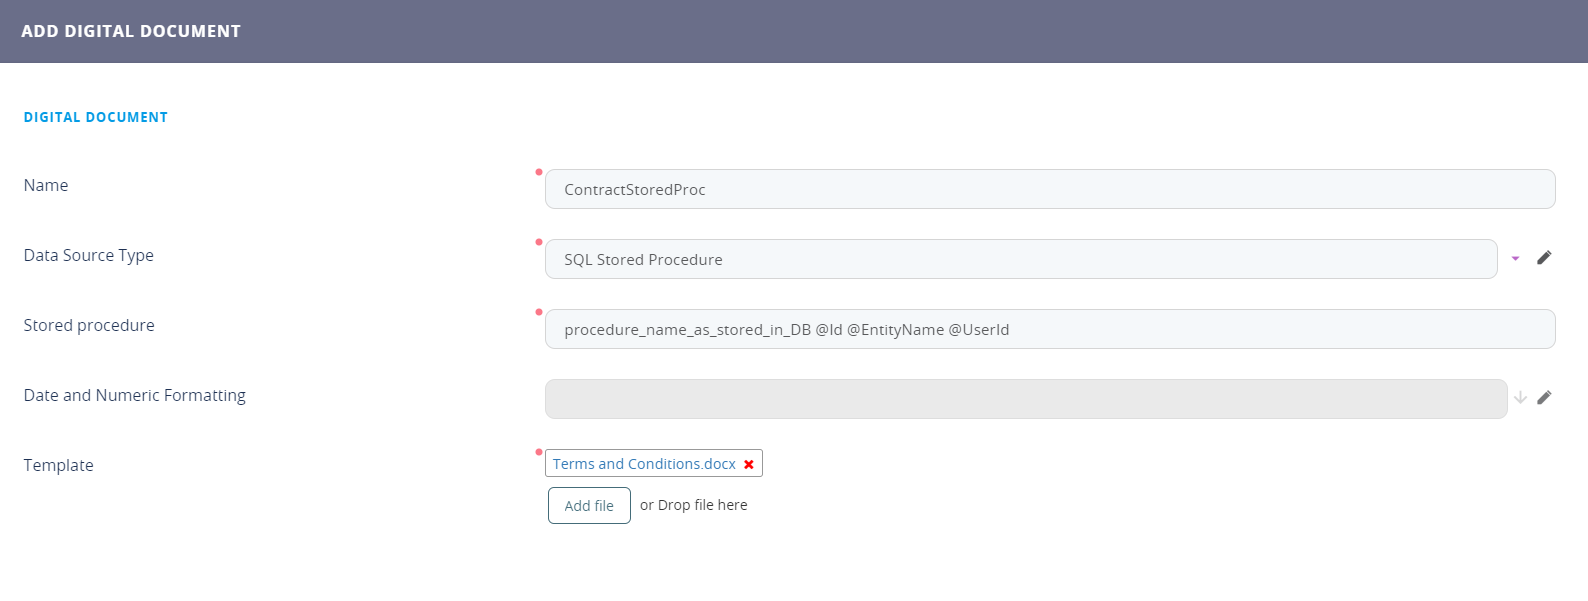
 - Enter a Name for the digital document.
- By default, the selected Data Source Type is Stored SQL Procedure. Leave it as is.
- In the Stored procedure field, provide the name of the SQL procedure following this convention: procedure_name_as_stored_in_DB @Id @EntityName @UserId
- In the Template field, upload the document template to be used . The word document will be uploaded into the system and linked to the current digital document.
- Click the Save and Close button at the top right corner of the page.
The following parameters of the stored SQL procedure are automatically mapped to specific values, as described in the table below.
| Parameter | Value mapped to |
| @Id | The record ID of the entity item that has the Report linked to the Report Document. |
| @EntityName | The name of the entity that has the Report linked to the Report Document; |
| @UserId | The ID of the user that runs the Report linked to the Report Document. |
During this configurations, the document is created based on the template attached while gathering the source data for an entity and its attributes.
- Open FintechOS Studio.
-
Click the Main Menu icon at the top left corner.
- Click Fintech Automation > Digital Documents. The Digital Documents List page appears.
- At the top-right corner of the page, click the Insert icon. The Add Digital Document page appears.
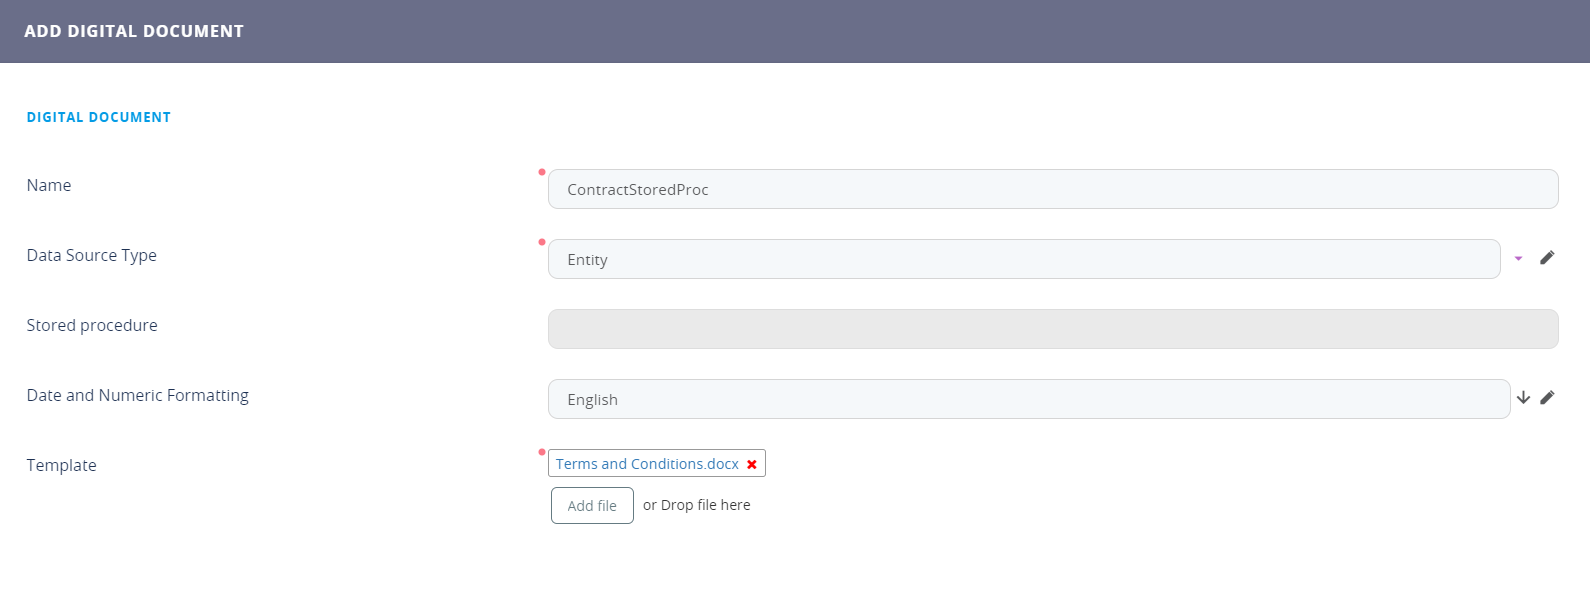
- Enter a Name for the digital document.
- From the Data Source Typefield, select Entity.
- Optionally, from the Date and Numeric Formatting field, select the culture that will apply to dates and numbers.
- In the Template field, upload the document template to be used . The word document will be uploaded into the system and linked to the current digital document.
-
Click the Save and Close button () at the top right corner of the page.
During this configurations, the document is created based on the template attached while gathering the source data using Fetch Designer, a FintechOS Studio feature which pulls data in a no-code manner. It can join entities while adding conditions with the operands ''AND'' and ''OR''.
Add a Digital Document:
-
Open FintechOS Studio in developer mode.
-
Click the Main Menu icon at the top left corner.
- Click Fintech Automation > Digital Documents. The Digital Documents List page appears.
- At the top-right corner of the page, click the Insert icon. The Add Digital Document page appears.
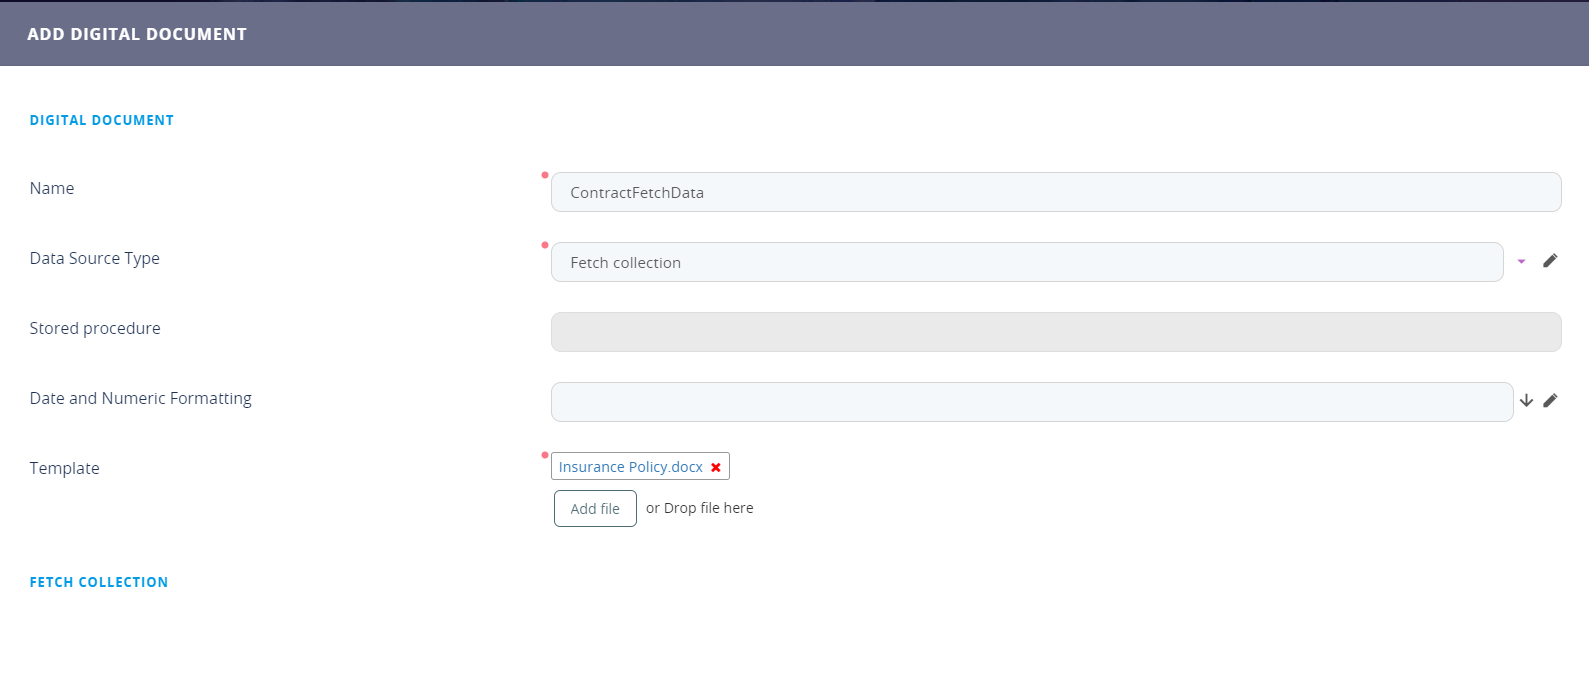
- Enter a Name for the digital document.
- From the Data Source Type field, select Fetch collection.
- Optionally, from the Date and Numeric Formatting field, select the culture that will apply to dates and numbers.
- In the Template field, upload the template to be used . The MS Word or Excel document will be uploaded into the system and linked to the current digital document.
-
Click the Save and Reload button at the top right corner of the page.The Edit Digital Document page appears
The digital document will get its data from the entity record that is opened when generating the document.
Define Fetches
Prerequisites
- Make sure that there are at least two entities in the system.
- Create relationships between the entities on which you do the fetch.
- Add custom attributes to each entity for which you do the fetch; the attributes that you will use when defining the fetch.
For more information on entities, attributes and relationships, see the FintechOS Studio User Guide, section Data Model Explorer.
To define a fetch, follow these steps:
- In the Edit Digital Document page, scroll-down to the Fetch Collection section and click the Insert button. The Add Fetch Definition page appears.
- Enter a Name for the digital document.
- In the Fetch definition field, fetch the data which will be used for generating the report.
- The fetch definition is saved into the system and it displays in the Fetch Collection section.
To retrieve the value of a document parameter (when the document is generated, use the getParameter function.
var p1 = getParameter("param1");
return {
    "entity": {
        "alias": "base",
        "name": "entity",
        "attributelist": [
                    {
                        "name": "displayName",
                        "alias": "",
                        "attributeType": 3
                    },
                    {
                        "name": "name",
                        "alias": "",
                        "attributeType": 3
        }
    ]
    },
    "where": {
        "type": "and",
        "conditionlist": [
                    {
                        "first": "base.tableName",
                        "type": "equals",
                        "second": "val(" + p1+ ")"
                    }
        ]
    }
}
The following fetch parameters are automatically mapped to specific values, as described in the table below.
| Parameter | Value mapped to |
| Id | The record ID of the entity item that has the Report linked to the Report Document. |
| EntityName | The name of the entity that has the Report linked to the Report Document; |
| UserId | The ID of the user that runs the Report linked to the Report Document. |
Set the fetch collection execution order
If you have multiple fetches defined in the Fetch Collection, you can set their execution order by drag and dropping rows in the Fetch Collection section, whereas the first fetch has the order index 1, that is, will be executed first.
The placeholders in the document template (word document) will be replaced following these rules:
- The first fetch (with order index 1), will always return one record which is used to define the Headers.
- If the fetch attribute does not have an alias, then the placeholder name is based on entity alias and fetch attribute name. The format is
{entityalias_attributename}; - If the fetch attribute has an alias then the placeholder is the alias,
{alias}; - Fetches other then the first one (with order index higher than 1) will be used to populate tables; therefore, they might return many records.
- If the fetch attribute does not have an alias then the placeholder name is based on fetch name, entity alias and fetch attribute name. The format is
{fetchname.entityalias_attributename}; - If the fetch attribute has an alias then the placeholder name is based on fetch name and attribute alias, {
fetchname.alias};
Using the example above: for the “name” attribute the placeholder should be {base_name} and for “entityid“ attribute the placeholder should be {exampleAlias}.