Creating Campaigns
1 Set up a campaign
- Click the main menu icon (
 ) at the top left corner.
 - In the main menu, click Business Automation> Omnichannel Campaigns > Campaigns. The Campaigns List page appears.
- Click the Insert button (
 ) at the top right corner of the page. The campaign configuration page appears by default on the Setup tab.
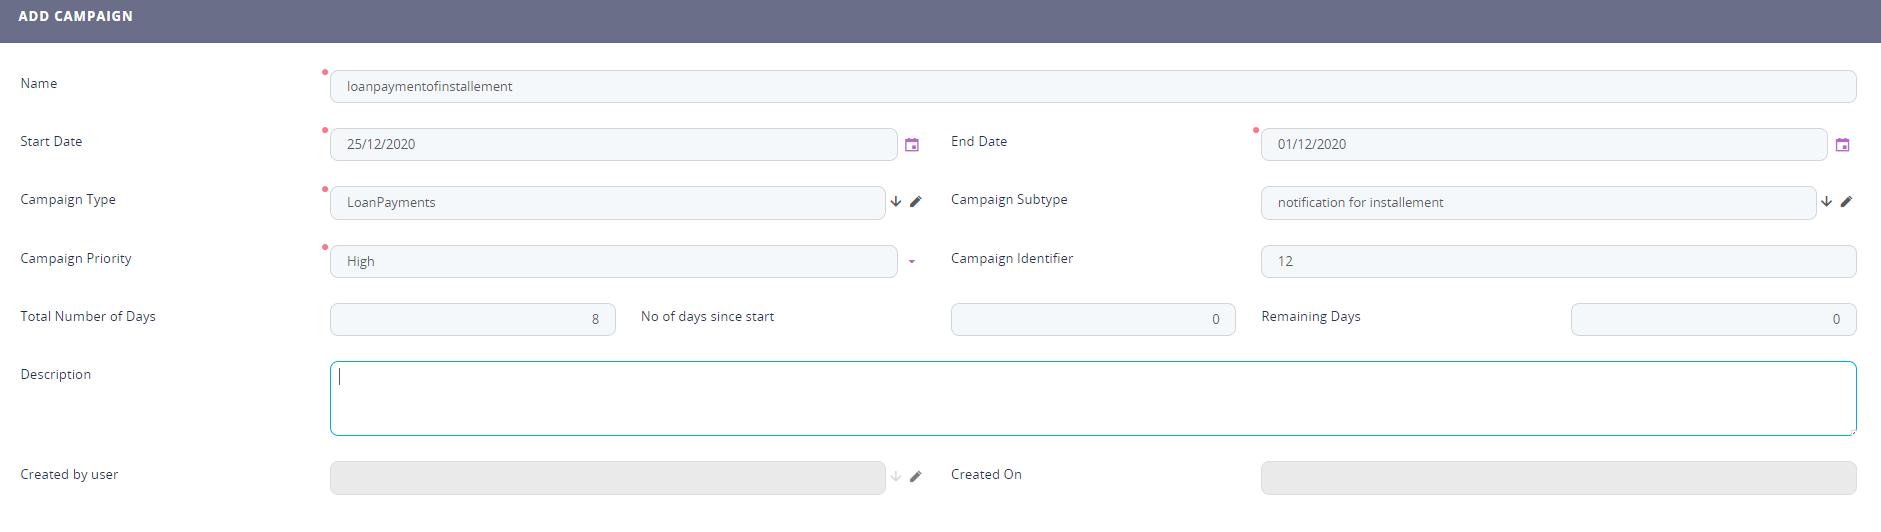
 - Set the following fields:
Field
Description
Name
The name of the campaign which will uniquely identify it. This field is mandatory.
Start Date
The date when the campaign starts. This field is mandatory.
End Date
The date when the campaign ends. This field is mandatory.
Campaign Type
The campaign type.
Campaign Subtype
The campaign subtype.
Campaign Priority
The campaign's priority. This field is mandatory.
Campaign Identifier
Specific to each customer, this is an unique identifier of the campaign.
Total Number of days
Insert the number of days that the campaign will be taking place.
No days since start
The number of days since the campaign has started.
remaining days
The number of remaining days, the campaign has until it ends.
Description
The purpose of the campaign, how it works, intended audience, etc.
Created by user
This field is read-only. It will display the name of the user once saved.
Created On
This field is read-only. It will display the date once saved.
- Click the ''Save and reload'' button.
You can continue with the next step.
2 Define the campaign content
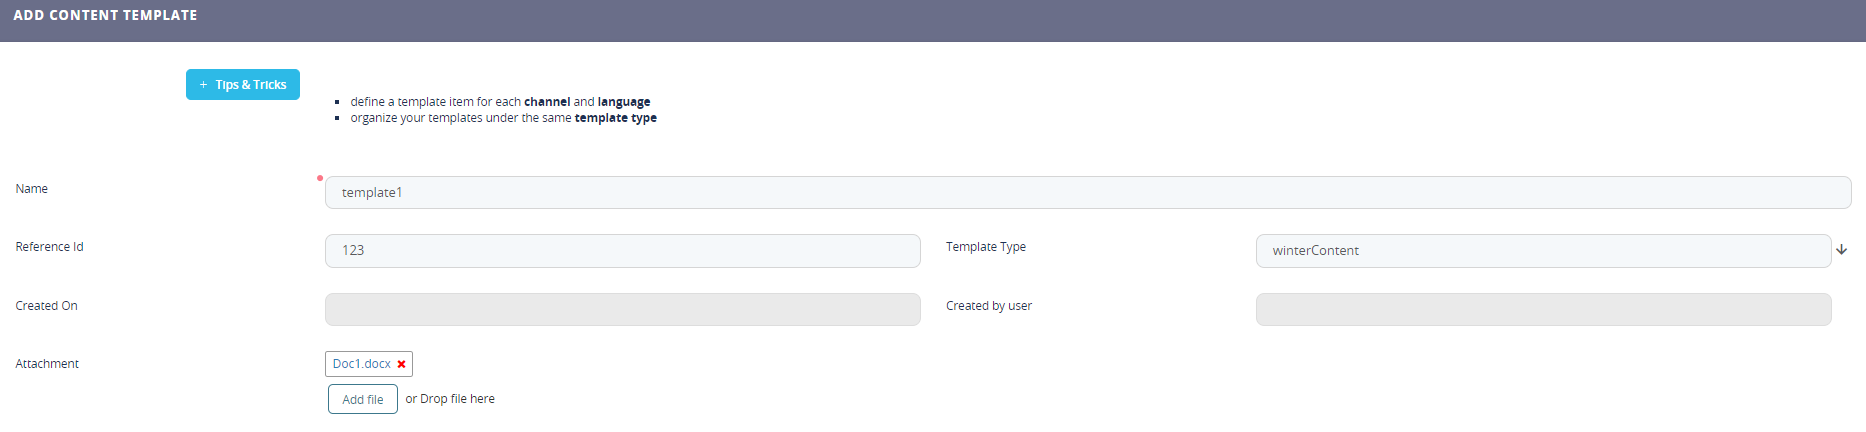
Click the Content tab. The Content section allows you to define how the audience will be contacted and with what content will be sent.
The content is selected by choosing a template. Content templates are essential to the content creation process, they provide the means to interact with customers in a meaningful manner.
Special options exist for anti-spam, namely the possibility to select delays for weekends and special holidays. These work by adding a delay for the communication if that message would happen in a weekend or a holiday.
In addition to that, there is the option to exempt the communication from anti-spam rules. This is useful for critical messages that need to reach our audience right away.
This section also allows you to select messages, as you can insert each type of communication and select an individual delay for each of these.
The table below describes the settings for defining the campaign content:
Field | Description |
|---|---|
Template | Selects the personalized content to use from the list of available templates.
|
Type of delay for holidays | The number of days of delay to be added to the communication date should this date occur on a holiday:
|
Type of delay for weekend | The number of days of delay to be added to the communication date should this date occur during a weekend:
|
Exclude from antispam | Tick checkbox to exclude communication from the antispam rules. This is used for highly important messages that need to be sent to the customer as fast as possible. |
Max Delay Days No | Insert the maximum days available for delay of campaign. |
Marketing Antispam Settings
To avoid spamming your audience or being unnecessarily disruptive to the clients, a special set of rules and conditions have been created in order to help you choose the best course of action (antispam rules).
For all the different types of communication channels available in FintechOS, you can define certain triggers. These can include the number of days to delay the communication:
Field | Description |
|---|---|
Communication Channel | The communication channel that will be used to send messages to your audience (e.g., SMS, email, etc.). |
Source Campaign | Select the campaign name. |
Delay Days No | The number of days that communications will be delayed in order to prevent spamming the audience with the same message in a short period of time. |
3 Define the campaign audience
Audience is any specific person that exists in the database who has given data processing consent for marketing purposes and which fulfills any conditions that might be set. The data source for the audience is the audience type, which can be:
- imported
- static
- dynamic.
A dynamic audience list is one that changes over time while a static list is one that remains the same. An imported list behaves similar to a static list with the exception that it is a list from an outside source (e.g., a marketing partner).
To define the campaign audience, click the Audience tab. The content of the Audience section varies based on the Audience Type you select.
The Audience field filters the available audience with certain rules data in order to deliver a customizable marketing experience.
After you select the audience type and the audience, continue to next step.
4 Schedule the campaign
Click the Schedule tab and define the starting dates and end dates along with all the campaign stages. New campaign stages can be easily added or modified. Campaign stages have additional options that can be configured and support AB testing.
Field | Description |
|---|---|
Start Date | Allows you to define a starting date for the campaign stages. |
End Date | Allows you to define an ending date for the campaign stages. |
Campaign Stages | List of the current defined campaign stages. |
Days display | Displays the total number of days for which the campaign runs, the days since start and the remaining days for the campaign. |
Campaign Stages
Setting up the campaign stage is done similarly to setting up a campaign. This includes fields for Name of the campaign stage and the Content Template, personalized content to be used during the campaign stage.
You can also create simple AB tests. A/B testing (bucket tests or split-run testing) is a randomized experiment with two variants, A and B.
A company with a customer database of 2,000 people decides to create an email campaign with a discount code in order to generate sales through its website. It creates two versions of the email with different call to action (the part of the copy which encourages customers to do something — in the case of a sales campaign, make a purchase) and identifying promotional code. To 1,000 people it sends the email with the call to action stating, "Offer ends this Saturday! Use code A1", and to another 1,000 people it sends the email with the call to action stating, "Offer ends soon! Use code B1".
All other elements of the emails copy and layout are identical. The company then monitors which campaign has the higher success rate by analyzing the use of the promotional codes.
The email using the code A1 has a 5% response rate (50 of the 1,000 people emailed used the code to buy a product), and the email using the code B1 has a 3% response rate (30 of the recipients used the code to buy a product).
The company therefore determines that in this instance, the first Call to Action is more effective and will use it in future sales.
A more nuanced approach would involve applying statistical testing to determine if the differences in response rates between A1 and B1 were statistically significant (that is, highly likely that the differences are real, repeatable, and not due to random chance).
There are many A/B testing case studies which show that the practice of testing is increasingly becoming popular with small and medium-sized businesses as well.
You can define send channel percentages in order to distinguish between different channels. The view to be sent can be previewed along with the starting and end times. Further differences might be set in order to differentiate between two versions of the same channel communication. For example, you can have two versions of the same email and split those to determine the results.
Field | Description |
|---|---|
Allow recurrence Duplicates | Allows any recurring messages to be duplicates of previous messages. |
Channel Variations list | The proportion for sending differentiated communications. |
Content and Channel Variations list | The proportion for sending differentiated communications of the same type. |
Moreover, the schedule is fully customizable, you can define a starting and ending date along with a recurrence type. You can also have a different schedule type that allows many different combinations to occur: daily, monthly, every X day, where X can be a number, every specific day combination of the week, and others. Previewing these settings offers a powerful way to set up an in-depth strategy of communication in order to provide your audience with the most effective possible way of receiving content updates.
Field | Description |
|---|---|
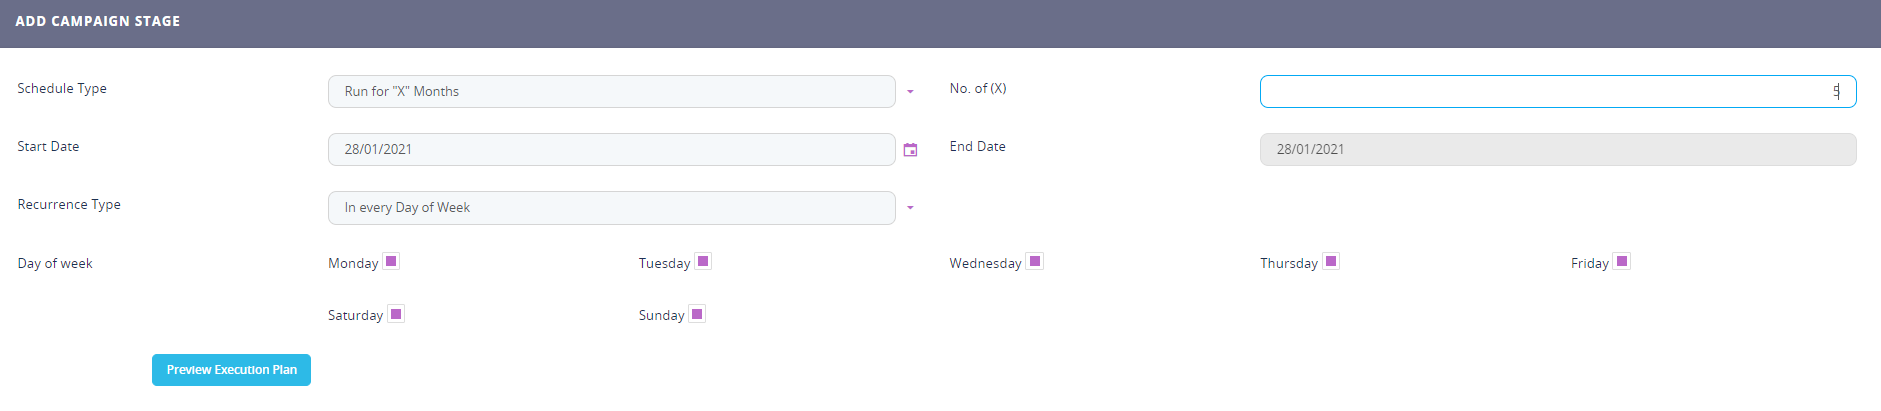
Schedule Type | The type of recurrence that the campaign stage will run on:
|
No. of X | Number of recurrences. Depending on this number you insert, the period of the stage will grow. If it is too big, it may become bigger than the date period for the whole campaign, in which case it will not allow you to save the stage. |
Start Date | Starting date for the campaign stage. |
End Date | Ending date for the campaign stage. |
Recurrence Type | Type of recurrence that will be executed by the campaign stages. Depending on the selection of these types, certain fields appear. Select from the list:
|
Activity Validity Days | By default, activities generated in a stage are active for one day before they expire. If this timeframe is not sufficient, you can manually enter the number of days you wish to keep activities valid. |
For each type of concurrence a new field or fields open.
| Type of concurrence | Fields | Description |
|---|---|---|
| At every X Days | No of X | How many days. |
| Daily No of Days | The gap between those X, e.g. No of X 3 and Daily No of Days 5, renders three days when the campaign is sent with 5 days in between each of those three days. | |
| At every x Minutes | No of X | How many minutes. |
| No of Minutes | The gap between those minutes. | |
| In every day of week
| No of X | The number of days. |
Checkboxes with Weekdays | The week days: Monday to Sunday.
| |
Week of Month
| No of X | The number of weeks. |
Week No (1-5) | In which week the month the campaign will be executed. | |
At day of month
| No of X | The number of days. |
Day No. | the actual calendar number of the day, from 1 to 31. e.g. 4 will render every day with the calendar structure 04/m/y. | |
At season occurrence
| No of X | number of seasons. |
Season | Select one of the seasons:
|
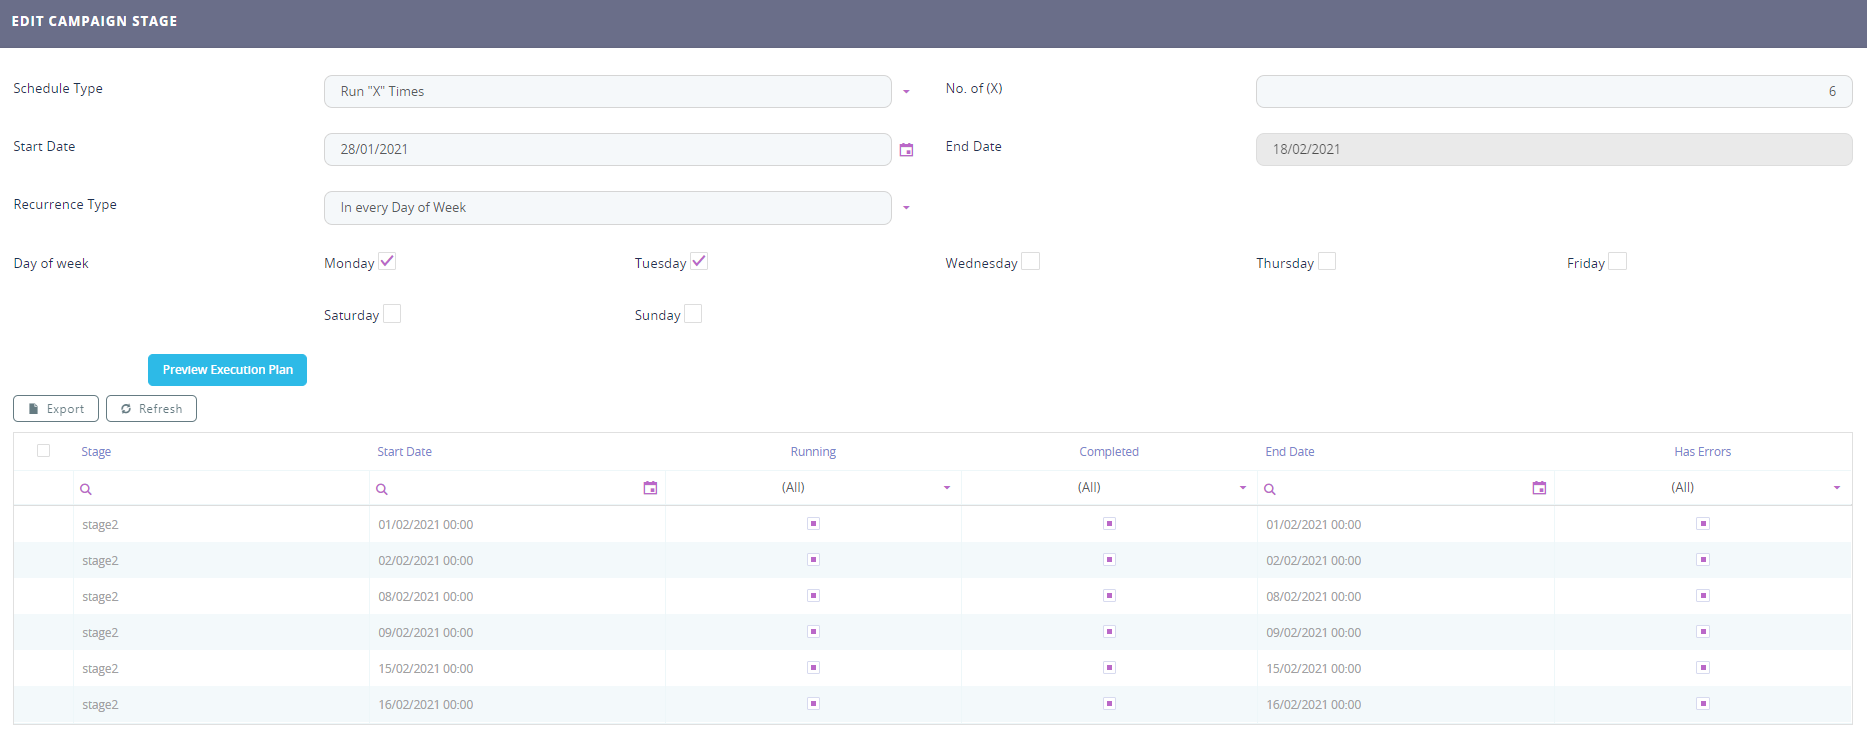
Underneath, there is a button to see the Execution plan. Click to reveal the execution of the campaign.
Configuring the selected audience can be further changed from the Refining Audience tab, by excluding specific segments from the initial data set available. These are a set of conditions that will further filter the selected audience (examples include: customers under 20, customers without children, etc.).
Actions can be used (Actions tab) to automatically send email or SMS messages, based on user configuration, and place them in a system queue which will then deliver them to the intended audience. Activities can be used to send email or SMS messages under human supervision by inserting them in this list will execute them where it is applicable.
The Execution Log tab displays a list of all the actions undertaken in this category along with the associated stage and ending dates. This allows you to easily track and see what happens under the system.
Define A/B Variations
Depending on the template created and selected for the campaign, certain channels will be rendered here:
- SMS.
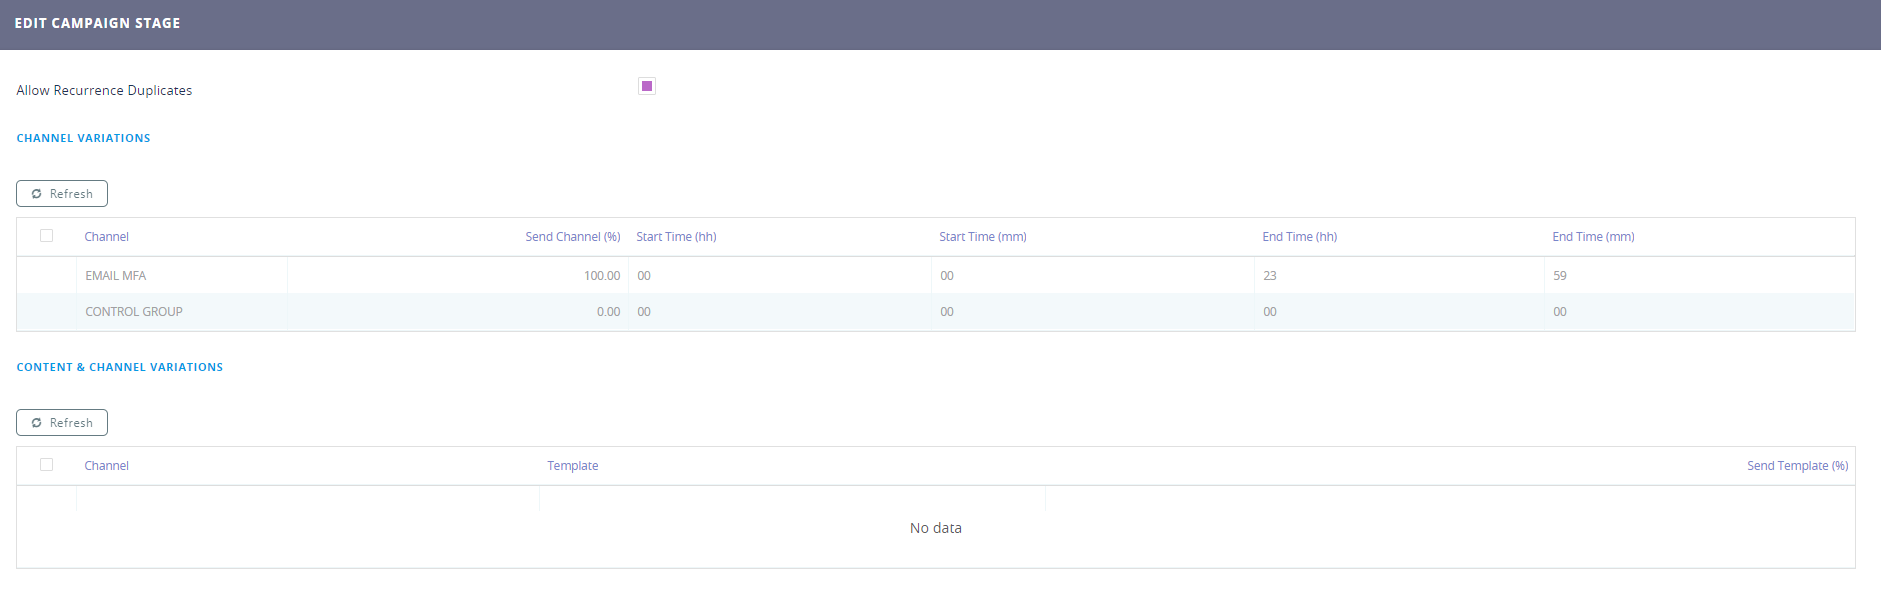
Edit the:
| Field | Description |
|---|---|
| Send channel % | There is the percentage used for the usage of the channel. |
| Start time (hh) | The starting hour. |
| Start time (mm) | The starting minutes. |
| End time (hh) | The ending hour. |
| End time (mm) | The ending minute. |
Exclude Segment
From the audience selected it is possible to eliminate certain people depending. Click the ''Insert existing'' and select from the pop-list the audience which will not receive the campaign messages.
Create the list with the audience to be excluded before arriving to this step.
Preview campaign stage instances
Once you have defined and saved a campaign stage, you can generate an Excel file that lists all the data for an instance of that stage. The preview is generated asynchronously by a job scheduler and you have the option to receive an email notification when the Excel file is ready. To create a stage instance preview:
- In FintechOS Studio, open a campaign in the editor and select the Schedule tab.
- If the execution plan is not displayed, click the Preview Execution Plan button to generate it.
- Double click a stage instance from the execution plan to open it.
- In the stage instance form, select the Activities Preview List tab.
- Click Insert to create a new stage instance preview.
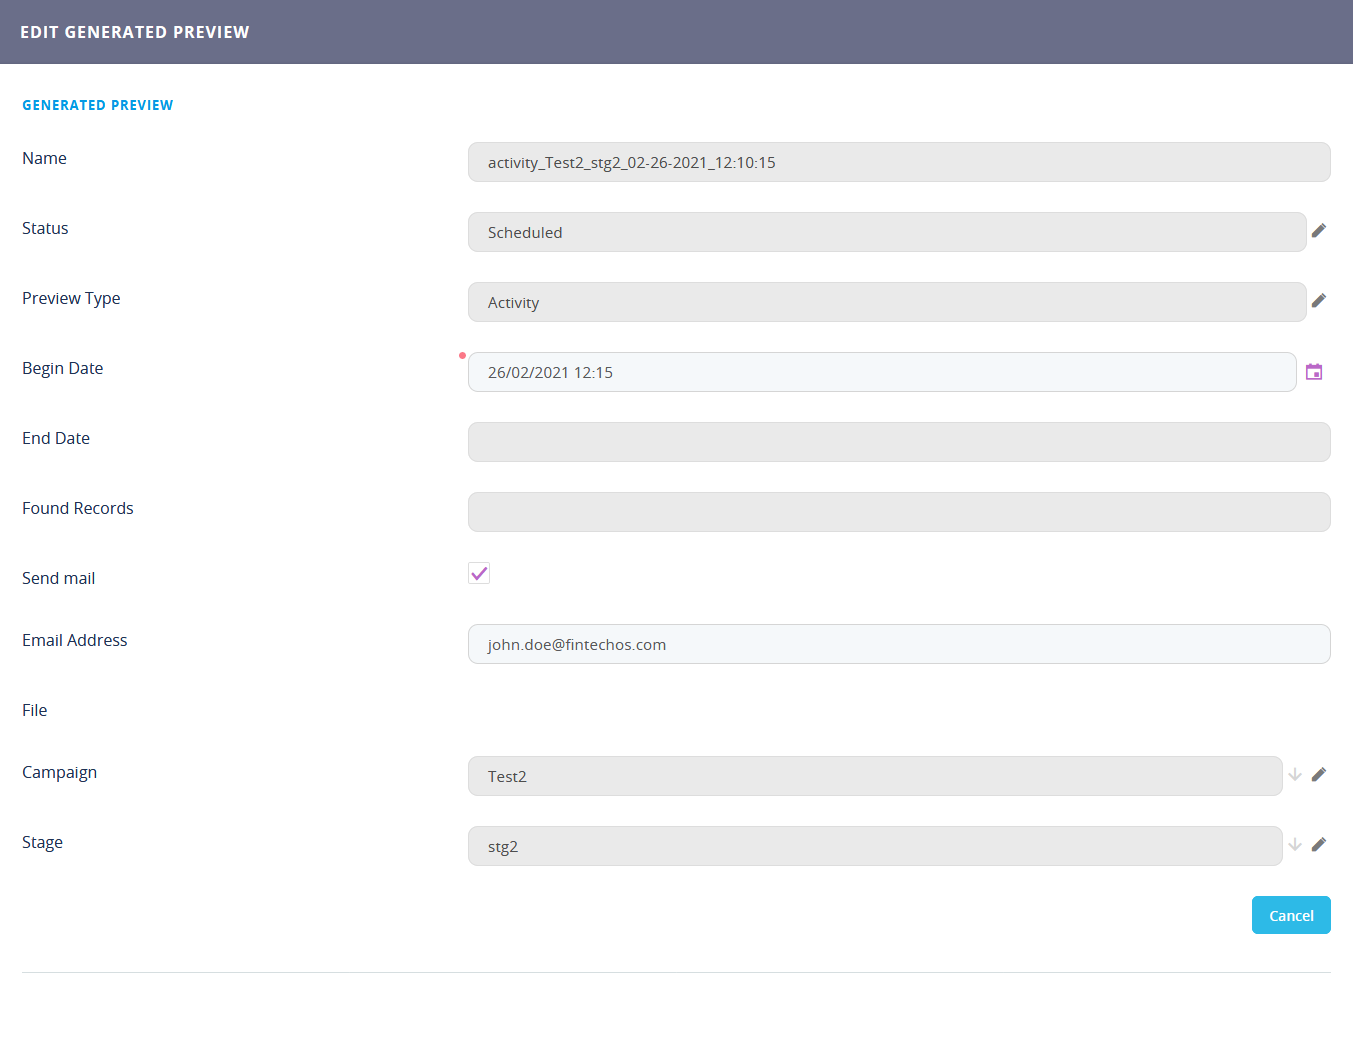
- In the Add Generated Preview window, enter a Begin Date for when you wish to schedule the processing for the preview and select the Send Mail checkbox if you wish to send an email notification when the preview is ready.
- Click Save and Reload at the top right corner of the page.
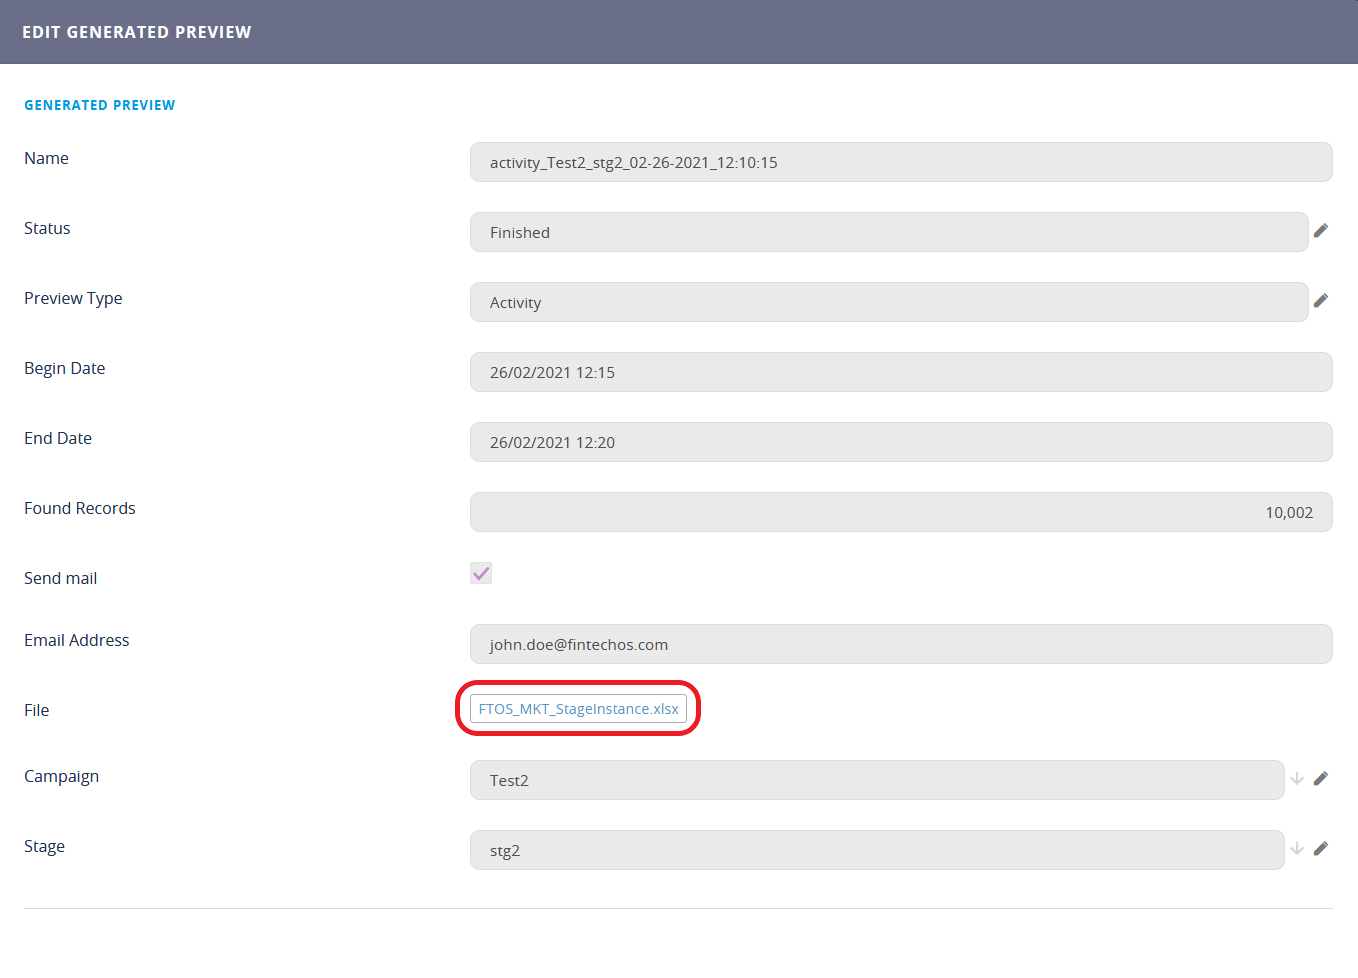
- In the Edit Generated Preview page, you can modify the Begin Date and Send Mail options and customize the Email Address where you wish to receive the notification once the preview is ready.

- Click Save and Close.

The Activities Preview List tab lists all the stage instance previews tasks that have been finished, are in progress, or are scheduled to run in the future.
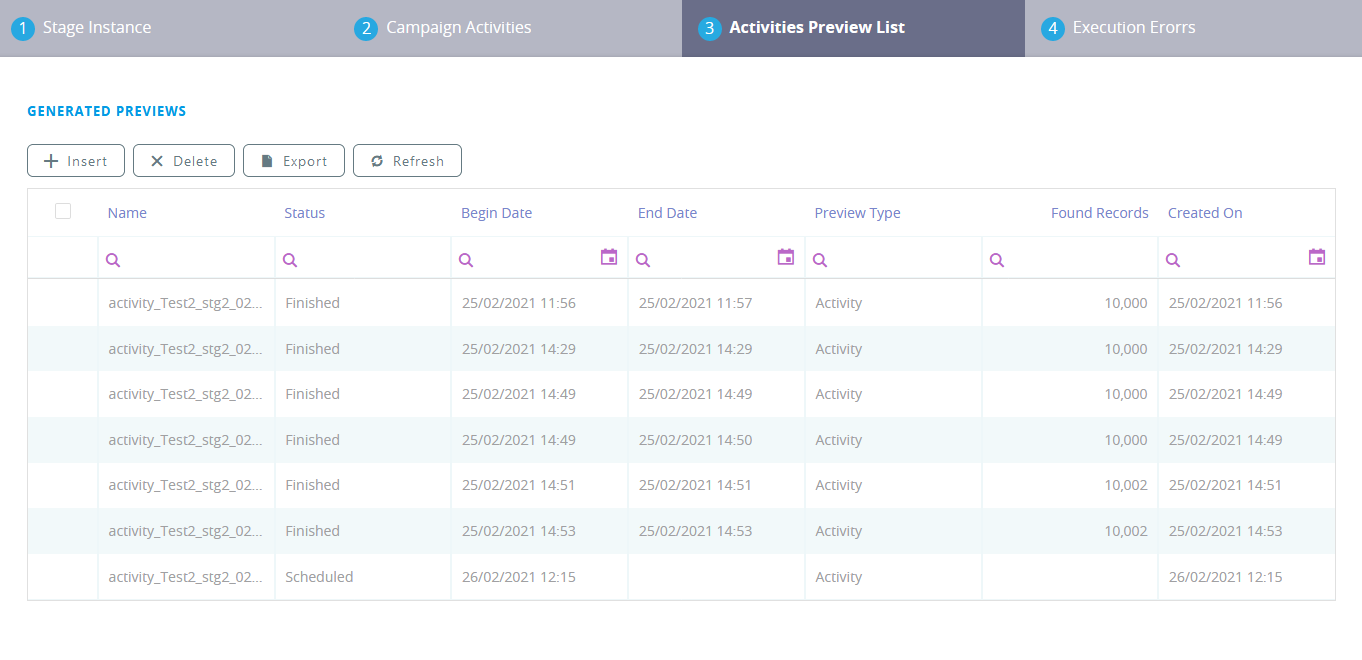
Once a preview generation is finished, if you select it from the list, you will be able to download the Excel file containing stage instance preview data.
5 Control campaign activities
Click the Activities tab, this section allows you to control the associated campaign activities and actions that can be sent. These behave in a similar fashion to the activities and actions configured for the campaign stages only these should occur once the campaign has ended.
6 Control campaign
Team members can be added to the campaign team member list by allowing them to be entered in the Control tab. The Control section allows you to select the number of messages that will be sent and varying the control message by selecting the random message option. Each message number is associated to a campaign user.
Field | Description |
|---|---|
Control Message Count | The number of messages that are sent. |
Random Control Message | The type of message that will be sent. |
In the CAMPAIGN TEAM MEMBERS grid, it is possible to select the member who can control the campaign.
7 Save campaign
Click Save and Close ( ) to save the campaign.