Applying Payment Holiday to a Loan
The payment holiday represents taking a break of any number of installments for the generated repayment schedule of a loan. You can apply payment holiday for the principal alone or for both interest and principal of a loan contract. This has been a functionality in demand lately during the COVID pandemic, being a regulatory requirement for financial institutions. After applying a payment holiday transaction to a loan contract, Loan Management recalculates the repayment schedule, rebuilding the schedule projection automatically based on the instructions you provided.
You can add payment holiday transactions to an approved contract via Loan Management's user interface or through API calls, using the Loan Management endpoints. Read more about these endpoints in the Loan Management Developer Guide.
In order to add a payment holiday transaction to a loan contract through the menus available in Loan Management, follow these steps:
-
In FintechOS Portal, select a contract with Approved status and double-click to open it.
-
Navigate to the contract's Payments tab and click the Insert button above the Transactions section. The Event page is displayed.
-
Fill in the following fields:
-
Event Date - This is pre-filled with current date.
-
Transaction Type - Select from the list the Payment Holiday transaction type. If you can't find it, then the transaction type is not associated with the banking product which is at the base of the contract.
Other values are automatically completed: contract, customer, and currency.
-
-
Click the Save and Reload button.
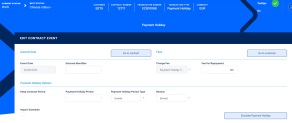
The event is saved in Draft status and a transaction number is automatically generated for it. The Edit Contract Event page corresponding to the selected transaction type is displayed. A series of value fields are automatically calculated, their values are displayed, and you can't edit them: the contract's financed and available amounts, the selected installment calculation method, the repayment day ant the contract's tenor. -
Fill in the external identifier of the transaction, if available.
-
View the fee for repayment or the repayment fee percent, depending on which is displayed. The fee value or the percentage are pre-filled by Loan Management according to the Charge Fee defined for this transaction type. Depending on the
ManualRepaymentFeeLoan Management system parameter's value, the system may allow you to change the fee or the percentage. See Transaction Fees for more details. -
Set the payment holiday options:
-
Keep Contract Period - Select this checkbox to instruct Loan Management to keep the period of the contract. If left unselected, the contract period is recalculated.
-
Payment Holiday Period - Enter the number of months for which you request a break from the payments.
-
Payment Holiday Period Type - Select the type of payment holiday to be applied for the contract:
-
Both- take a break from paying the principal and interest amounts of the installments. -
Principal- take a break from paying the principal amount of the installments.
-
-
Reason - Select the reason for requesting the event: activity suspended, major force, or financial restructuring.
-
-
Decide whether you want to use the repayment schedule calculated by Loan Management through automatic processes, or you want to import a custom schedule. For custom schedule, select the Import Schedule checkbox. Read more about importing a custom schedule file in the Manually Upload Repayment Schedules section of the user guide.
-
Click the Save and Reload button.
If the event value meets the business requirements defined within Loan Management, the event is saved. Otherwise, an error message appears. Change the values as instructed in the message and try saving the event again.
While the event is in Draft status, you can modify all the event's fields except Transaction Type. The event value is not applied to the contract while the event is still in this status. -
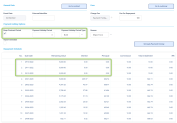
Click the Simulate Payment Holiday button to view the details of each installment of the calculated repayment schedule.
-
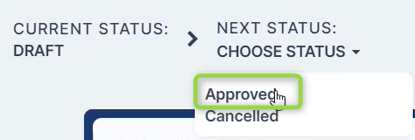
Approve the event by changing its status to Approved in the upper left corner of the Event page.

-
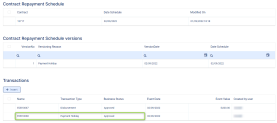
Confirm the change of status in the Confirmation window, clicking Yes. The event is now in Approved status and Loan Management applies the recalculated repayment schedule to the contract, displaying the previous schedule version in the Contract Repayment Schedule Versions section of the contract's Payments tab.
The transaction is visible in the Transactions section.
All existing versions of the contract in Contract Version Draft status are automatically changed to Contract Version Closed when a payment event is approved for that contract.


