Editing and Customizing Repayment Schedules
Once a loan approved and disbursed, you can check the repayment schedule built based on the contract's details in the Payments tab. You can also view the versions of the repayment schedules automatically generated by Loan Management when the schedule is recalculated due to specific contract events.
If you need to have a schedule to reflect a product that has a fixed rate for the first x years and moving to variable afterward, use a Collection interest type at product definition. When creating the contract, Loan Management automatically builds the schedule projection with the 2 different rates, while the changes in amounts to be collected are visible upfront. This is sometimes referred to as fixed to variable loan, especially valid for mortgages. Read more in the Manage Contract Level Interest & Penalty Interest Rate and in the Applying Fees and Commissions sections.
When you need to collect amounts during the life of the loan, but also leave a balloon (residual) payment, you can use the functionality enabled via the Is Manual Value option on the contract, if Installment Value Custom is set on the schedule type definition used within the product. With Is Manual Value set to True, you can edit the repayment amount in the Initial Royalty or Initial Principal Value field and provide a lower value, thus any capital not made due until maturity results in a balloon payment. In practice, you can also manage in this way fixed to variable loans where the business is to fix the mortgage for the x years, and you are expected either to close by the time it moves to variable, or re-fix again. Read more about setting the repayment information on contract level in the Enter Repayment Information for the Contract section.
A revolving line of credit might be a case where you need to enable a loan for which you collect interest and potentially some fees monthly, at end of month, and the principal at maturity. Such loan would also be a revolving one. This sort of setup can be achieved with a schedule definition that includes the fee. On the contract, you select the due date as end of month, plus a grace for principal for the number of installments of the full loan minus one, for example the loan has 13 installments, the Principal Grace Period (Months) has 12 installments, and thus all principal is expected to be repaid on maturity. When the funds are available, you can perform an early repayment transaction and reuse those funds again when needed since it is a revolving setup. In practice, such approvals may be extended and if this is the case you need to make sure you perform the extension one day in advance of the maturity, otherwise the jobs set at the end of the day also pick up and process such maturity. Read more about setting the repayment information on contract level in the Enter Repayment Information for the Contract section.
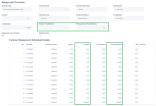
Below is an example of an out-of-the-box setting for a repayment schedule setup, to obtain the same approach with full capital repaid on maturity. Make sure you have Once for Principal definition, as pictured here:
Apart from the standardized regular repayment schedules, there may be cases when for a specific customer or for a specific business area you need custom repayment frequencies or even amounts. For such cases, you can manually upload a repayment schedule from an excel template. There are some validations and transformation requirements, but at the end you have a repayment schedule that does not follow any of the classical definitions.
Loan Management can use a series of methods to calculate the repayment schedule. For example, it uses the following mathematical formula to generate equal monthly installments:
where:
...
Depending on other definitions within the banking product, Loan Management uses business logic to factor in the instructed number of days between the installments' due dates, as defined in the repayment schedule's Interest Calculation Type: 30/360, 30/365, Actual/360, etc. These elements, together with the amount, interest rate, and period, lead to the equal installments.
For instance, for Actual/Actual, the installment is calculated as a recursive calculation to equalize the payment flow and result in equal installments, although the interest amount is calculated based on the exact number of days between two installments and within a year. In this case, Loan Management uses the same formula, but with an adjusted (actual) number of days:
Follow these steps to view the repayment schedule automatically generated by Loan Management for the approved contract, after performing a disbursement:
-
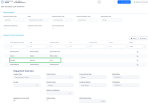
In the contract's Payments tab, go to the Contract Repayment Schedule section. This section displays only basic information about the generated schedule, such as contract number, schedule date and last modification date and time.
-
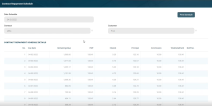
To see detailed information and the actual list of the installments, double-click the schedule. The Contract Repayment Schedule page is displayed with the selected schedule and a list with every schedule detail:
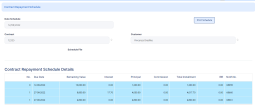
You can't edit the information displayed on this page, but for contracts in Version Draft status, you can import a custom repayment plan, if you don't want the contract to use the repayment plan automatically generated by Loan Management.NOTE Following an early repayment event, for contracts based on banking products with the Is Revolving field set toFalse, when the installments number recalculated after such an event is lower than the previous installments number, the maturity date and the contract period are updated along with the number of installments. -
View the information displayed about each schedule detail (installment): number, due date of the installment, interest, principal and commissions calculated for this installment, the value of the repayment notification generated for this schedule detail, and its number, if the repayment notification was already generated.
Within the list, the schedule details are color coded as follows:
-
Schedule details highlighted in blue are already paid, allocated or closed to payment.
-
Schedule details not highlighted (displayed on a white background) remain to be paid.
-
-
To export the schedule in a
.pdffile, click the Print Schedule button. Your browser automatically downloads thePaymentScheduleFilefile, with all the information displayed within the Contract Repayment Schedule page.
Follow these steps to view the versions of the repayment schedules automatically generated by Loan Management each time when a contract event that changed either the maturity date or the amount of a repayment was performed on the contract:
-
In the contract's Payments tab, go to the Contract Repayment Schedule Versions section. The section displays only basic information about the generated versions, such as version number, versioning reason, version creation date and the date of the previously active schedule.
NOTE
The most recent repayment schedule version is considered active by Loan Management, while the previous schedule records are kept for historical purposes. -
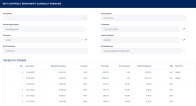
To see detailed information about the repayment schedule version, double-click on the desired record. The Edit Contract Repayment Schedule Version page is displayed with the selected schedule and a list with every schedule detail:
You can't edit the information displayed on this page.
-
View the information displayed about each schedule version: its number and date, the versioning reason specifying the type of contract event that triggered the generation of the version, the customer, contract and event information, as well as the date of the previous repayment schedule and the type of schedule selected in the contract and used to generate the repayment schedule.
-
View the information displayed about each schedule detail (installment): number, due date of the installment, remaining value to be repaid from the contract value at the moment of this installment, interest, principal and commissions calculated for this installment, the value of the repayment notification generated for this schedule detail, and its number, if the repayment notification was already generated.
To accommodate cases when a contract's repayment plan can't be built using any of the existing Loan Management automated logic, you can import a custom-built schedule on a contract. You can either perform the import at a contract event level (when adding a Disbursement, Early Repayment, Payment Holiday, or Reschedule Overdues transaction), or at a contract level within the Contract Repayment Schedule page, for contracts in Version Draft status. After importing a custom repayment plan on a contract through a .xlsx file whose template must be first exported, Loan Management validates that the total outstanding amount is matched by the principal on schedule. On due dates, the due amounts are processed properly and the notifications are generated as per the imported repayment plan.
For example, you could use such imported schedules for contracts that require seasonal repayment plans. For seasonal credits in agriculture, you could have due dates only in April or September. You could build a schedule to have installments only in these months, to accommodate such situations.
Another example is that you could use the import functionality for contracts with atypical schedules that have to be migrated into Loan Management. First, you could import the schedules as they are, then you could decide to adopt the Loan Management logic for schedule calculation, maybe change the interest rate, so you version the contract to have a repayment plan automatically calculated by the system.
After importing a repayment plan on a contract in Version Draft status, the
Auto disbursement field on that contract version is automatically set to False and any future contract events must have imported repayment plans! To import a custom repayment plan at a contract event level (when performing a transaction), for contract events in Approved status, perform the following steps:
-
On the Contracts page or in the Contracts Dashboard, select a contract with Approved status.
-
Double-click the contract to open it for editing.
-
Navigate to the contract's Payments tab.
-
Double-click a Disbursement, Early Repayment, Payment Holiday, Returned Amount Or Goods, or Reschedule Overdues transaction in Draft status.
OR
Create a new Disbursement, Early Repayment, Payment Holiday, Returned Amount Or Goods, or Reschedule Overdues transaction, up until saving the event in Draft status.
-
Select the Import Schedule checkbox. The Schedule File field is displayed, with the Select file button. The Export Schedule Template button is also displayed. A warning message informs you that "The previous repayment schedule was generated by the system".

-
Click the Export Schedule Template button to download a
.xslxfile with the schedule template for this specific contract. -
Open the downloaded schedule template
.xlsxfile exported from Loan Management and make it editable. -
Format the Due Date column as
Text -
Fill in the lines of the template file with the data needed in the contract's custom repayment plan.
Fill in each installment's type according to the event type.NOTE Make sure you don't change the data formats within the columns, except for the Due Date column which needs to beText. Do not change the headings. Validations are performed for the file after uploading it to Loan Management, when the record is saved, and incorrect formats or data are not accepted, then error messages are shown for such files.IMPORTANT! For contracts with existing repayment notifications, these notifications are already present in the downloaded template file. Do not modify the existing notifications' data. Compose your custom schedule taking into account the already existing repayment notifications.Read more about the repayment plan template file and how to fill it in its dedicated section.
-
Save the file. If the file needs to be labeled according to your company's information protection policy, label it as
Public, otherwise, Loan Management can't import it. -
Back in Loan Management's Contract Repayment Schedule page, click Select File.
-
In the newly displayed Explorer window, browse for the
.xlsxfile that contains the custom schedule you've filled in with the contract's repayment plan, then click Open.
The selected file's name is displayed under the Schedule File field.
-
Click the Save and Reload button.Loan Management performs the validations, making sure that the uploaded file meets all the criteria for a correct, functional schedule.
-
Click the Run Import Schedule button to perform the import of the new custom schedule to the contract. This button can be clicked only if a file was selected in the Schedule File field. The Contract Repayment Schedule Details section now displays data contained in your custom schedule.
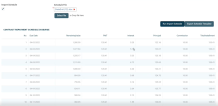
If you click the Run Import Schedule button one more time, the values within the Contract Repayment Schedule Details section are deleted and reinserted. -
Approve the event by changing its status to Approved in the upper left corner of the Event page.
The contract's repayment schedule, accessible through the Contract Repayment Schedule page, now displays the custom repayment plan uploaded through the approved event.
When versioning a contract that has an imported repayment plan, the schedule recalculation is not mandatory. You can choose between recalculating and importing an updated repayment plan.
To import a custom repayment plan directly at a contract level, for contracts in Version Draft status, perform the following steps:
-
On the Contracts page or in the Contracts Dashboard, select the contract for which you wish to change its schedule with a custom repayment plan. Make sure that the contract is in Version Draft status.
-
On the displayed contract's page, navigate to the Payments tab and double-click the contract displayed in the Contract Repayment Schedule section. The Contract Repayment Schedule page is displayed.
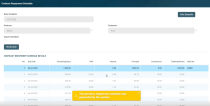
A warning message lets you know that "The previous repayment schedule was generated by the system". You can either recalculate the schedule using the Loan Management logic, or you can import a custom repayment plan which you build for this contract version. -
On the newly opened Contract Repayment Schedule page, select the Import Schedule checkbox. The Schedule File field is displayed, with the Select file button. The Export Schedule Template button is also displayed. A warning message informs you that "The previous repayment schedule was generated by the system".
-
Click the Export Schedule Template button to download a
.xslxfile with the schedule template for this specific contract. -
Open the downloaded schedule template
.xlsxfile exported from Loan Management and make it editable. -
Format the Due Date column as
Text -
Fill in the lines of the template file with the data needed in the contract's custom repayment plan.
Fill in each installment's type according to the event type.NOTE
Make sure you don't change the data formats within the columns, except for the Due Date column which needs to beText. Do not change the headings. Validations are performed for the file after uploading it to Loan Management, when the record is saved, and incorrect formats or data are not accepted, then error messages are shown for such files.IMPORTANT!
For contracts with existing repayment notifications, these notifications are already present in the downloaded template file. Do not modify the existing notifications' data. Compose your custom schedule taking into account the already existing repayment notifications.Read more about the repayment plan template file and how to fill it in its dedicated section.
-
Save the file. If the file needs to be labeled according to your company's information protection policy, label it as
Public, otherwise, Loan Management can't import it. -
Back in Loan Management's Contract Repayment Schedule page, click Select File.
-
In the newly displayed Explorer window, browse for the
.xlsxfile that contains the custom schedule you've filled in with the contract's repayment plan, then click Open.
The selected file's name is displayed under the Schedule File field. -
Click the Save and Reload button.Loan Management performs the validations, making sure that the uploaded file meets all the criteria for a correct, functional schedule.
-
Click the Run Import Schedule button to perform the import of the new custom schedule to the contract. This button can be clicked only if a file was selected in the Schedule File field. The Contract Repayment Schedule Details section now displays data contained in your custom schedule.

If you click the Run Import Schedule button one more time, the values within the Contract Repayment Schedule Details section are deleted and reinserted.
When versioning a contract that has an imported repayment plan, the schedule recalculation is not mandatory. You can choose between recalculating and importing an updated repayment plan.
Each time you need to import a custom schedule to a contract, you must export its template file first, make the needed changes, then save the file. Follow these steps to work with repayment schedule template files:
-
On the Contract Repayment Schedule page, or on the Contract Event page, click the Export Schedule Template button.
A file with.xlsxformat is downloaded to your computer. The file contains the columns that must be filled in based on the contract's schedule type definition.NOTE
Each contract type may have a different schedule type definition, so make sure you download the template!This is an example of an exported repayment plan template file:
-
After opening the downloaded schedule template
.xlsxfile, make it editable so that you can perform changes within its cells. -
Format the Due Date column as
Text. -
Fill in the lines of the template file with the data needed in the contract's custom repayment plan. Fill in each installment's type according to the event type. The possible values are
Installment,EarlyRepayment,DownPayment,PaymentHoliday,ReturnAmount, orRescheduleOverdue.NOTE
Make sure you don't change the data formats within the columns, except for the Due Date column which needs to beText. Do not change the headings. Validations are performed for the file after uploading it to Loan Management, when the record is saved, and incorrect formats or data are not accepted, then error messages are shown for such files.IMPORTANT!
For contracts with existing repayment notifications, these notifications are already present in the downloaded template file. Do not modify the existing notifications' data. Compose your custom schedule taking into account the already existing repayment notifications. -
Save the file after filling in the template file with the desired schedule information. If the file needs to be labeled according to your company's information protection policy, label it as
Public, otherwise, Loan Management can't import it.
A series of checks and validations are performed for the file after uploading it to Loan Management, when the record is saved, before being imported:
-
Due Date must be of the correct
Textformat:dd-mm-yyyy; -
Remaining Value = previous Remaining Value - previous Principal;
-
Sum(Principal) = eventValue for
Disbursementevent type; -
Sum(Principal) = outstanding amount (sum of principal for installments not notified yet) in all other cases;
-
Values are not negative;
-
Due Date >= Activation Date if installment type =
DownPayment; -
Due Date >= First Due Date if installment type =
Installment; -
Due Date <= Maturity Date;
-
Total Installment respects the formula from the contract's schedule type;
-
Max(InstallmentNo) <= Installment Number from the contract Overview tab;
-
Due Date and InstallmentNo values must be different and consecutive, except for
Early Repaymentevent type, where you can have 2 installments of the same number on the same day; -
If the installment is of
Early Repaymentevent type, it can only be the first installment in the imported schedule; -
If the import is performed on a contract in Version Draft status and there are installments notified, those should not be modified and the checks should be done over installments that were not notified yet, so sum(principal) for installments to be imported = outstanding amount. In this case, Due Date should be >= than the last notified installment and Installment Number > the last notified installment.
If any of these checks fail, then you are presented with error messages and cannot continue with the import process. For example, an error appears when you try to change an installment's Due Date (within the contract's Overview section) starting with the second disbursement.
Warning messages notify you if the previous repayment schedule was generated by the system or it was imported. These warnings are for your information and do not affect the import process. For example, whenever you opt for using the automatically generated repayment plan on a contract that already had an imported schedule, a warning message informs you that the standard system method overwrites the schedule that was imported in a previous version/ event.
For contracts with imported schedules where the second disbursement with repayment contract was automatically generated by Loan Management, the workaround is to:
1. Create a new version of the contract.
2. Recalculate the repayment plan.
3. Approve the contract version.
4. Create a new disbursement.


